

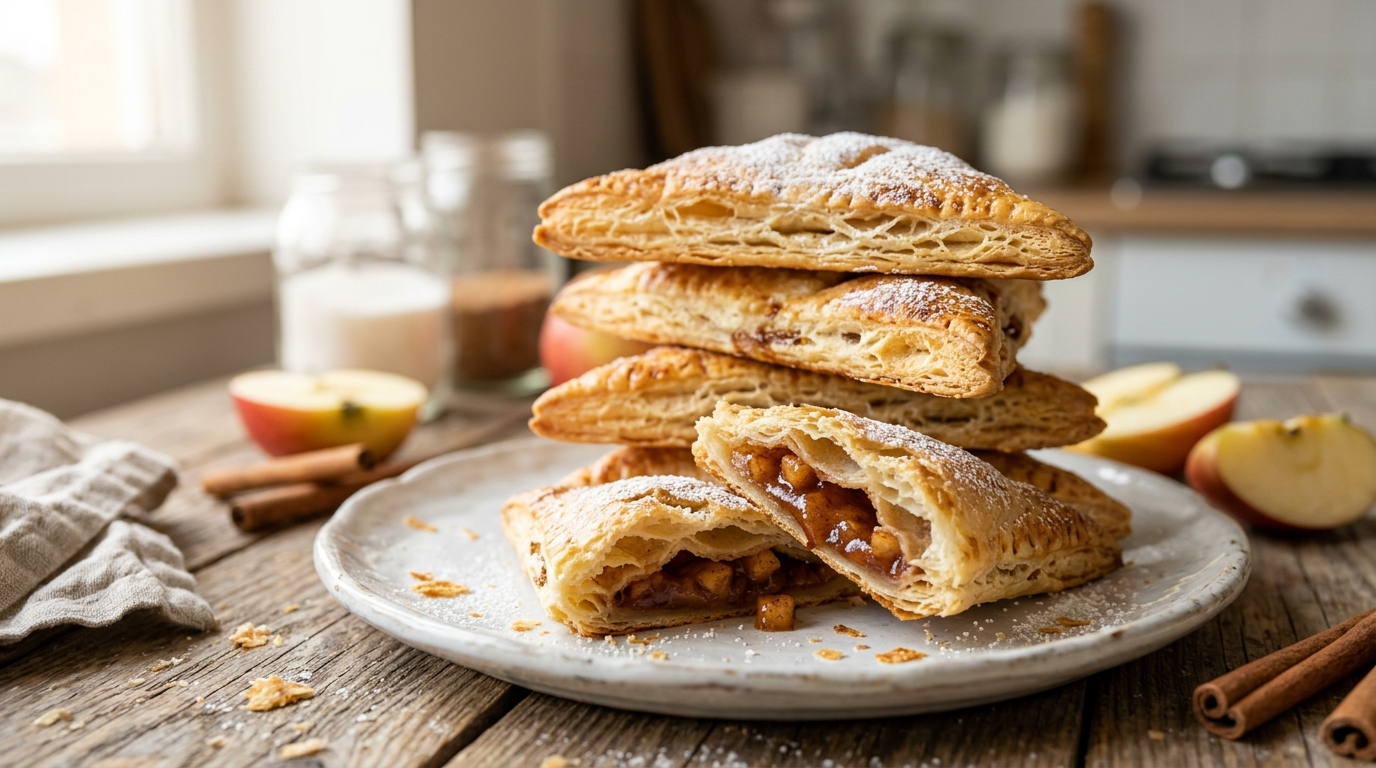
I have a soft spot for desserts that look like I spent half the afternoon making them when, honestly, I barely had time to wash the mixing bowl.
That’s exactly how this easy puff pastry dessert with simple ingredients became one of my favorites. I first made a version of it on a chilly afternoon when I wanted something sweet but didn’t want to make a complicated cake. I had a sheet of puff pastry in the freezer, a few apples on the counter, some sugar, cinnamon, and a little butter.
That was enough.
The first batch disappeared while it was still warm. I also learned one important lesson: don’t put too much filling in the pastry. I got a little enthusiastic the first time, and the filling escaped all over the baking sheet. It still tasted great, but the cleanup reminded me to keep things simple.
Now I make these little pastries whenever I need an easy dessert that feels special without requiring pastry-school skills.
The outside turns crisp and golden, while the inside stays soft, sweet, and warmly spiced. You can serve them plain, dust them with powdered sugar, or add a scoop of vanilla ice cream for a more indulgent finish.
And the best part? You only need a handful of everyday ingredients.
Why You’ll Love This Recipe

- Very easy: Store-bought puff pastry does most of the work for you.
- Simple ingredients: You probably already have most of them in the kitchen.
- Quick: You can have warm pastries on the table in roughly 30 minutes.
- Flexible: Apples work beautifully, but you can switch up the filling.
- Great for sharing: Make a batch for family dessert, afternoon tea, or an unexpected guest.
There’s also something satisfying about watching puff pastry transform in the oven. You start with flat sheets of dough, and a short while later you have flaky, golden pastries that look like you worked much harder than you actually did.
Ingredients
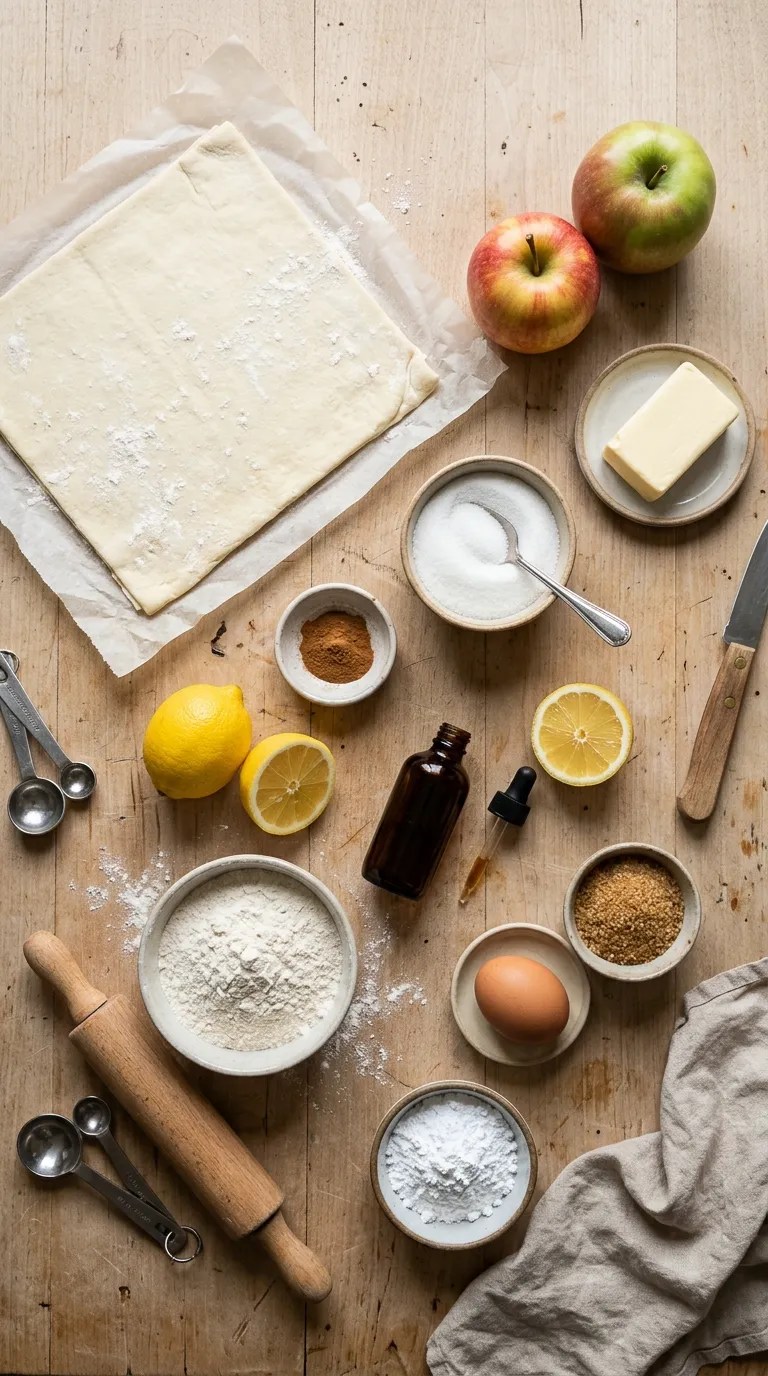
This recipe makes about 8 small puff pastry desserts.
For the Pastries
- 1 sheet frozen puff pastry, about 8 ounces (225 g), thawed according to the package directions
- 2 medium apples, peeled, cored, and finely diced
- 2 tablespoons granulated sugar
- 1 teaspoon ground cinnamon
- 1 tablespoon unsalted butter
- 1 teaspoon lemon juice
- 1 teaspoon all-purpose flour
- 1 teaspoon vanilla extract
- 1 egg, beaten, for brushing
- 1 tablespoon coarse sugar, optional, for topping
- Powdered sugar, optional, for serving
A Few Easy Substitutions
You can use brown sugar instead of granulated sugar if you prefer a deeper caramel-like flavor.
For the apples, choose varieties that hold their shape during baking. Gala, Honeycrisp, Pink Lady, or Granny Smith all work well.
If you don’t have lemon juice, you can leave it out. It adds a little brightness but won’t make or break the recipe.
You can also skip the coarse sugar on top. The pastries will still brown nicely from the egg wash.
Step-by-Step Instructions
1. Thaw the Puff Pastry — About 20–30 Minutes
Start by thawing your puff pastry according to the package directions.
You want it flexible enough to unfold without cracking, but still cool to the touch. This matters more than I realized when I first started making puff pastry desserts.
If the pastry gets warm and floppy, place it in the refrigerator for a few minutes before continuing.
While it thaws, heat your oven to 400°F (200°C) and line a baking sheet with parchment paper.
2. Make the Apple Filling — About 5 Minutes
Place a skillet over medium heat and add the butter.
Once the butter melts, add the diced apples, sugar, cinnamon, and lemon juice.
Cook for about 4–5 minutes, stirring occasionally.
You don’t want to turn the apples into applesauce. They should soften slightly while still keeping some shape.
When the apples look glossy and lightly softened, sprinkle the flour over them and stir well.
Cook for another minute.
Remove the skillet from the heat and stir in the vanilla extract.
Let the filling cool for a few minutes.
I used to rush this part, but warm filling makes puff pastry harder to handle. Letting it cool slightly makes the whole process much less messy.
3. Prepare the Pastry — About 5 Minutes
Unfold the thawed puff pastry on a lightly floured work surface.
If the pastry feels sticky, dust the surface with just a little flour. Don’t bury the pastry in flour because excess flour can make the finished pastry less delicate.
Cut the pastry into 8 roughly equal squares.
You can use a pizza cutter or a sharp knife. A pizza cutter makes quick, clean cuts, but either works.
4. Add the Filling
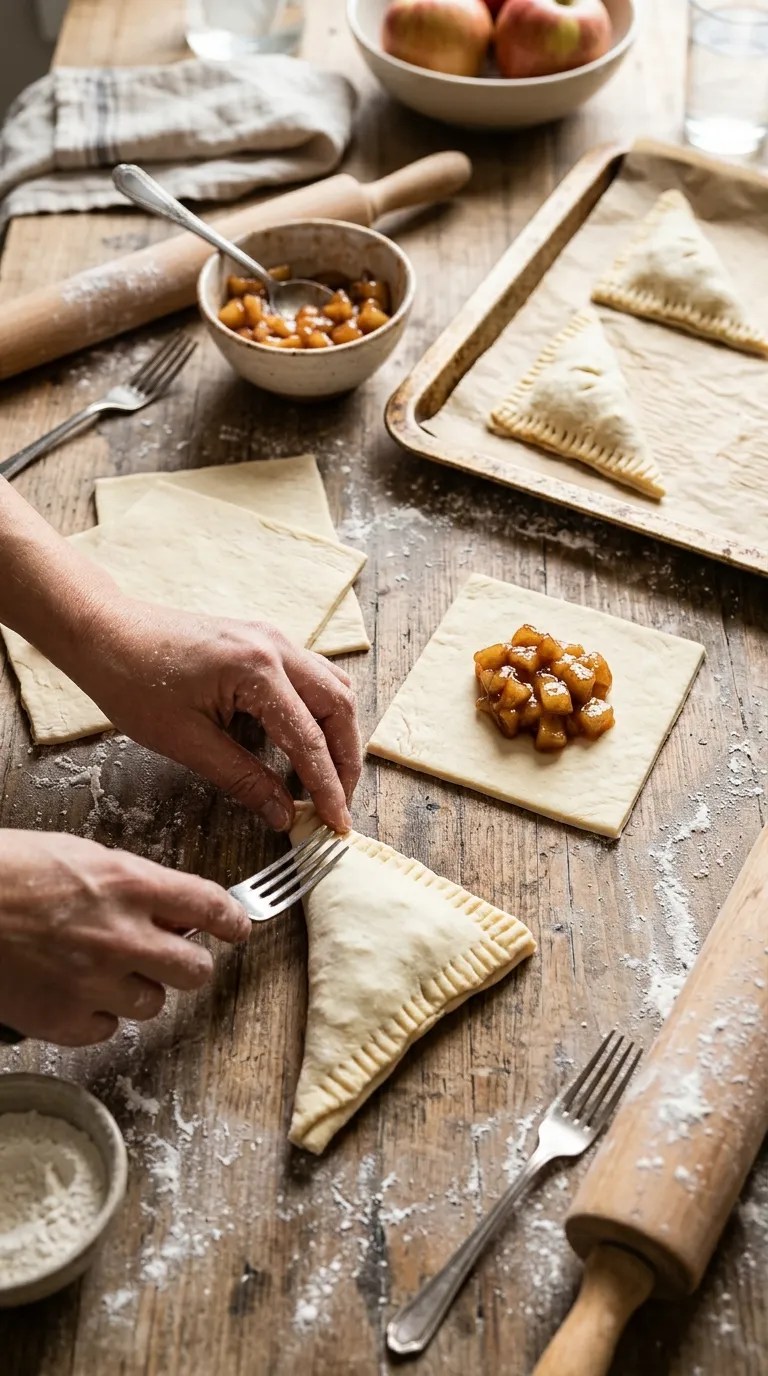
Place a small spoonful of apple filling in the center of each pastry square.
Resist the temptation to pile it high.
A couple of tablespoons might look like too little, but remember that the pastry needs enough room around the edges to seal properly.
If you overfill the squares, the filling can squeeze out while you seal them.
5. Fold and Seal
Fold each pastry square diagonally to create a triangle.
Press the edges together gently with your fingers.
Then use the tines of a fork to crimp the edges.
The fork does two jobs here: it gives the pastries a pretty border and helps seal the dough.
If an edge refuses to stick, lightly dampen it with a tiny bit of water and press again.
Transfer the pastries to your lined baking sheet.
6. Brush With Egg — About 2 Minutes
Brush the tops lightly with beaten egg.
Try not to let a lot of egg drip down the sides. Too much egg on the cut edges can interfere with the pastry layers puffing properly.
If you like a little crunch, sprinkle the tops with coarse sugar.
For a more polished finish, make one or two tiny cuts in the top of each pastry with a sharp knife. These little vents give steam somewhere to escape.
7. Bake Until Golden — About 15–20 Minutes
Place the baking sheet in your preheated oven.
Bake for 15–20 minutes, or until the pastries have puffed up and turned deeply golden brown.
Start checking around the 15-minute mark because ovens vary.
Don’t pull them out just because the tops look lightly golden. Puff pastry tastes best when it has developed a rich golden color and the layers look crisp.
If the pastries need another few minutes, give them the extra time.
8. Cool Slightly and Serve
Let the pastries rest on the baking sheet for about 5 minutes before serving.
The filling will be extremely hot right out of the oven, so that short wait is worth it.
Transfer them to a cooling rack if you want the bottoms to stay crisp.
Dust with powdered sugar just before serving.
And if you’re serving them as a proper dessert, add a scoop of vanilla ice cream while the pastry is still slightly warm.
That combination is hard to beat.
Pro Tips & Tricks
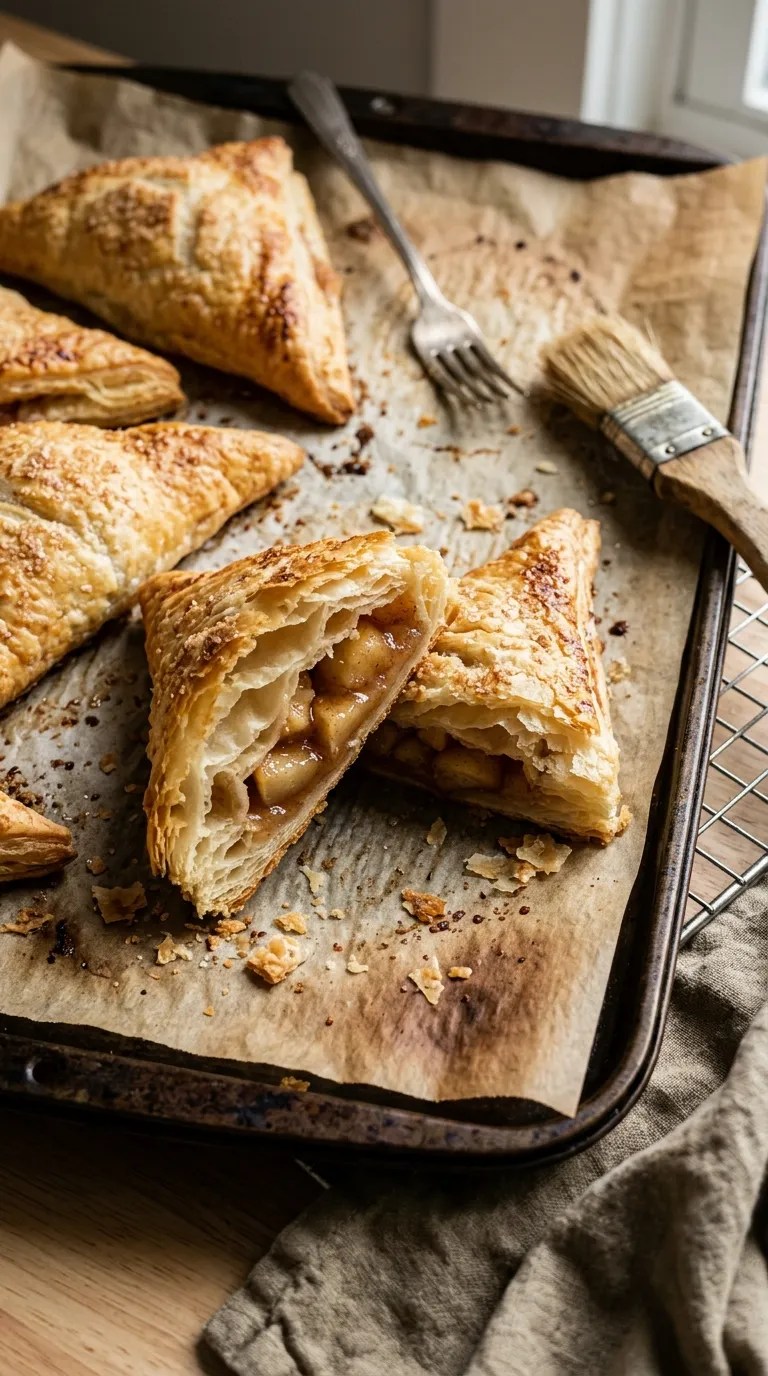
Keep the Puff Pastry Cold
This is probably the most useful tip I can give you.
Cold puff pastry goes into the hot oven and creates those lovely flaky layers. If the dough becomes warm and soft while you’re working, pop the assembled pastries into the refrigerator for 10–15 minutes before baking.
I started doing this after a few batches came out flatter than I wanted.
Don’t Overfill the Pastry
A little filling goes a surprisingly long way.
Too much apple mixture can prevent the edges from sealing and may cause the filling to leak onto the baking sheet.
If you have leftover filling, don’t force it into the pastries. Save it for oatmeal, yogurt, toast, or pancakes.
Don’t Skip the Preheated Oven
Puff pastry needs a properly hot oven to rise well.
Give your oven enough time to reach 400°F (200°C) before you put the pastries inside.
An oven thermometer can help if you suspect your oven runs hotter or cooler than the display says.
Give Them Space
Leave some room between each pastry on the baking sheet.
The dough expands as it bakes, and crowded pastries can bake unevenly.
A standard half-sheet pan works well for one batch.
Let Them Cool Before Storing
If you store the pastries while they’re still warm, trapped steam can make the crisp pastry turn soft.
Let them cool completely first, then place them in an airtight container.
They keep well at room temperature for about 1 day for the best texture. Refrigeration can extend storage, but it can also soften the pastry.
For longer storage, freezing works better.
Variations & Substitutions
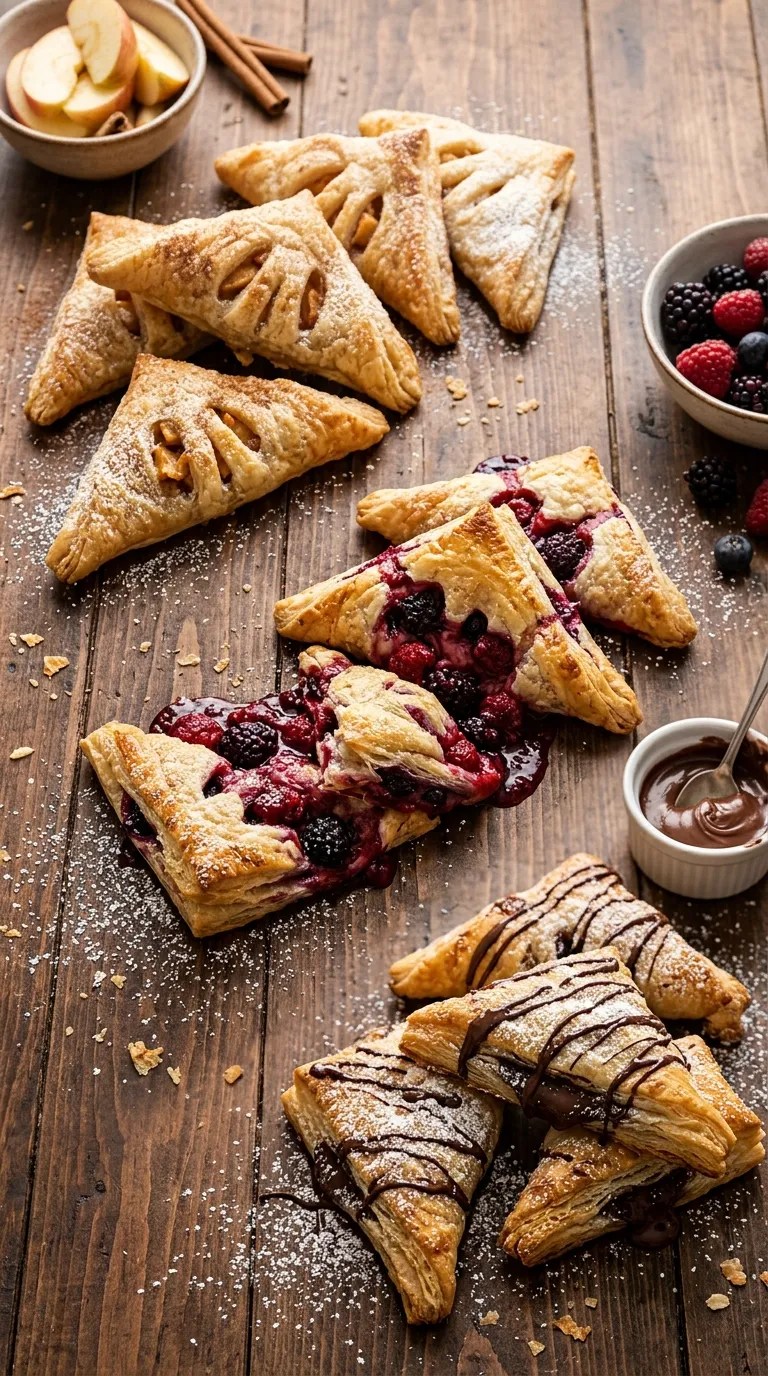
Berry Puff Pastry Desserts
Swap the apple filling for about 1 cup of fresh or frozen berries.
Strawberries, blueberries, raspberries, or a mixture can work nicely. Toss the berries with sugar and a little flour or cornstarch before adding them to the pastry.
Don’t use too much filling because juicy berries can release quite a bit of liquid.
Cinnamon Pear Version
Pears make a wonderful alternative to apples.
Dice two firm pears and cook them with the butter, sugar, and cinnamon just as you would the apples.
Pears soften quickly, so keep an eye on them while they cook.
A tiny pinch of ground ginger also works beautifully here.
Chocolate-Hazelnut Version
For a completely different dessert, skip the fruit and place a small spoonful of chocolate-hazelnut spread in the center of each pastry square.
Fold, seal, brush with egg, and bake the same way.
Keep the filling modest because chocolate spreads can become very runny when hot.
A Note About Gluten-Free Puff Pastry
If you need a gluten-free version, use a certified gluten-free puff pastry that works with your dietary requirements.
Follow that product’s thawing and baking directions because different brands can behave differently.
Serving Suggestions

These puff pastry desserts fit almost anywhere.
For a relaxed family dessert, serve them warm with powdered sugar and a cup of tea or coffee.
For a weekend brunch, arrange them on a platter alongside fresh fruit. They look festive without demanding much work.
For a dinner party, place one warm pastry on each dessert plate and add a scoop of vanilla ice cream.
You can also drizzle a little caramel sauce over the top if you want something richer.
If you’re making them for children, let the pastries cool well before serving because the fruit filling can stay hot longer than the pastry itself.
For a holiday table, add a little extra cinnamon to the apple filling and finish the pastries with powdered sugar just before bringing them out.
They have that cozy baked-apple flavor that works especially well during cooler weather.
Related Recipes:
- Dirt and Worms Desserts for Halloween Parties
- Fancy Desserts That Look Impressive but Are Easy to Make
- Easy Pear Dessert Recipe for Fall
- Delicious Dessert Recipes for Sweet Cravings
FAQ’s
Can I make this puff pastry dessert ahead of time?
Yes. You can assemble the pastries several hours ahead and keep them covered in the refrigerator until you’re ready to bake them.
For the flakiest result, I prefer baking them close to serving time.
If the assembled pastries sit in the refrigerator for a while, make sure the pastry stays cold and firm before baking.
Can I freeze puff pastry desserts?
Yes.
Freeze the assembled, unbaked pastries in a single layer on a parchment-lined tray until firm. Then transfer them to a freezer-safe container or bag.
When you’re ready to bake them, you can usually bake them directly from frozen, but allow a little extra baking time and follow the puff pastry package’s recommendations.
Brush with egg just before baking rather than before freezing.
How should I store leftover pastries?
Let them cool completely, then store them in an airtight container.
They taste best on the day you bake them because puff pastry gradually loses its crisp texture.
If you have leftovers, reheat them in a 350°F (175°C) oven for about 5–8 minutes.
An air fryer can also work well for reheating small portions. Avoid microwaving if crisp pastry matters to you because the microwave tends to soften the layers.
Why didn’t my puff pastry rise?
Several things can cause this.
The pastry may have become too warm before baking, the oven may not have been hot enough, or you may have pressed the edges too heavily while sealing.
Also check the pastry itself. If it has been frozen for a very long time or thawed and refrozen, its quality may suffer.
Keep everything as cool as practical and bake in a properly preheated oven.
Can I use store-bought apple pie filling?
You can, although I prefer the quick homemade filling in this recipe.
Store-bought filling often contains more liquid, so spoon it into the pastry carefully and avoid adding excess syrup.
You want enough filling to flavor the pastry without making the seams difficult to seal.
Can I use different fruit?
Absolutely.
Apples, pears, berries, peaches, and cherries can all work, although juicy fruits need a little extra attention.
If the fruit releases a lot of liquid, cook the filling first and let it cool before placing it on the pastry.
The goal is a filling that’s flavorful and moist without being watery.
Final Thought
There are recipes I make because they teach me something new, and then there are recipes I make because I know they’ll work when I simply want something good.
This easy puff pastry dessert with simple ingredients belongs firmly in the second group.
I love that it doesn’t require homemade pastry, unusual ingredients, or complicated decorating. The flaky pastry does most of the visual work, while the simple apple filling brings that warm, familiar flavor.
And don’t worry if your first batch isn’t perfectly shaped. Mine certainly wasn’t.
A little filling might escape. One pastry might puff more than another. You might accidentally make triangles that look more like lopsided rectangles.
That’s fine.
Put them on a plate, dust them with powdered sugar, and enjoy them while they’re warm.
Once you’ve made them once, you’ll probably start looking at that package of puff pastry in your freezer a little differently. It can turn a few ordinary ingredients into dessert with very little fuss — and sometimes that’s exactly the kind of recipe worth keeping around.
Leave a Reply
You must be logged in to post a comment.