

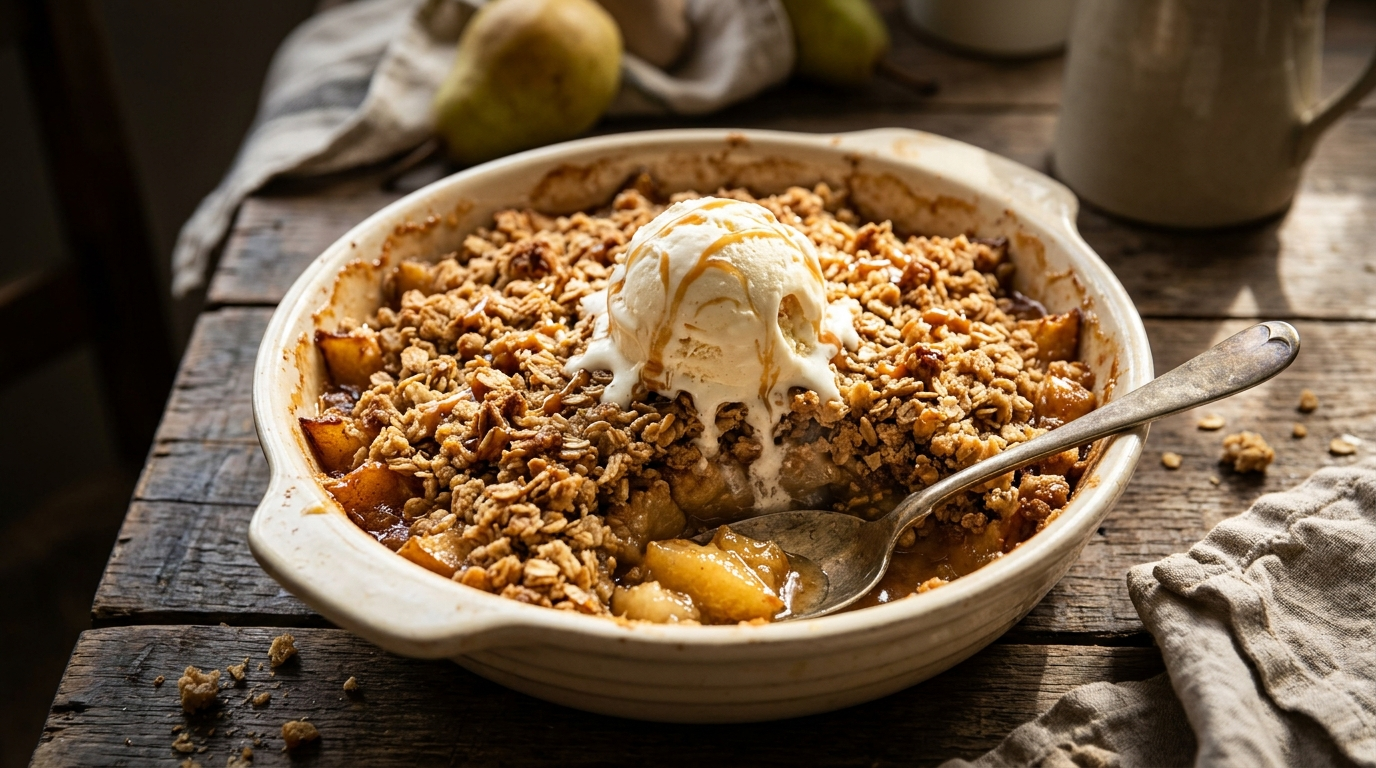
There is something about a cool fall afternoon that makes me want to turn on the oven, pull out a mixing bowl, and make something sweet with whatever fruit I have on the counter. When pears start showing up in grocery stores and farmers’ markets, I always look for a simple way to turn them into a dessert that feels a little special without requiring hours in the kitchen.
This Easy Pear Dessert for a Sweet Fall Treat is exactly the kind of recipe I reach for on those days. It combines tender, juicy pears with a buttery cinnamon-sugar topping that turns golden in the oven. As the pears bake, they soften and release their natural juices, while the cinnamon and brown sugar create that familiar, cozy aroma that makes the whole kitchen feel welcoming.
The best part? You don’t need fancy equipment, complicated techniques, or a long list of ingredients. A baking dish, a knife, and a few pantry staples will get you most of the way there.
I especially love this dessert because it gives ripe pears a little extra attention. Pears can sometimes sit on the counter while everyone reaches for apples or bananas first. But once you bake them with butter, cinnamon, and a touch of lemon juice, they become the star of the table.
This recipe makes a lovely weeknight dessert, but it also fits right in at a fall dinner party, Thanksgiving gathering, or relaxed weekend brunch. Serve it warm with vanilla ice cream, a spoonful of whipped cream, or a drizzle of caramel sauce, and you have a dessert that tastes as though you spent much longer preparing it.
If you have a few ripe pears waiting to be used, grab them and let’s make something delicious.
Why You’ll Love This Easy Pear Dessert

- Simple ingredients: You probably have most of what you need already, including butter, brown sugar, cinnamon, and flour.
- Easy preparation: You can prepare the pears and topping in about 15 minutes, making this a practical dessert for busy evenings.
- Perfect fall flavor: Cinnamon, brown sugar, and warm baked pears bring a cozy seasonal touch without overpowering the fruit.
- Flexible serving options: Enjoy it on its own, pair it with ice cream, or dress it up with chopped nuts and caramel.
- Easy to customize: Use your favorite pear variety, adjust the spices, or add oats for a more rustic, crumble-style topping.
You also don’t need perfectly shaped pears for this recipe. Slightly uneven slices bake beautifully, and a few rustic edges make the finished dessert feel homemade in the best possible way.
Ingredients for Easy Pear Dessert
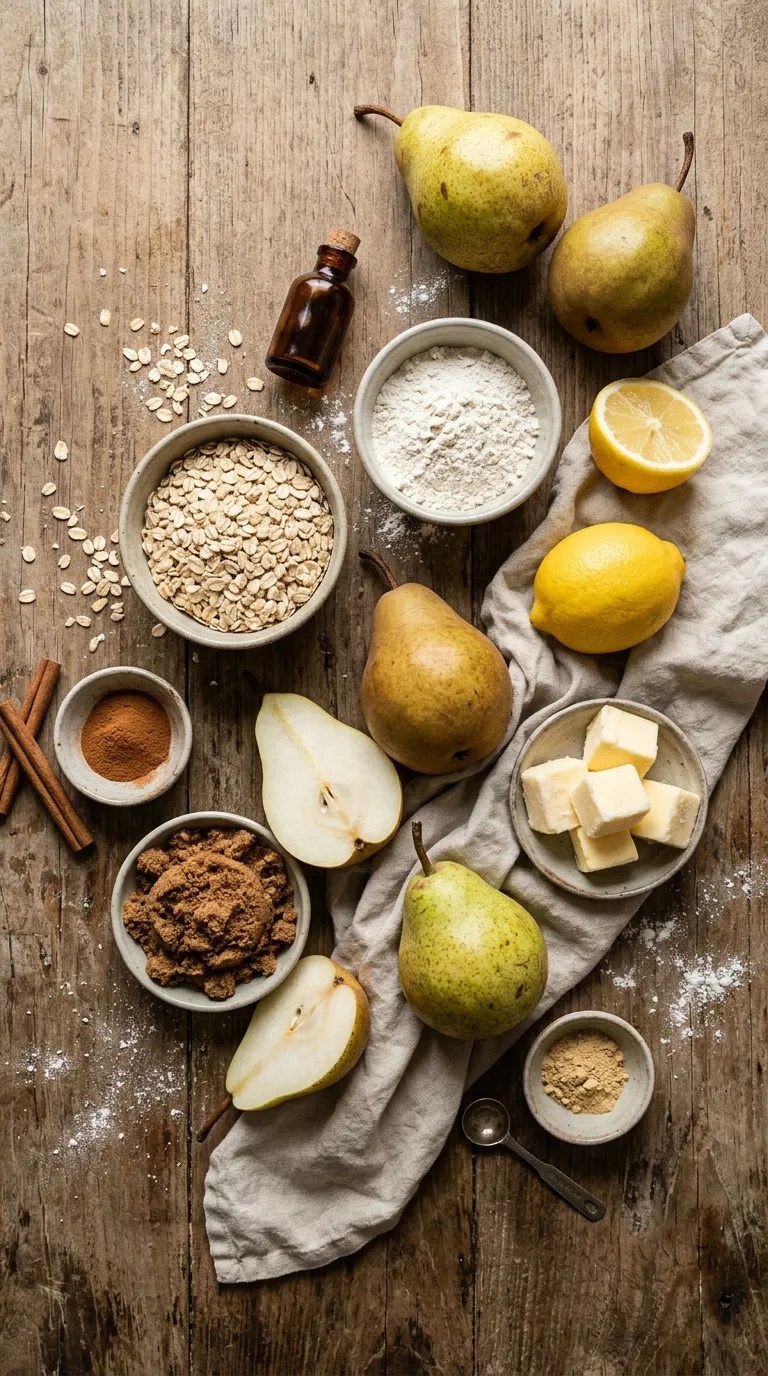
This recipe makes approximately 4 servings and uses everyday ingredients. The pears provide most of the flavor, while a simple buttery topping adds sweetness and texture.
For the pears
- 4 medium ripe but firm pears: About 1½ pounds or 680 grams. Bartlett, Anjou, or Bosc pears all work well.
- 1 tablespoon fresh lemon juice: Helps balance the sweetness and slows browning while you prepare the fruit.
- 2 tablespoons brown sugar: Adds a gentle caramel flavor.
- ½ teaspoon ground cinnamon: Brings warmth without overwhelming the pears.
- ¼ teaspoon ground ginger: Optional, but lovely if you enjoy a slightly spiced dessert.
- 1 teaspoon vanilla extract: Adds a soft, sweet aroma.
- 1 tablespoon unsalted butter, melted: Helps coat the fruit and adds richness.
For the crumb topping
- ½ cup all-purpose flour: Provides the base for the buttery crumbs.
- ¼ cup rolled oats: Adds a pleasant texture and a little rustic character.
- ¼ cup brown sugar: Sweetens the topping and encourages golden edges.
- ¼ teaspoon ground cinnamon: Reinforces the warm fall flavor.
- ¼ teaspoon salt: Balances the sweetness.
- 4 tablespoons unsalted butter, cold and cubed: Creates a crumbly topping that turns golden as it bakes.
Optional toppings for serving
- Vanilla ice cream
- Freshly whipped cream
- Caramel sauce
- Chopped walnuts or pecans
- A light dusting of powdered sugar
A quick ingredient note: Choose pears that yield slightly when you press near the stem but still feel firm enough to slice. Very soft pears can release too much liquid during baking, leaving the dessert watery.
If you prefer a sweeter topping, add another tablespoon of brown sugar. If your pears taste particularly sweet, keep the original amount and let their natural flavor shine.
Step-by-Step Instructions
Step 1: Preheat the oven and prepare your baking dish
Preheat your oven to 375°F (190°C).
Lightly butter an 8-inch square baking dish or a similarly sized oven-safe dish. A ceramic baking dish works nicely, but a standard glass baking dish also does the job.
Set the dish aside while you prepare the fruit.
Allowing the oven to reach the correct temperature before baking helps the pears cook evenly and gives the topping a better chance of turning golden without drying out.
Step 2: Wash, peel, and slice the pears
Wash the pears under cool running water and pat them dry with a clean towel.
Peel them if you prefer a softer texture, although you can leave the skins on for a more rustic dessert. Cut each pear in half, remove the core and seeds, and slice the flesh into wedges about ¼ to ½ inch thick.
Try to keep the slices reasonably similar in thickness. Thin slices soften faster, while thick wedges hold their shape a little longer.
Place the sliced pears in a large mixing bowl.
Step 3: Season the pears
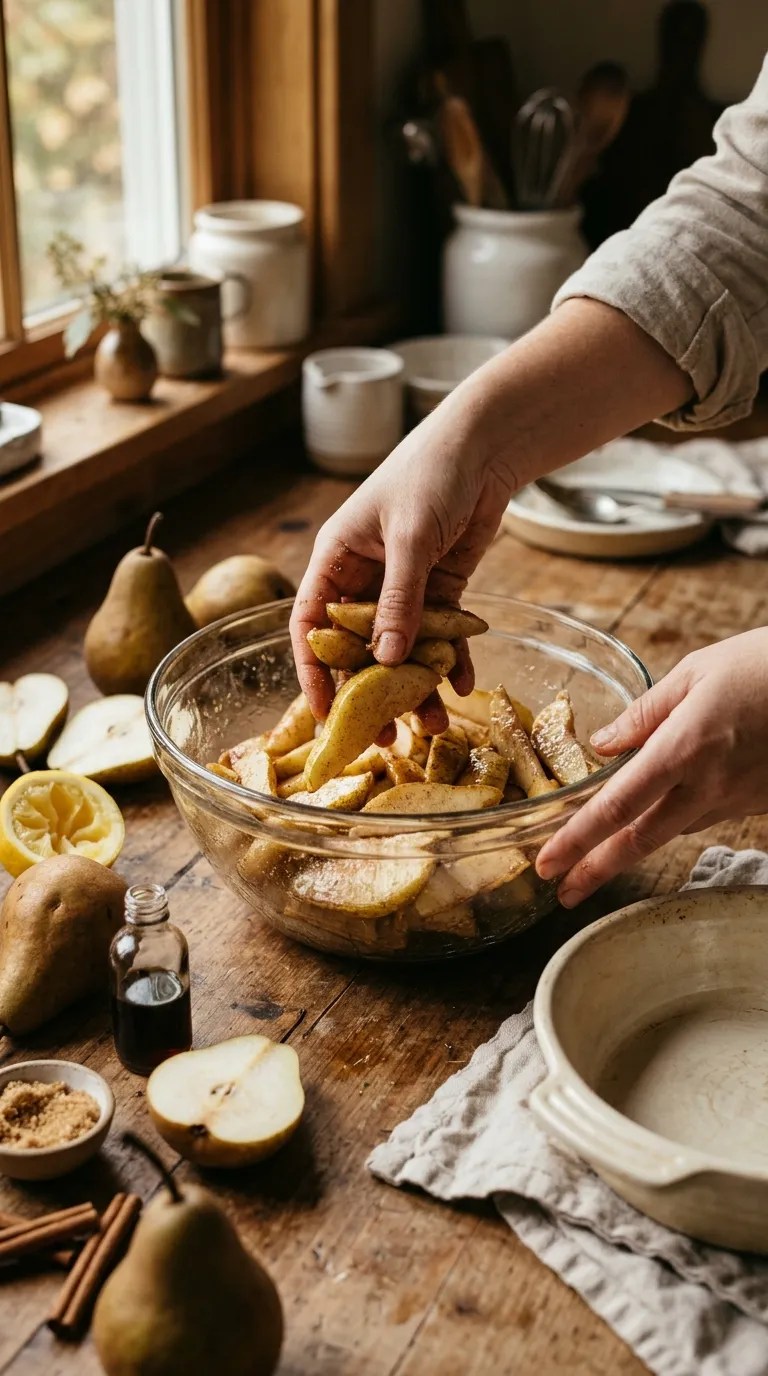
Add the lemon juice, 2 tablespoons of brown sugar, ½ teaspoon of cinnamon, ground ginger if using, vanilla extract, and melted butter.
Toss everything gently with a silicone spatula or a large spoon until the pears receive an even coating.
At this point, the fruit should look lightly glossy rather than swimming in liquid. The lemon juice adds brightness, while the butter and brown sugar help the pears develop a lovely, lightly caramelized flavor.
Transfer the seasoned pears to your prepared baking dish. Spread them into an even layer so they cook at roughly the same rate.
Step 4: Make the crumb topping
In a medium bowl, combine the flour, rolled oats, brown sugar, cinnamon, and salt.
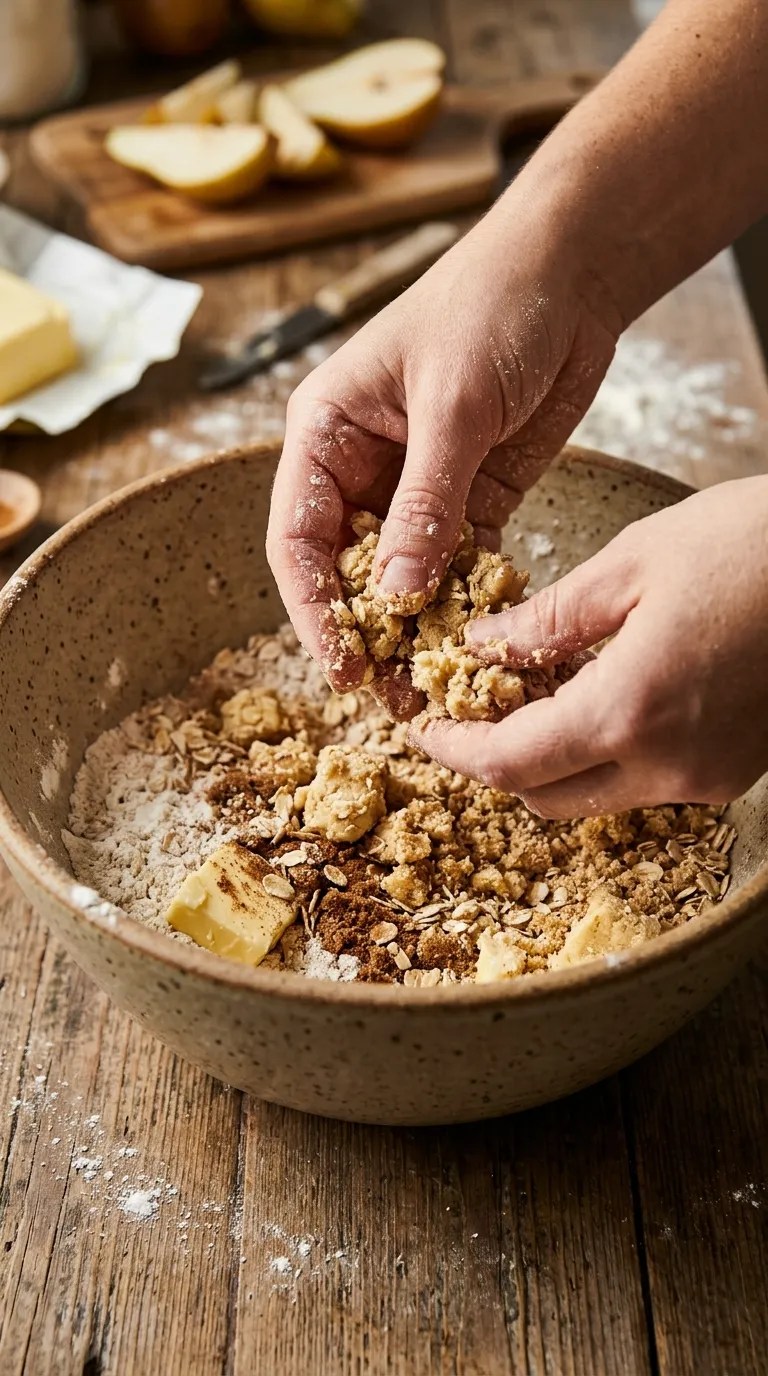
Add the cold, cubed butter. Use your fingertips, a pastry cutter, or two forks to work the butter into the dry ingredients.
Continue until the mixture resembles coarse crumbs, with some pieces about the size of small peas. A few larger buttery clumps are perfectly fine because they create delicious crisp spots on top.
Avoid melting the butter before adding it to the topping. Cold butter helps the crumbs retain their texture instead of blending into a paste.
If the mixture feels too dry and powdery, keep working the butter into it. If it looks slightly uneven, don’t worry. A rustic crumble topping doesn’t need perfect uniformity.
Step 5: Assemble the dessert
Sprinkle the crumb mixture evenly over the pears.
Try to cover most of the fruit, but don’t press the topping down firmly. Leaving it loose allows the crumbs to bake into a lighter, more textured layer.
Place the baking dish on the middle oven rack.
If you want to add chopped walnuts or pecans, scatter a small handful over the topping before baking. They add a pleasant crunch and pair especially well with the cinnamon and brown sugar.
Step 6: Bake until the pears are tender
Bake for 30–40 minutes, checking the dessert around the 30-minute mark.
The topping should look golden brown, and the pears should feel tender when you pierce a thick slice with a small knife. You may also notice a little bubbling around the edges of the dish.
If the topping browns before the pears soften, loosely cover the dish with aluminum foil and continue baking until the fruit reaches the right texture.
Keep in mind that baking time depends on the pear variety, ripeness, slice thickness, and your oven. Firm Bosc pears may need a little longer than softer Bartlett pears.
For a particularly crisp topping, let the dessert bake uncovered unless the crumbs start getting too dark.
Step 7: Let the dessert rest
Remove the baking dish from the oven and place it on a heat-safe surface.
Let the dessert rest for about 10 minutes before serving.
I know it’s tempting to scoop into it immediately, especially when the cinnamon aroma fills the kitchen. However, those few minutes allow the juices to settle slightly and make serving easier.
The pears should remain soft and juicy, while the topping keeps its crumbly texture.
Step 8: Add your favorite toppings and serve
Spoon the warm pear dessert into small bowls.
For a classic fall treat, add a scoop of vanilla ice cream and let it soften slightly over the warm fruit. You can also use whipped cream, caramel sauce, chopped nuts, or a small dusting of powdered sugar.
If you prefer a less sweet dessert, serve it plain or with a spoonful of unsweetened Greek yogurt.
Enjoy it while the topping remains crisp and the pears are still warm.
Pro Tips and Tricks for the Best Baked Pear Dessert
A few small details can make the difference between a delicious pear dessert and one that turns out too soft, too sweet, or unevenly baked.
1. Choose the right pears
Bartlett pears offer a soft, juicy texture and a sweet flavor. Anjou pears hold their shape reasonably well, while Bosc pears have a firmer texture that works particularly well for baking.
You don’t have to buy an expensive variety. Use what you can find, but avoid fruit that feels extremely soft or bruises easily.
If your pears are still very firm, give them a little more baking time and check their tenderness before removing the dish from the oven.
2. Don’t skip the lemon juice
Pears have a delicate sweetness that can sometimes taste a little flat when paired with brown sugar and butter.
Lemon juice adds a gentle tart note that balances those richer flavors. You won’t end up with a lemon-flavored dessert; the goal is simply to keep the sweetness lively.
Fresh lemon juice works best, but bottled lemon juice can work in a pinch.
3. Keep the topping butter cold
Cold butter helps create distinct crumbs rather than a dense, greasy layer.
If your kitchen feels warm and the butter starts softening while you work, place the bowl in the refrigerator for 5–10 minutes before sprinkling the mixture over the pears.
Don’t worry about making every crumb identical. A mixture of fine crumbs and larger clumps gives the topping an appealing homemade texture.
4. Watch the liquid at the bottom of the dish
Pears naturally release juice as they cook. A little syrup around the edges is delicious, but too much liquid can soften the topping.
To avoid a watery result, use firm-ripe pears, slice them evenly, and avoid adding extra liquid unless the fruit seems unusually dry.
If your pears release plenty of juice, let the dessert rest after baking. The juices may thicken slightly as the dish cools.
5. Store leftovers properly
Let the dessert cool, then transfer leftovers to an airtight container and refrigerate them within two hours of baking.
For the best quality, enjoy the leftovers within 3–4 days. The topping will soften in the refrigerator, but you can bring back some of its texture by reheating portions in the oven.
For meal prep, you can also prepare the topping a day ahead and keep it refrigerated in a covered container until you’re ready to assemble the dessert.
Variations and Substitutions
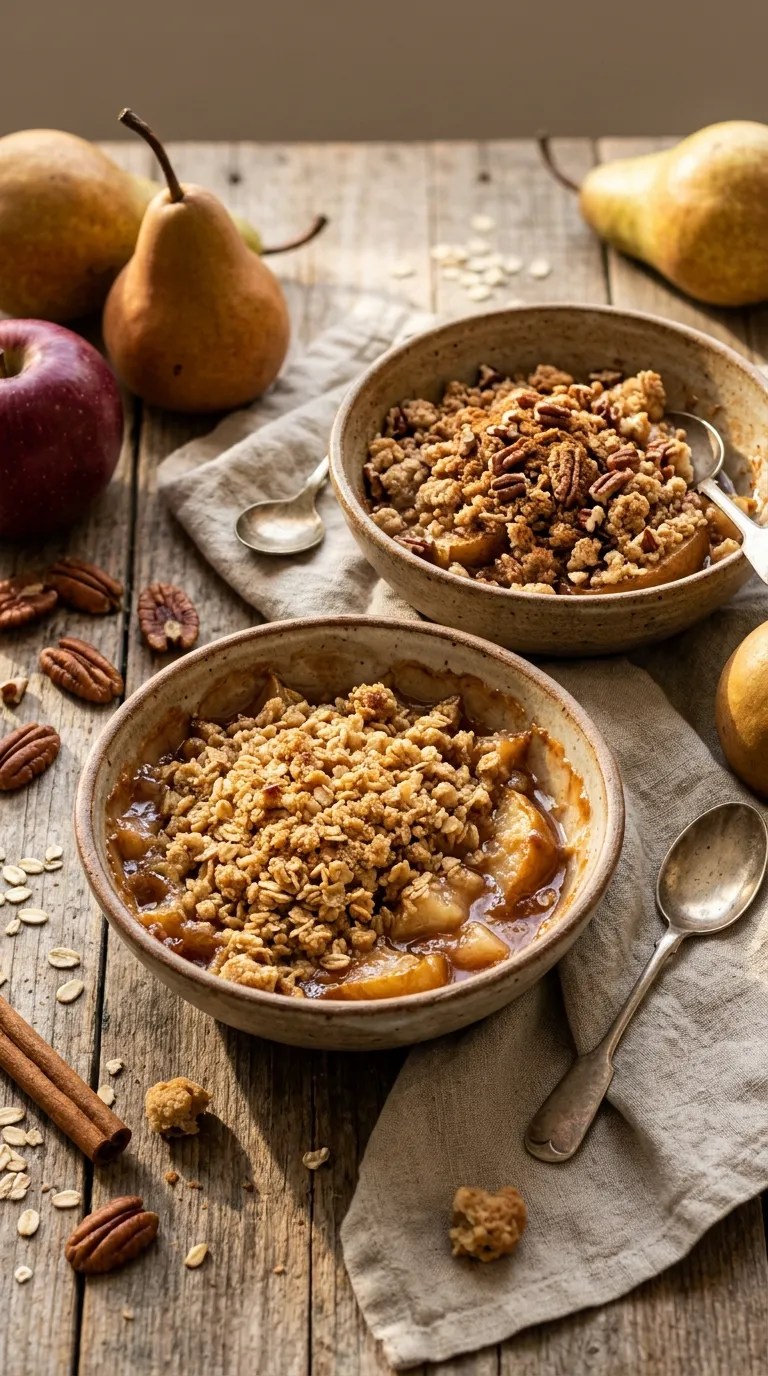
One of the nicest things about this easy pear dessert is how easily you can adapt it to suit your pantry or the people around your table.
Make it a pear and apple crumble
For a slightly different fall flavor, replace two of the pears with two small apples.
Choose firm apples such as Granny Smith or Honeycrisp, then slice them to a similar thickness as the pears. The apples add a pleasant tartness and a firmer bite, while the pears keep the filling juicy.
Keep the remaining ingredients and baking temperature the same. Start checking for tenderness after 30 minutes, as the fruit may need a little more time depending on your slices.
Make a dairy-free version
You can replace the unsalted butter with a firm, plant-based butter alternative suitable for baking.
Use it in both the pear mixture and the crumb topping. Check the product label because some alternatives contain more water than dairy butter and may produce a softer topping.
For serving, choose a dairy-free vanilla dessert or enjoy the baked pears on their own.
Add nuts, cardamom, or extra spice
If you enjoy a more aromatic dessert, add ¼ teaspoon of ground cardamom to the pear mixture or topping.
Chopped pecans and walnuts also work beautifully. Add about ¼ cup to the crumb mixture for extra crunch.
For a deeper caramel flavor, replace one tablespoon of the brown sugar in the topping with maple syrup only if you’re comfortable with a softer, slightly less crumbly texture. For the most reliable results, keep the original dry topping ingredients unchanged and drizzle maple syrup over the finished dessert instead.
Serving Suggestions

This baked pear dessert feels right at home on a chilly evening, but it also works for casual gatherings and holiday meals.
For an everyday treat: Serve a small bowl while the pears are still warm. You don’t need an elaborate garnish when the fruit and topping already taste so good.
For a dinner party: Add vanilla ice cream and a light drizzle of caramel sauce. Serve the dessert in individual bowls for a simple presentation that looks thoughtful without creating extra work.
For a fall brunch: Pair it with coffee, black tea, or chai. The cinnamon and brown sugar complement warm drinks particularly well.
For a holiday table: Offer the dessert alongside other seasonal favorites. Its fruit-forward flavor makes a pleasant alternative to heavier cakes and pastries.
For a slightly less sweet option: Serve the pears with plain Greek yogurt or lightly sweetened whipped cream. The creamy texture balances the warm fruit and crumb topping.
If you’re serving guests, you can bake the dessert shortly before they arrive and let it rest while everyone finishes dinner. That way, the kitchen smells wonderful, and you won’t need to spend the entire evening preparing dessert.
Related Recipes:
- Easy Pear Dessert Recipe for Fall
- Delicious Dessert Recipes for Sweet Cravings
- Easy Dirt Cup Dessert with Chocolate Pudding
- Best Pecan Desserts for Fall and Winter
FAQ’s
Can I make this easy pear dessert ahead of time?
Yes. You can prepare the crumb topping up to a day ahead and refrigerate it in an airtight container.
You can also slice and season the pears a few hours ahead, although they may release some juice as they sit. Keep them covered in the refrigerator, then assemble the dessert just before baking. For the crispest topping, bake it close to serving time.
How should I store leftover baked pears?
Let the dessert cool, then place the leftovers in an airtight container and refrigerate them within two hours of baking.
Use the leftovers within 3–4 days for the best quality. Keep in mind that the crumb topping will gradually soften as it absorbs moisture from the fruit.
Can I freeze this pear dessert?
Yes, although the texture may change slightly after thawing.
For the best results, freeze the baked dessert in a freezer-safe, airtight container once it has cooled. Use it within about 2–3 months for good quality.
Thaw it overnight in the refrigerator and reheat it in a 325°F (165°C) oven until heated through. The fruit may become softer, and the topping may not return to its original crispness.
If you plan to make this dessert specifically for freezing, consider freezing the crumb topping separately and preparing the fresh pears when you are ready to bake.
How do I reheat the dessert without making the topping soggy?
The oven works better than the microwave when you want to preserve the topping’s texture.
Place the desired portion in an oven-safe dish and warm it at 325°F (165°C) for approximately 10–15 minutes, checking that the center heats through. Larger portions may need additional time.
A microwave works for a quick serving, but it tends to soften the crumbs. If convenience matters more than crunch, microwave a portion in short intervals until warm.
Can I use canned pears instead of fresh pears?
Yes, but fresh pears generally provide the best texture for this recipe.
If you use canned pears, drain them thoroughly and pat them dry with paper towels. Choose pears packed in juice rather than heavy syrup if you want to control the sweetness.
Since canned pears already feel soft, shorten the baking time and check the topping for doneness. You mainly need enough time to heat the fruit and brown the crumbs.
Why did my pear dessert turn out watery?
Very ripe pears, excess liquid, or thin slices can all contribute to a watery filling.
Next time, choose pears that still feel slightly firm, avoid adding unnecessary liquid, and cut the fruit into reasonably even slices. Let the finished dessert rest for 10 minutes before serving so the juices can settle.
If the fruit is tender but the filling still looks loose, you can return the dish to the oven briefly to encourage some moisture to evaporate, keeping an eye on the topping to prevent over-browning.
Final Thought
I love desserts that make an ordinary afternoon feel a little more special without demanding a sink full of dishes or an entire afternoon of preparation. This Easy Pear Dessert for a Sweet Fall Treat does exactly that.
With tender baked pears, a buttery cinnamon crumble, and just enough brown sugar to bring everything together, it turns a handful of simple ingredients into something worth sharing.
You can follow the recipe as written the first time, then make it your own with apples, pecans, cardamom, or your favorite topping. That’s part of the fun of home baking: discovering the little changes that make a recipe fit your kitchen.
If you have pears on the counter right now, this is a lovely way to use them. Preheat the oven, pull out your baking dish, and let the cinnamon do its thing.
And when you make this dessert, I’d love to hear how it turns out. Did you serve it with vanilla ice cream, add a handful of nuts, or try a different spice? Share your favorite variation in the comments so other home cooks can try it, too.
Here’s to warm kitchens, crisp fall afternoons, and simple desserts that bring everyone back for one more spoonful.
Leave a Reply
You must be logged in to post a comment.