


Every Halloween party seems to have that one dessert everyone keeps sneaking back to the table for. In my kitchen, it’s these Easy Halloween Party Dessert for All Age chocolate monster cups.
I first made them when I wanted something festive but didn’t want to spend the afternoon rolling out cookies or decorating a complicated cake. I had a few basic ingredients in the pantry, some whipped topping in the fridge, and a package of candy eyes left over from another Halloween project.
The result surprised me.
The little chocolate cups looked wonderfully silly, tasted rich and creamy, and took much less effort than I expected. The kids loved decorating their own, while the adults happily grabbed one with their coffee.
I’ve made them several times since, and I’ve learned one important lesson: don’t make the eyes too perfect. The wonkier the monsters look, the more charming they become.
This dessert works especially well for Halloween parties because you can prepare the chocolate mixture ahead of time, chill the cups, and let everyone add their own spooky decorations just before serving.
Why You’ll Love This Recipe

- No oven required. You only need a little stovetop or microwave work.
- Great for mixed-age parties. Kids can decorate while adults handle the hot chocolate mixture.
- Easy to customize. Make cute monsters, spooky ghosts, silly faces, or colorful Halloween characters.
- Party-friendly. Individual portions make serving simple and reduce the mess of cutting a large dessert.
- Make-ahead friendly. Prepare the cups earlier in the day and decorate them shortly before the party.
Ingredients
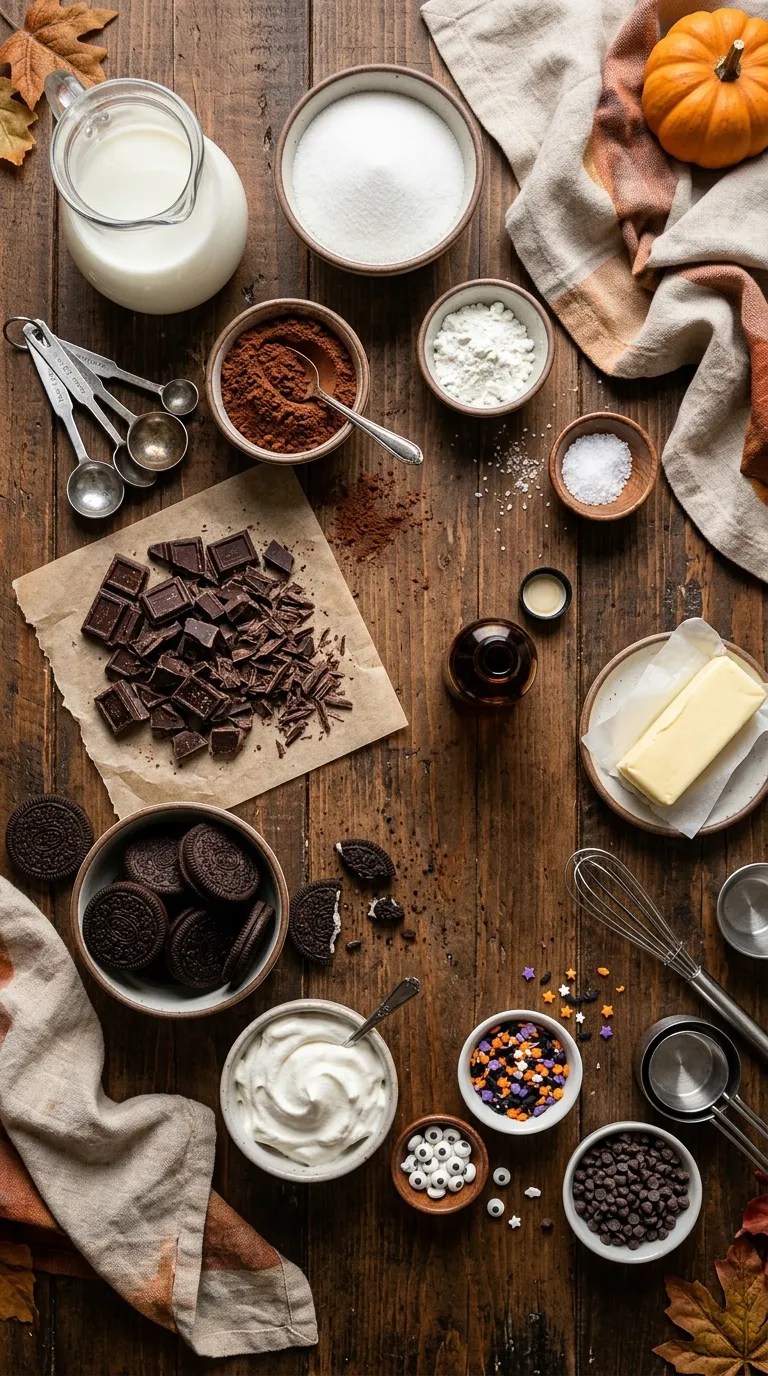
This recipe makes about 10 small dessert cups.
For the chocolate pudding cups
- 2 cups whole milk
- 1/2 cup granulated sugar
- 1/4 cup unsweetened cocoa powder
- 3 tablespoons cornstarch
- 1/4 teaspoon salt
- 4 ounces semi-sweet chocolate, finely chopped
- 1 teaspoon vanilla extract
- 1 tablespoon unsalted butter
For the cookie layer
- 20 chocolate sandwich cookies
- 2 tablespoons melted unsalted butter
You can use regular chocolate sandwich cookies, chocolate wafer cookies, or another crisp chocolate cookie you enjoy.
For decorating
- 1 cup whipped topping or whipped cream
- 20–30 candy eyes
- 1/4 cup Halloween sprinkles
- 2 tablespoons mini chocolate chips
- 2 tablespoons crushed chocolate cookies
- A small amount of red or orange decorating gel, optional
If you prefer less sweetness, skip some of the sprinkles and use extra crushed cookies instead.
For a different look, use white chocolate chips for teeth or small pieces of fruit for colorful decorations.
Step-by-Step Instructions
1. Crush the cookies — 5 minutes
Place the chocolate sandwich cookies in a food processor and pulse until they become fine crumbs.
If you don’t have a food processor, put the cookies in a sturdy zip-top bag and crush them with a rolling pin. This method takes a little longer, but it works perfectly well.
Set aside about 2 tablespoons of crumbs for decorating later.
Mix the remaining crumbs with 2 tablespoons of melted butter.
The mixture should resemble damp sand. When you squeeze a little between your fingers, it should hold together without becoming greasy.
2. Build the cookie bases — 5 minutes
Spoon about 2 tablespoons of the cookie mixture into each small dessert cup.
I like using 6- to 8-ounce clear plastic or glass cups because you can see the chocolate and cookie layers. Small jars also work nicely if you want a more rustic presentation.
Press the crumbs gently with the back of a spoon.
Don’t pack them down too firmly. A light, even layer gives you a pleasant crumbly texture instead of a hard cookie crust.
Place the cups in the refrigerator while you prepare the chocolate filling.
3. Mix the dry ingredients — 2 minutes
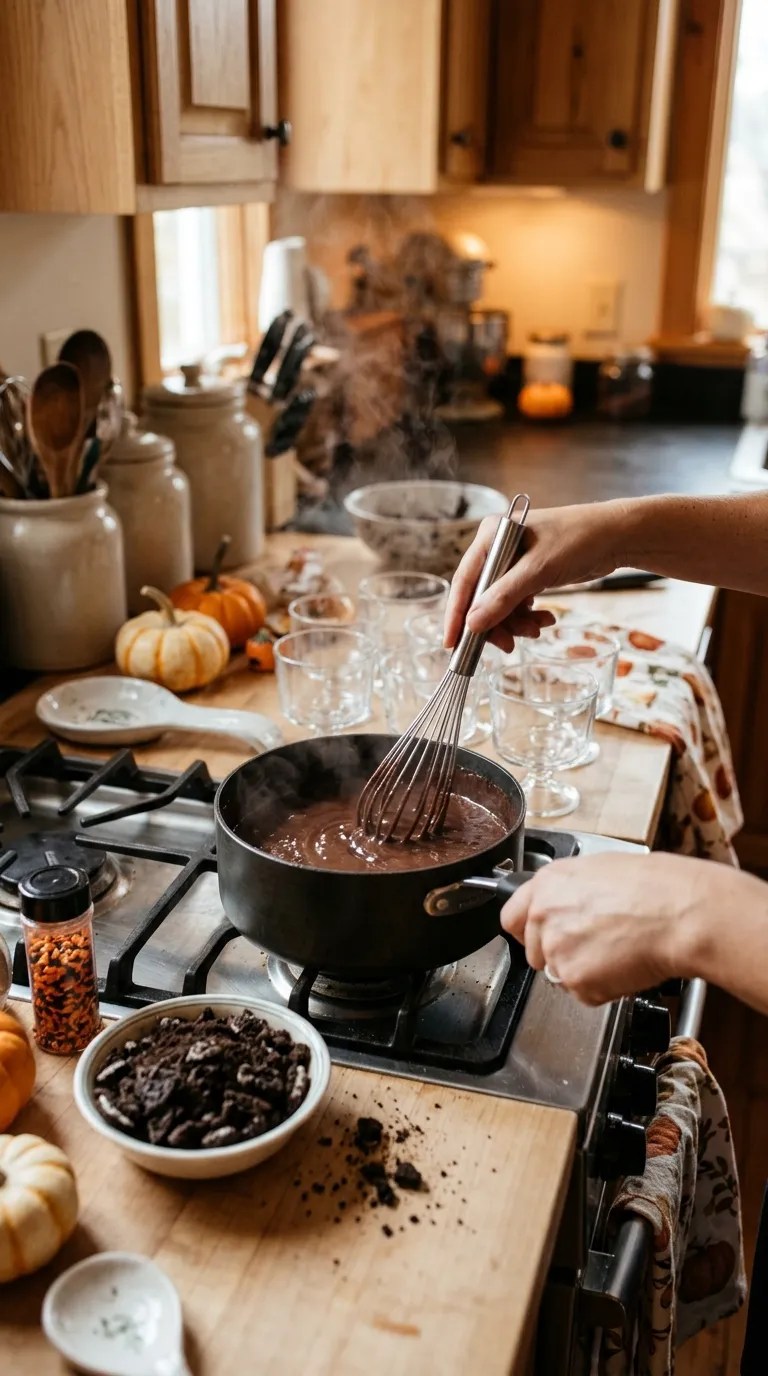
In a medium saucepan, whisk together the sugar, cocoa powder, cornstarch, and salt.
Take a minute to break up any cocoa lumps now. Once you add the milk, they become much harder to remove.
4. Add the milk — 2 minutes
Slowly pour in the milk while whisking constantly.
Keep whisking until the cocoa mixture looks smooth.
This small step makes a noticeable difference. The first time I made these, I rushed this part and ended up with a few tiny lumps. They weren’t disastrous, but I learned that an extra minute of whisking saves you from having to fix the texture later.
5. Cook the chocolate mixture — 6 to 8 minutes
Place the saucepan over medium heat.
Cook the mixture while whisking frequently, especially around the bottom and corners of the pan.
After several minutes, the mixture will begin to thicken.
Keep cooking until it reaches a pudding-like consistency. When you lift the whisk, the mixture should fall back slowly rather than running like milk.
Avoid cranking up the heat to make it happen faster. Medium heat gives you much better control and helps prevent scorching.
6. Add the chocolate — 2 minutes
Remove the saucepan from the heat.
Immediately add the chopped semi-sweet chocolate, butter, and vanilla extract.
Whisk until the chocolate and butter completely melt into the warm pudding.
The mixture should look glossy and smooth.
If you see a few stubborn pieces of chocolate, keep whisking for another 30 seconds. The residual heat usually melts them.
7. Fill the cups — 5 minutes
Take the chilled cookie cups from the refrigerator.
Carefully spoon or pour the warm chocolate mixture over the cookie layer.
Leave about 1/2 inch of space at the top so you have room for the whipped topping and decorations.
Give each cup a gentle tap against the counter to help remove large air bubbles.
8. Chill until set — at least 2 hours
Cover the cups loosely with plastic wrap and refrigerate for at least 2 hours.
For the best texture, I usually make them about 3 to 4 hours before serving.
The pudding should feel firm when you gently touch the surface, but it should still have a soft, creamy texture when you scoop into it.
9. Add the monster topping — 10 minutes
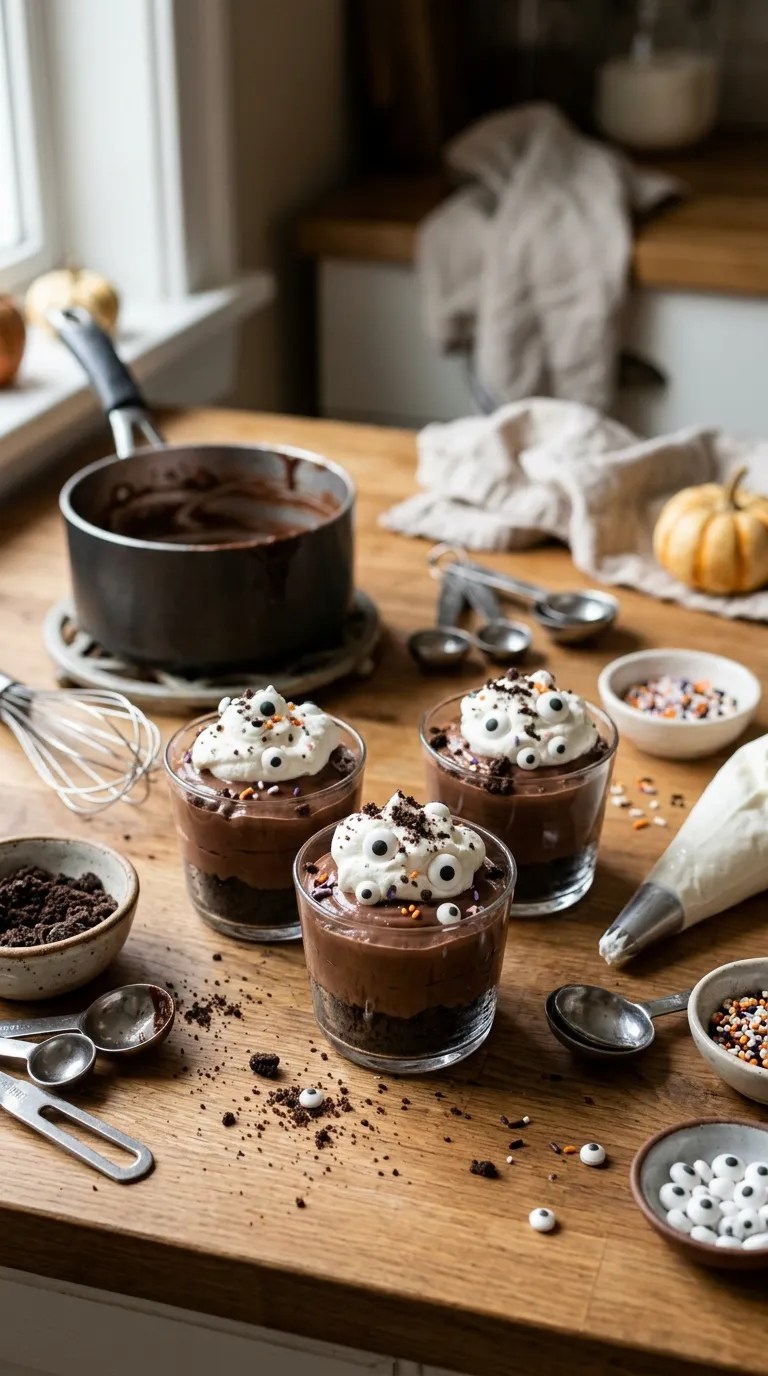
Right before serving, add a spoonful of whipped topping to each chocolate cup.
Now comes the fun part.
Scatter a few chocolate cookie crumbs over the whipped topping. Add candy eyes, sprinkles, and mini chocolate chips.
You can make each monster different.
Try two large eyes for a classic monster, several tiny eyes for a goofy creature, or one giant eye for a cyclops.
If you use decorating gel, add little eyebrows, mouths, or silly expressions.
This is a great step for children, but an adult should handle any ingredients or tools that could create a safety issue.
Pro Tips & Tricks
Let the pudding cool slightly before decorating
Don’t put whipped topping onto piping-hot pudding.
The heat can make it melt quickly and leave you with a flat, messy topping. Chilling the pudding completely gives you a much cleaner finish.
Use clear cups for the best presentation
The layered look is part of the charm.
Clear dessert cups let guests see the dark cookie crumbs underneath the creamy chocolate filling. If you use opaque cups, the dessert still tastes great, but you lose some of that visual effect.
Don’t overcook the pudding
The mixture thickens more as it cools.
If it already looks extremely thick in the saucepan, it can become too firm after refrigeration. Aim for thick and creamy rather than stiff.
Decorate close to serving time
You can make the pudding cups well ahead, but add whipped topping and decorations shortly before serving.
This keeps the topping fresh and prevents sprinkles from becoming soft.
Store leftovers properly
Cover the dessert cups and refrigerate them.
They taste best within about 2 days. The cookie layer gradually softens as it sits, so expect the texture to change slightly after the first day.
I actually enjoy that softer cookie layer, but if you prefer more crunch, assemble the cookie bases and pudding ahead of time and add a fresh sprinkle of cookie crumbs before serving.
Variations & Substitutions
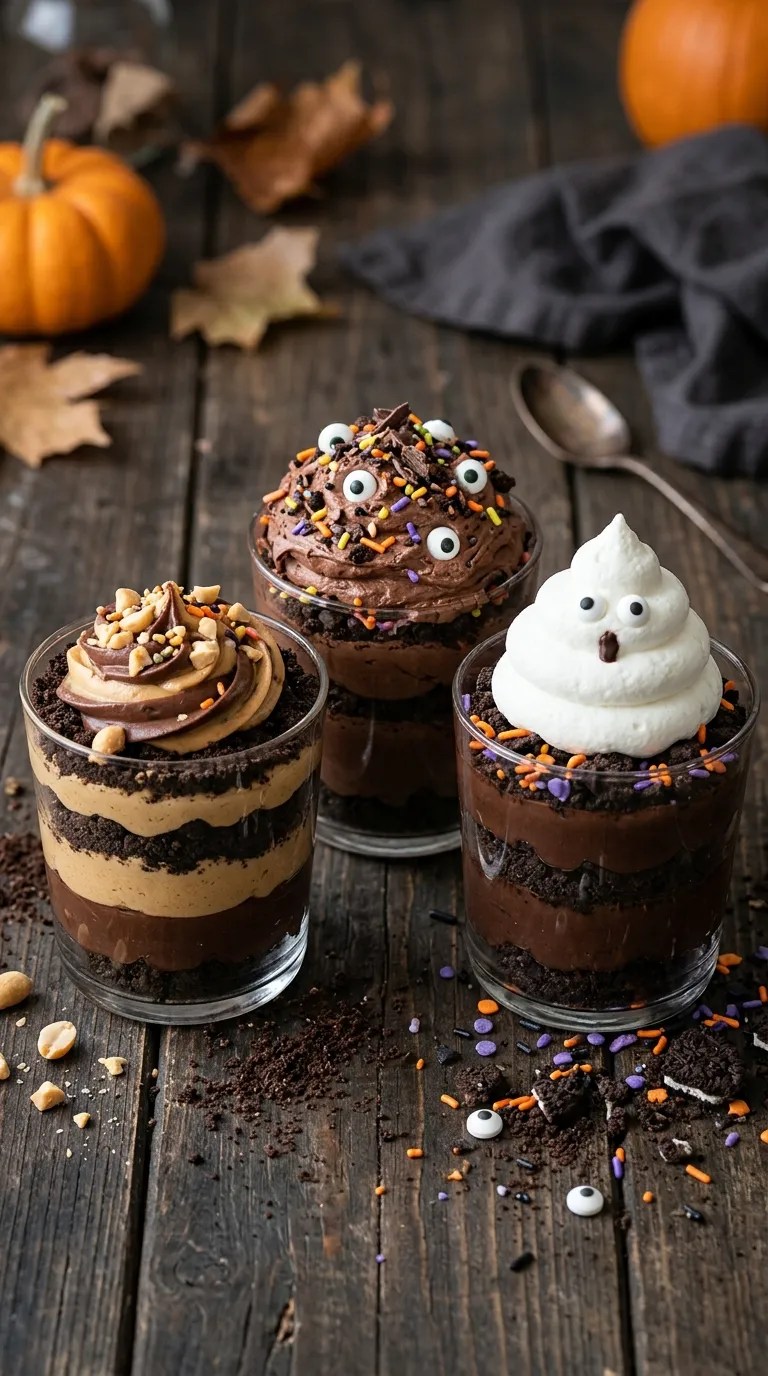
Make spooky ghost cups
Instead of making monster faces, add a generous mound of whipped topping and shape it loosely into a ghost-like figure.
Use two candy eyes for the face and a few cookie crumbs around the bottom. Keep the decoration simple so the ghost shape stays visible.
Make peanut butter chocolate cups
For a peanut butter twist, stir 1/3 cup creamy peanut butter into the warm chocolate mixture after removing the saucepan from the heat.
Whisk until completely smooth.
You can also sprinkle chopped roasted peanuts on top, but check for nut allergies before serving them at a party.
Make a lighter-tasting version
Use milk chocolate instead of semi-sweet chocolate if you prefer a sweeter, softer chocolate flavor.
You can also reduce the sugar slightly, although I recommend keeping enough sugar to balance the unsweetened cocoa powder.
Make them gluten-free
Choose certified gluten-free chocolate sandwich cookies or gluten-free chocolate wafer cookies.
Also check the labels on your decorations, especially if you’re serving guests with food allergies or specific dietary restrictions.
Make them dairy-free
Use a dairy-free milk that works well for desserts, dairy-free chocolate, dairy-free butter, and a dairy-free whipped topping.
Because different products behave differently when heated, check the package instructions and choose products designed for cooking or baking when possible.
Serving Suggestions

These chocolate monster cups fit naturally into a Halloween dessert table.
I like arranging them on a large tray with a few extra candy eyes and Halloween sprinkles scattered around the cups. The little decorations make the whole table feel festive without requiring a complicated centerpiece.
They also work well for:
- Halloween classroom celebrations
- Family movie nights
- Neighborhood Halloween gatherings
- Costume parties
- October birthday parties
- Kids’ baking afternoons
- Casual Halloween dinners
For drinks, serve them with cold milk, hot chocolate, coffee, or a simple apple cider.
If you’re serving several desserts, keep these portions small. Halloween tables can get crowded with cookies, cupcakes, candy, and other treats, so individual mini cups give everyone a chance to try one without taking up too much room.
For a fun activity, prepare the chilled chocolate cups and set out bowls of decorations. Let guests create their own monster faces.
Just keep ingredients with common allergens clearly identified, especially when you’re feeding a group.
Related Recipes:
- Spooky Halloween Oreo Dirt Cups Kids and Adults
- Spooky Halloween Dessert Everyone Will Love
- Easy Halloween Desserts for a Spooky Party
- Easy Halloween Sweets for Kids and Adults Spooky Chocolate
FAQ’s
Can I make these Halloween dessert cups the day before?
Yes. You can prepare the cookie bases and chocolate pudding the day before.
Keep the cups covered in the refrigerator. Add the whipped topping, candy eyes, and other decorations closer to serving time for the freshest appearance.
How long do chocolate monster cups last in the refrigerator?
For the best texture, enjoy them within about 2 days.
Keep them refrigerated and covered. The cookie layer will gradually soften as it absorbs moisture from the chocolate pudding.
Can I freeze these Halloween dessert cups?
I don’t recommend freezing the fully assembled cups.
The pudding and whipped topping can change texture after thawing, and the cookie layer may become softer than you want.
If you need to work ahead, prepare the components separately and assemble them later instead.
Why didn’t my chocolate pudding thicken?
The most common reason is that the mixture didn’t cook long enough after it became hot.
Cornstarch needs sufficient heat to thicken the mixture. Return the pudding to medium heat and whisk continuously until it becomes noticeably thicker.
Also make sure you measured the cornstarch accurately.
Can I use instant chocolate pudding instead?
Absolutely.
If you’re making a large batch or want the fastest possible version, prepared instant chocolate pudding works well. Follow the package directions, chill it, and layer it over the cookie crumbs.
The homemade version takes a little more effort, but I like its deeper chocolate flavor.
Can children help make this dessert?
Yes, and decorating makes a particularly fun kitchen activity.
Children can crush cookies, spoon cooled ingredients into cups, and create the monster faces. An adult should handle the saucepan, hot ingredients, and any sharp kitchen equipment.
Final Thought
I love recipes that look like you spent hours making them when you actually had plenty of time left to enjoy the party.
That’s exactly what these Easy Halloween Party Dessert for All Age chocolate monster cups give me. They feel festive without being fussy, and every batch ends up with its own personality.
Some monsters look adorable. Some look completely ridiculous. A few somehow end up with five eyes.
And honestly, those are always my favorites.
Make the chocolate cups a few hours before your Halloween gathering, put the decorations on the table, and let everyone have fun creating their own little monsters. You don’t need perfect piping skills or elaborate decorations—just chocolate, cookies, and a bit of Halloween imagination.
If you make them, I hope your monsters turn out wonderfully wonky too.
Leave a Reply
You must be logged in to post a comment.