

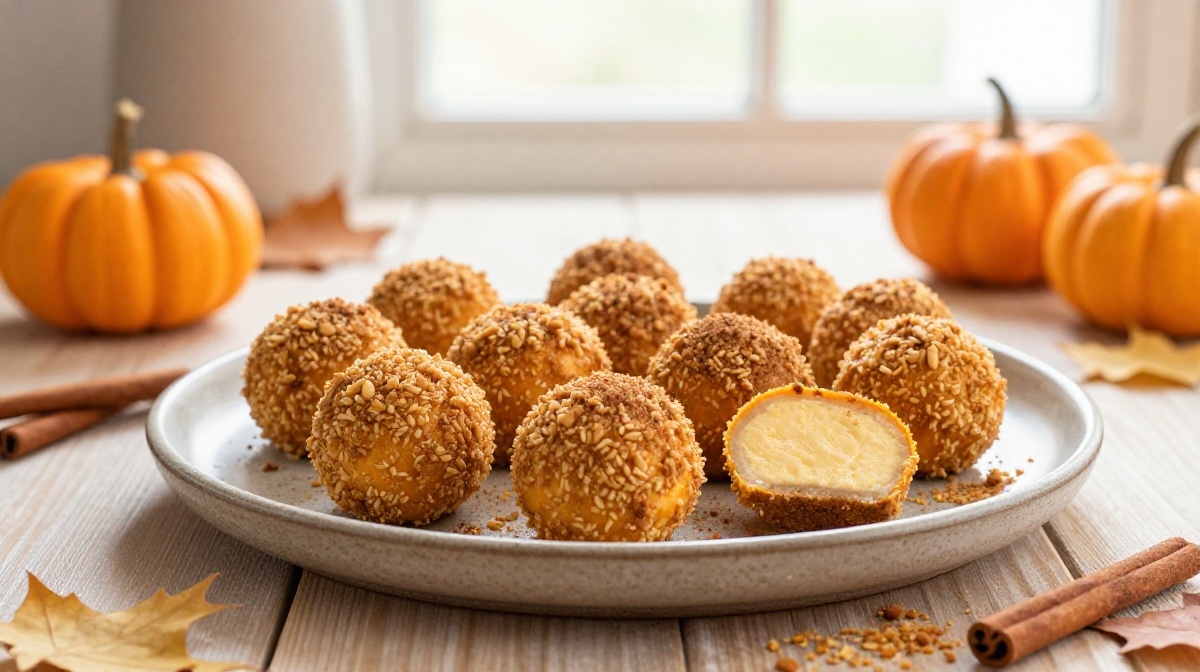
The first time I made these pumpkin cheesecake balls, I planned to serve them after dinner. That plan lasted about twenty minutes.
I rolled the first batch, chilled them, and tasted one “just to make sure they were set.” Then I had another. Before I knew it, I was standing in the kitchen with the container open, wondering where half the batch had gone.
That’s what I love about these easy no-bake pumpkin cheesecake balls for fall. They taste like a little bite of pumpkin cheesecake, but you don’t need to heat the oven, fuss over a water bath, or wait for a whole cheesecake to cool.
The filling comes together in one bowl, and the hardest part involves rolling the mixture into balls. Even that becomes surprisingly relaxing once you get into a rhythm.
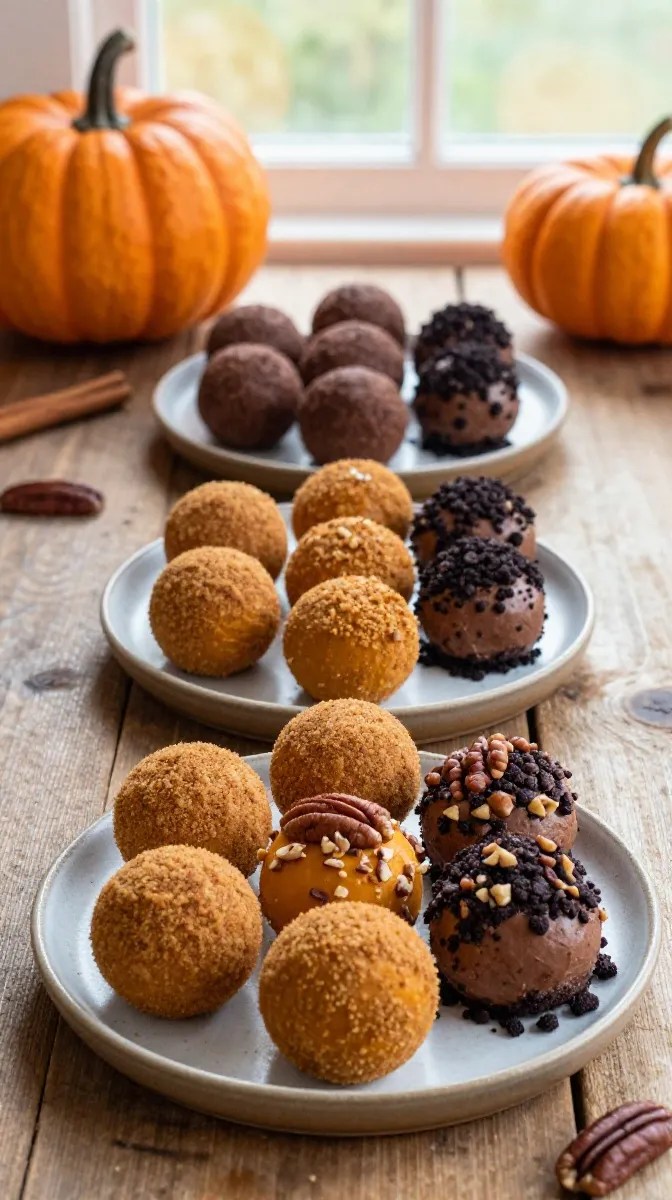
I especially like making them when the weather starts cooling down and I want something pumpkin-flavored without committing to a full dessert. They also look lovely on a fall dessert tray, especially with a simple coating of crushed graham crackers and a tiny sprinkle of cinnamon.
Why You’ll Love This Recipe

- No oven required: Perfect when you want a fall dessert without turning on the oven.
- Simple ingredients: Most of them may already be sitting in your pantry or refrigerator.
- Easy to make ahead: The cheesecake balls actually benefit from some chilling time.
- Great for sharing: One batch makes plenty of small treats for a family gathering, party, or movie night.
- That pumpkin-cheesecake flavor: Cream cheese, pumpkin, warm spices, and graham crackers do all the heavy lifting.
Ingredients
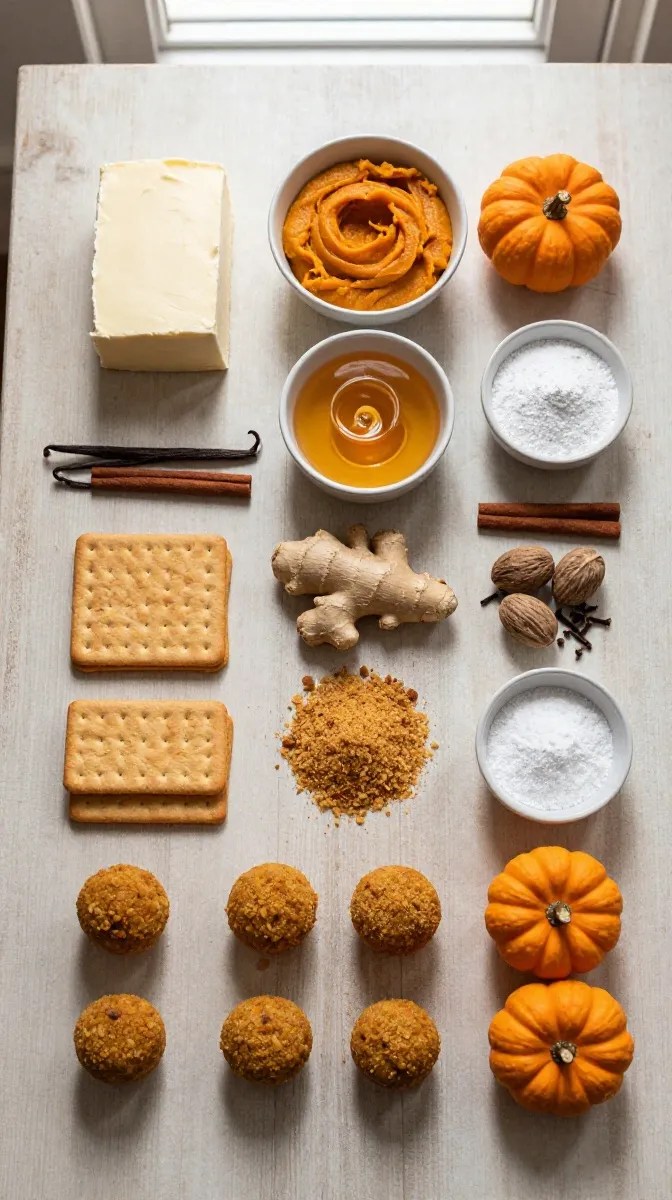
This recipe makes about 20–24 small pumpkin cheesecake balls, depending on how generously you scoop them.
For the Cheesecake Balls
- 8 ounces cream cheese, softened to room temperature
- 1/2 cup pumpkin puree, preferably plain pumpkin rather than pumpkin pie filling
- 1/3 cup powdered sugar
- 1 teaspoon vanilla extract
- 1 teaspoon ground cinnamon
- 1/2 teaspoon ground ginger
- 1/4 teaspoon ground nutmeg
- 1/8 teaspoon ground cloves
- 1 1/2 cups finely crushed graham crackers
- 1/4 teaspoon salt
For the Coating
- 1 cup finely crushed graham crackers
- 1/2 teaspoon ground cinnamon
- 2 tablespoons powdered sugar
You can use homemade graham cracker crumbs or crush whole graham crackers in a food processor. If you don’t own a food processor, put the crackers into a sturdy zip-top bag and crush them with a rolling pin.
For the cream cheese, full-fat cream cheese gives these the firmest, creamiest texture. Reduced-fat cream cheese can work, but the mixture may feel softer and require more chilling.
And one small but important detail: use pumpkin puree, not pumpkin pie filling. Pie filling already contains sugar and spices, so swapping it into this recipe can throw off both the sweetness and texture.
Step-by-Step Instructions
1. Soften the Cream Cheese — 20 to 30 Minutes
Take the cream cheese out of the refrigerator and let it soften at room temperature.
You want it soft enough that a spoon or hand mixer can easily blend it. Don’t melt it.
If you forget this step, don’t panic. You can cut the cream cheese into small cubes and let those sit for a few minutes. They’ll soften much faster than one large block.
2. Crush the Graham Crackers — 5 Minutes
Crush your graham crackers until you get fine crumbs.
Aim for a texture similar to sand rather than large cookie chunks. Fine crumbs blend more evenly into the cheesecake mixture and make the finished balls easier to roll.
Measure 1 1/2 cups of crumbs for the filling and set another cup aside for the coating.
3. Mix the Cream Cheese and Pumpkin — 2 to 3 Minutes
Add the softened cream cheese and pumpkin puree to a medium mixing bowl.
Beat them together with a hand mixer on low to medium speed until the mixture looks smooth and evenly combined.
You can also use a stand mixer with the paddle attachment. For a batch this small, though, I usually grab my hand mixer because cleanup takes less time.
4. Add the Sweetness and Spices — 1 Minute
Add the powdered sugar, vanilla, cinnamon, ginger, nutmeg, cloves, and salt.
Mix until everything disappears into the cream cheese mixture.
At this stage, the bowl should smell like pumpkin pie.
Don’t worry if the mixture looks a little softer than you expected. The graham cracker crumbs will firm it up considerably.
5. Add the Graham Cracker Crumbs — 1 to 2 Minutes
Add the 1 1/2 cups finely crushed graham crackers gradually.
Stir or mix until you have a thick, scoopable mixture.
Here’s the texture you’re looking for: when you scoop some up with a spoon, it should hold its shape instead of spreading across the bowl.
If it feels very sticky and loose, add another tablespoon or two of graham cracker crumbs.
Try not to add a huge amount at once. Too many crumbs can make the cheesecake balls dry and crumbly.
6. Chill the Mixture — 30 to 60 Minutes
Cover the bowl and refrigerate the mixture for at least 30 minutes.
I prefer about 45 minutes.
This little rest makes a big difference. Cold cream cheese mixture feels much easier to handle, and your hands won’t turn into a sticky mess while you roll.
If you have time, you can chill it for a few hours.
7. Prepare the Coating — 2 Minutes
While the mixture chills, combine the remaining 1 cup graham cracker crumbs, 1/2 teaspoon cinnamon, and 2 tablespoons powdered sugar in a shallow bowl.
Give it a good stir.
A shallow dish works better than a deep bowl because you can easily roll each cheesecake ball through the crumbs without digging around.
8. Roll the Cheesecake Balls — 10 to 15 Minutes
Line a baking sheet or large plate with parchment paper.
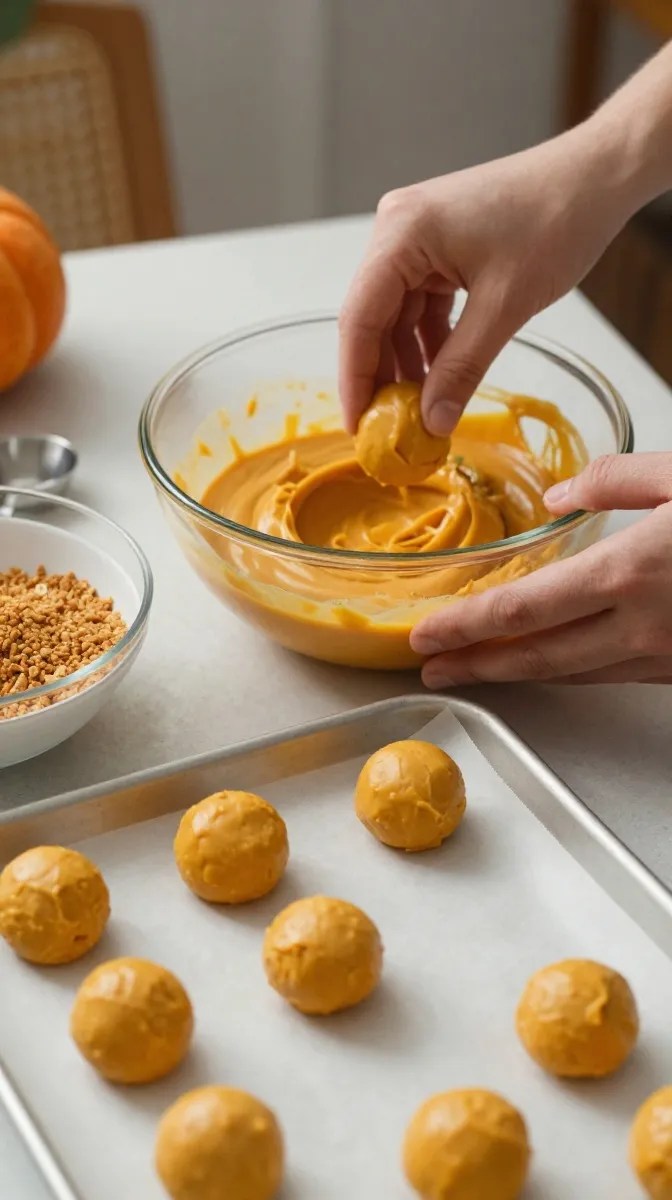
Use a small cookie scoop or tablespoon to portion out the mixture. Roll each portion gently between your palms until you have a smooth ball.
You don’t need perfectly identical balls. In fact, I think the slightly homemade look makes them more inviting.
Aim for roughly 1 tablespoon of mixture per ball.
If the mixture starts sticking badly to your hands, put it back in the refrigerator for another 10–15 minutes.
9. Coat Each Ball
Drop each cheesecake ball into the cinnamon-graham cracker mixture.
Roll it around until the outside has a light, even coating.
Place the finished ball on your parchment-lined tray.
Repeat until you’ve used all the filling.
If you want a more dramatic coating, roll each ball twice. For a lighter finish, one pass through the crumbs works beautifully.
10. Chill Before Serving — At Least 1 Hour
Refrigerate the finished pumpkin cheesecake balls for at least 1 hour before serving.
This final chill gives them a firmer texture and lets the flavors settle together.
I know it’s tempting to grab one immediately, but trust me on this part.
They taste better cold and firm.
Pro Tips & Tricks
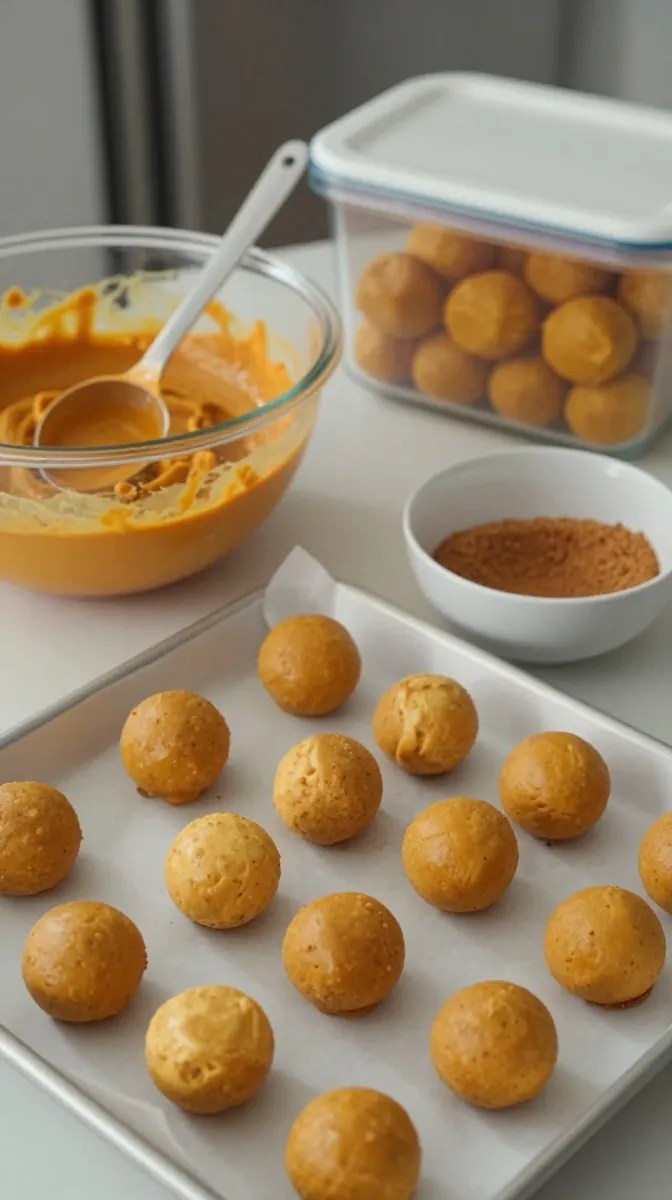
Don’t Skip the Chilling Time
This is probably the biggest difference between easy rolling and frustrating rolling.
The warmer the mixture gets, the softer it becomes. If you’re making these on a warm afternoon, you may need to chill the mixture longer than 30 minutes.
You can even work in two batches: keep half the mixture refrigerated while you roll the first half.
Don’t Add Too Much Pumpkin
Pumpkin adds wonderful flavor and color, but it also adds moisture.
Stick close to the 1/2-cup amount in this recipe. Adding extra pumpkin may leave you with a mixture that’s too soft to roll.
If you accidentally add a little too much, don’t immediately dump in a mountain of crumbs. Chill the mixture first, then adjust it gradually.
Use a Cookie Scoop
A small cookie scoop makes this job much faster.
It also helps you create evenly sized pieces, which matters when you’re serving these at a gathering. Nobody wants one person to get a tiny cheesecake ball while someone else gets a giant one.
Keep Your Hands Cool
This sounds overly particular until you’ve rolled ten sticky cheesecake balls.
If the mixture starts clinging to your palms, rinse your hands with cool water and dry them thoroughly before continuing.
You can also chill your hands for a moment by holding a cold glass or simply pop the mixture back into the refrigerator.
Store Them in a Covered Container
Keep the finished cheesecake balls refrigerated in an airtight container.
Place parchment or wax paper between layers if you stack them.
They should keep well in the refrigerator for about 4–5 days when properly covered.
For the best texture, avoid leaving them sitting at room temperature for long periods, since the cream cheese-based filling softens as it warms.
Variations & Substitutions
Make Them Gluten-Free
Use gluten-free graham-style crackers in place of regular graham crackers.
Check the packaging if you’re cooking for someone with a gluten allergy or celiac disease, since ingredients and manufacturing practices vary by brand.
The rest of the recipe stays essentially the same.
Try a Chocolate Pumpkin Version
For a richer variation, replace about 1/4 cup of the graham cracker crumbs in the filling with unsweetened cocoa powder.
You may need a small additional spoonful of powdered sugar depending on how chocolate-forward you want the flavor.
Coat the finished balls in chocolate cookie crumbs instead of graham crackers for a completely different look.
Add a Little Maple Flavor
Swap the vanilla extract for 1 teaspoon maple extract, or add a small amount alongside the vanilla.
Pumpkin, cinnamon, and maple make a particularly cozy combination.
I would keep the maple subtle. Too much can quickly overpower the cheesecake flavor.
Make Them Nutty
For a little crunch, mix 1/4 cup finely chopped pecans into the filling.
Chop them quite small so they don’t make the balls difficult to shape.
You can also mix a tablespoon or two of finely chopped pecans into the coating.
Serving Suggestions

These pumpkin cheesecake balls fit right into a fall dessert spread.
Arrange them on a platter with a few extra graham cracker crumbs scattered around the edges. A light dusting of cinnamon gives them a finished look without requiring complicated decoration.
They’re especially nice for:
- Thanksgiving dessert tables
- Halloween parties
- Fall potlucks
- Family movie nights
- School or community gatherings
- Weekend baking projects
- Holiday cookie exchanges
For a dessert tray, serve them alongside brownies, apple slices, cookies, or mini muffins.
You can also put a small bowl of whipped cream nearby for dipping, although honestly, these don’t need much help.
If you’re serving them at a party, keep the tray refrigerated until you’re ready to put it out. Since the filling contains cream cheese, don’t leave them sitting out for hours.
For an extra pretty presentation, place each ball in a small paper candy cup. It makes them easier for guests to pick up and keeps the coating from getting rubbed off.
Related Recipes:
- How to Make Pumpkin Cheesecake Without Cream Cheese
- Homemade Pecan Pie Bars for Thanksgiving
- Pumpkin Crisp Bars
- No-Bake Pumpkin Cheesecake Ball
- How to Make Caramel Apple Streusel Cheesecake
FAQ’s
Can I make pumpkin cheesecake balls ahead of time?
Absolutely. That’s one of the reasons I like this recipe for gatherings.
You can prepare the balls a day ahead, coat them, and keep them covered in the refrigerator until you’re ready to serve them.
In fact, the extra resting time gives the spices a chance to blend into the filling.
How long do pumpkin cheesecake balls last in the refrigerator?
Store them in an airtight container in the refrigerator for about 4–5 days.
For the freshest texture and flavor, I prefer eating them within the first few days.
Keep them chilled when you’re not serving them.
Can I freeze pumpkin cheesecake balls?
Yes, you can freeze them.
Arrange the finished balls in a single layer on a parchment-lined tray and freeze them until firm. Then transfer them to a freezer-safe airtight container.
For the best quality, use them within about 1 month.
Move them to the refrigerator to thaw. The coating may become slightly softer after thawing, so you can add a fresh sprinkle of graham cracker crumbs and cinnamon before serving.
Why is my cheesecake mixture too soft to roll?
The most common reasons are warm cream cheese, too much pumpkin, or a mixture that hasn’t chilled long enough.
First, refrigerate it for another 20–30 minutes.
If it’s still too soft after chilling, gradually mix in a tablespoon of finely crushed graham crackers at a time until the mixture becomes scoopable.
Avoid adding lots of crumbs at once because you can quickly go from too soft to too dry.
Can I use pumpkin pie filling instead of pumpkin puree?
I don’t recommend it.
Pumpkin pie filling usually contains added sugar and spices, while plain pumpkin puree gives you control over the flavor and sweetness.
For this recipe, reach for a can labeled 100% pumpkin or plain pumpkin puree.
Can I make these without a mixer?
Definitely.
A sturdy silicone spatula or wooden spoon works well once the cream cheese has softened properly.
The mixture may take a little more elbow grease, but you don’t need special equipment.
For the smoothest texture, make sure you soften the cream cheese before mixing.
Final Thought
There’s something wonderfully low-pressure about making these easy no-bake pumpkin cheesecake balls for fall.
You don’t have to worry about a cheesecake cracking in the middle. You don’t need to watch a timer anxiously or wonder whether the center has baked enough. You mix, chill, roll, coat, and chill again.
And somehow, those little pumpkin-spiced bites still give you that familiar cheesecake feeling.
The first time you make them, don’t worry if your balls aren’t perfectly round or your coating isn’t completely even. Mine certainly weren’t. After a few batches, I found that working with colder mixture and using a small cookie scoop made the process much easier.
If you’re craving something creamy, pumpkin-spiced, and genuinely simple this fall, put these on your weekend dessert list. Make a batch, tuck them into the refrigerator, and try to save a few for everyone else.
I won’t tell if you sneak the first one from the tray.
Leave a Reply
You must be logged in to post a comment.