


Every Halloween, I used to think the desserts had to be made right before guests arrived. Big mistake. After a few years of frosting cupcakes with one hand while answering the door with the other, I finally started making my Halloween desserts ahead of time.
That little change made my Halloween parties so much more enjoyable.
Now I like choosing desserts that hold their shape, taste even better after a little resting time, and don’t leave me standing in the kitchen when everyone else is having fun. Brownie bites, chocolate-covered treats, pudding cups, cupcakes, cookies, and no-bake desserts all work beautifully.
The best part? You don’t need complicated decorating skills. A few candy eyes, melted chocolate, Halloween sprinkles, and orange-and-black decorations can turn simple desserts into something spooky.
These Halloween dessert ideas you can make ahead are perfect when you want the party table to look festive without spending Halloween afternoon covered in flour and frosting.
Why You’ll Love These Make-Ahead Halloween Desserts

- Less last-minute stress: Prepare most of the desserts a day or two before the party.
- Simple ingredients: Many use pantry staples, chocolate, cookies, candy, and easy frosting.
- Fun for kids: Candy eyes and colorful sprinkles make decorating feel like a Halloween activity.
- Budget-friendly: You can create impressive-looking treats without buying expensive specialty decorations.
- Perfect for parties: Most options are easy to portion, arrange, and serve to a crowd.
Ingredients for a Make-Ahead Halloween Dessert Spread

Because this is a collection of Halloween dessert ideas you can make ahead, you can mix and match several treats instead of making one huge dessert.
For Chocolate Brownie Bites
- 1 cup all-purpose flour
- 1 cup granulated sugar
- ½ cup unsalted butter, melted
- ½ cup unsweetened cocoa powder
- 2 large eggs
- 1 teaspoon vanilla extract
- ¼ teaspoon salt
- ½ cup semi-sweet chocolate chips
- ½ cup Halloween sprinkles
- Candy eyes, for decorating
For Halloween Sugar Cookies
- 2 ¾ cups all-purpose flour
- 1 cup unsalted butter, softened
- ¾ cup granulated sugar
- 1 large egg
- 1 teaspoon vanilla extract
- ½ teaspoon baking powder
- ¼ teaspoon salt
- Orange, black, and purple icing
- Halloween sprinkles or candy eyes
For Chocolate-Dipped Pretzel Treats
- 3 cups mini pretzel twists
- 8 ounces semi-sweet chocolate
- 4 ounces white chocolate
- ½ cup Halloween sprinkles
- Candy eyes, optional
For Easy Halloween Pudding Cups
- 1 package instant chocolate pudding mix
- 3 cups cold milk
- 1 cup whipped topping
- 12 chocolate sandwich cookies
- Candy eyes
- Halloween sprinkles
- Gummy worms, optional
Helpful Ingredient Swaps
Don’t worry if you don’t have every ingredient listed.
You can use dark chocolate instead of semi-sweet chocolate for a deeper flavor. White chocolate works nicely for mummy-style decorations, while milk chocolate gives the treats a sweeter, softer taste.
For the cookies, you can use your favorite homemade icing or a good-quality prepared frosting when you’re short on time.
And if you’re making these desserts for children, let them choose the candy decorations. They usually come up with combinations I never would have thought of.
Step-by-Step Instructions
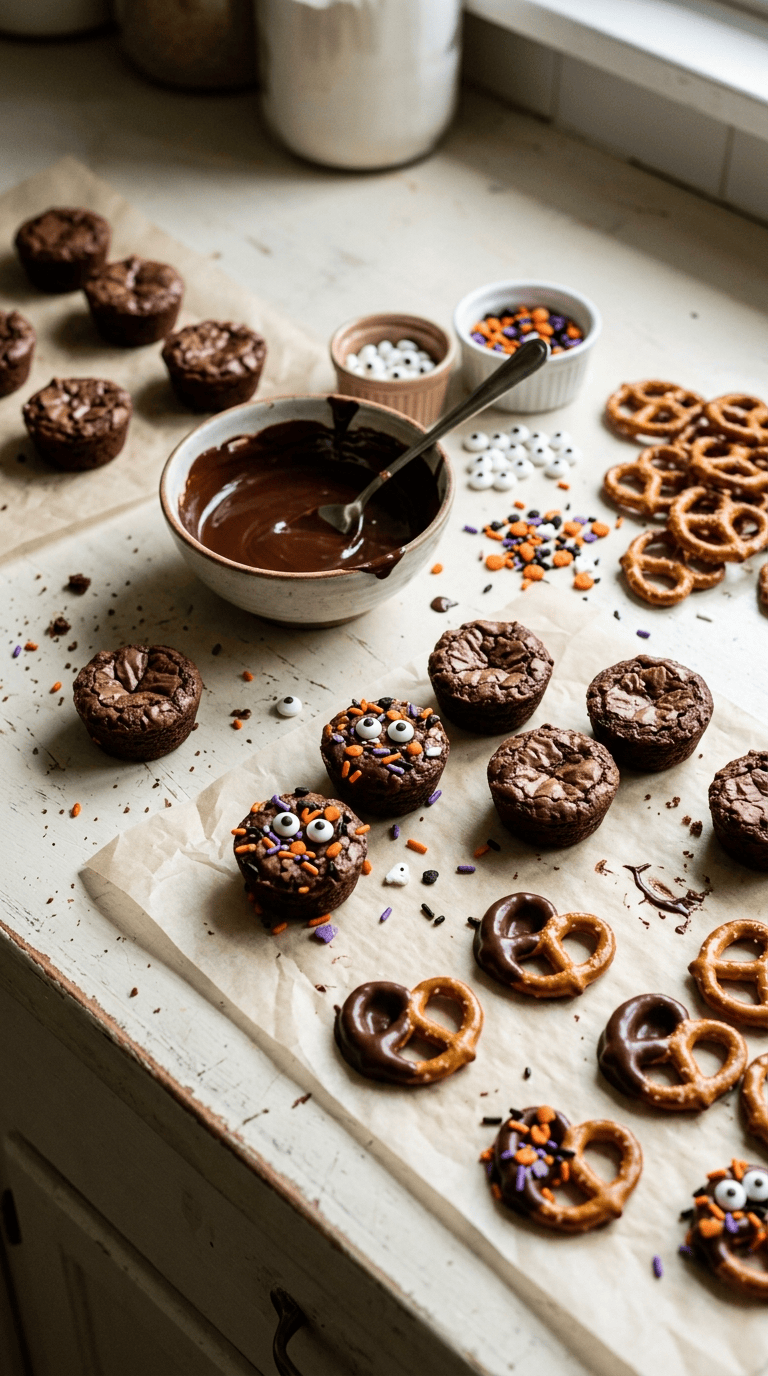
The beauty of make-ahead Halloween desserts comes from choosing treats that don’t require complicated timing.
I usually divide the work over two days. I bake the sturdy desserts first, then decorate and assemble everything closer to the party.
1. Bake the Brownie Bites
Preheat your oven to 350°F (175°C).
Line a mini muffin pan with paper liners or lightly grease the wells.
Whisk the melted butter and sugar together for about 1 minute. Add the eggs and vanilla and whisk until the mixture looks smooth.
Add the flour, cocoa powder, and salt. Stir just until you no longer see dry flour.
Fold in the chocolate chips.
Spoon the batter into the prepared mini muffin pan, filling each cup about two-thirds full.
Bake for 10–13 minutes.
Don’t overbake them. The centers should look set but still feel slightly soft when gently pressed.
Let the brownie bites cool completely before decorating.
2. Add the Halloween Decorations
Once the brownies have cooled, dip the tops lightly in melted chocolate or spread them with a thin layer of frosting.
Add candy eyes, sprinkles, or small chocolate pieces.
For a quick monster look, use two candy eyes and a few colorful sprinkles. You don’t need perfect decorating skills. In fact, slightly messy monsters look more fun.
Store the finished brownie bites in an airtight container.
3. Prepare the Sugar Cookies
Cream the softened butter and sugar until light and fluffy, about 2–3 minutes.
Beat in the egg and vanilla.
In another bowl, whisk together the flour, baking powder, and salt.
Gradually add the dry ingredients to the butter mixture. Mix until a soft dough forms.
Wrap the dough and chill it for at least 30 minutes.
Roll the dough on a lightly floured surface until it’s about ¼-inch thick.
Cut the dough into pumpkins, ghosts, bats, cats, or any Halloween shapes you have.
Place the cookies on a lined baking sheet.
Bake at 350°F (175°C) for 8–11 minutes, depending on their size.
The edges should look lightly golden while the centers remain pale.
Cool completely before decorating.
4. Decorate the Halloween Cookies
Pipe orange icing onto pumpkin cookies, white icing onto ghosts, and black icing onto bats.
Don’t worry about making every cookie identical.
I actually prefer giving each cookie a slightly different face. One ghost can look surprised, another can look grumpy, and another can look completely confused.
Let the icing dry completely before stacking the cookies.
5. Make the Chocolate-Dipped Pretzels
Melt the semi-sweet chocolate in a microwave-safe bowl in 20-second intervals, stirring between each interval.
Stop heating once the chocolate becomes smooth.
Dip each pretzel halfway into the melted chocolate.
Place the dipped pretzels on parchment paper.
Before the chocolate sets, add Halloween sprinkles.
For mummy pretzels, let the chocolate set first, then drizzle melted white chocolate back and forth across the pretzel.
Add two tiny candy eyes.
Let everything sit until completely firm, about 20–30 minutes.
6. Make the Halloween Pudding Cups
Whisk the chocolate pudding mix with cold milk according to the package directions.
Let it thicken for about 5 minutes.
Crush the chocolate sandwich cookies into fine crumbs.
Spoon some cookie crumbs into the bottom of small clear cups. Add chocolate pudding, then another layer of cookie crumbs.
Top each cup with whipped topping.
Add candy eyes, sprinkles, or gummy worms.
Cover the cups and refrigerate them for at least 2 hours before serving.
7. Arrange Everything Before the Party
This is the part that saves me every single time.
A few hours before guests arrive, place the desserts into serving trays, cupcake liners, small bowls, or dessert cups.
Keep cookies and brownies at room temperature if their decorations allow it.
Keep pudding cups refrigerated until you’re ready to serve them.
Then all you have to do is bring everything out.
No emergency baking required.
Pro Tips & Tricks
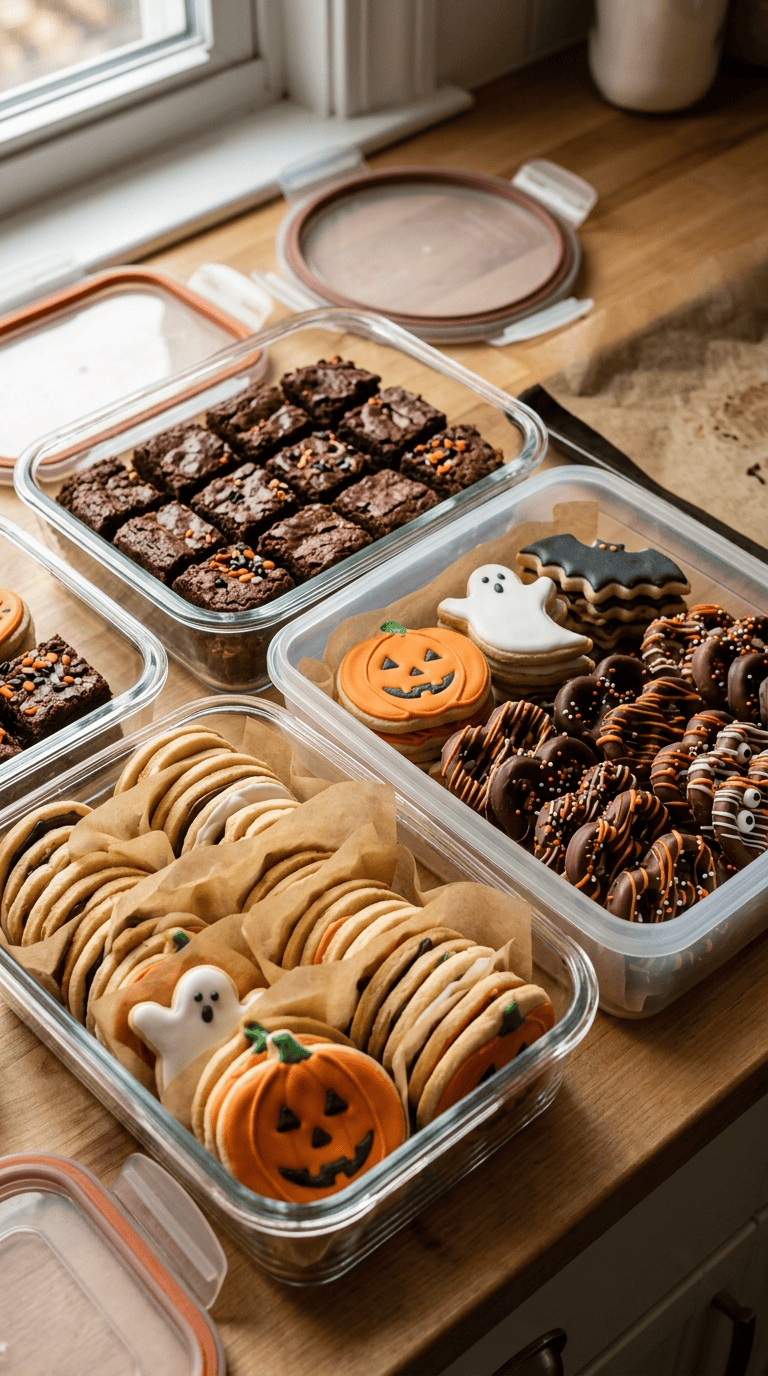
Make the Sturdy Desserts First
Cookies, brownies, and chocolate-dipped pretzels usually give you the most flexibility.
You can prepare them ahead and store them properly without worrying about texture changing too quickly.
Don’t Decorate Warm Desserts
This is one mistake I made more than once.
Warm brownies can make frosting slide right off, and warm cookies can cause icing to spread.
Let baked goods cool completely before decorating.
Use Airtight Containers
Air is the enemy of crisp cookies and soft brownies.
Keep cookies in an airtight container with parchment between layers. Store brownies in another sealed container.
Don’t pile decorated treats together until the icing or chocolate has completely hardened.
Keep Moist Desserts Refrigerated
Pudding cups, whipped-cream desserts, cheesecake-style treats, and other dairy-based desserts belong in the refrigerator.
Cover them well so they don’t absorb refrigerator odors.
Make Decorations Ahead
You can also prepare candy eyes, sprinkles, chocolate drizzle, and icing bags ahead of time.
I like putting everything into small containers so decorating becomes almost assembly-line easy.
Don’t Overcomplicate the Table
You don’t need ten different desserts.
Pick three or four textures: something chewy, something crunchy, something creamy, and something chocolatey.
That gives the dessert table plenty of variety without creating a mountain of leftovers.
Variations & Substitutions
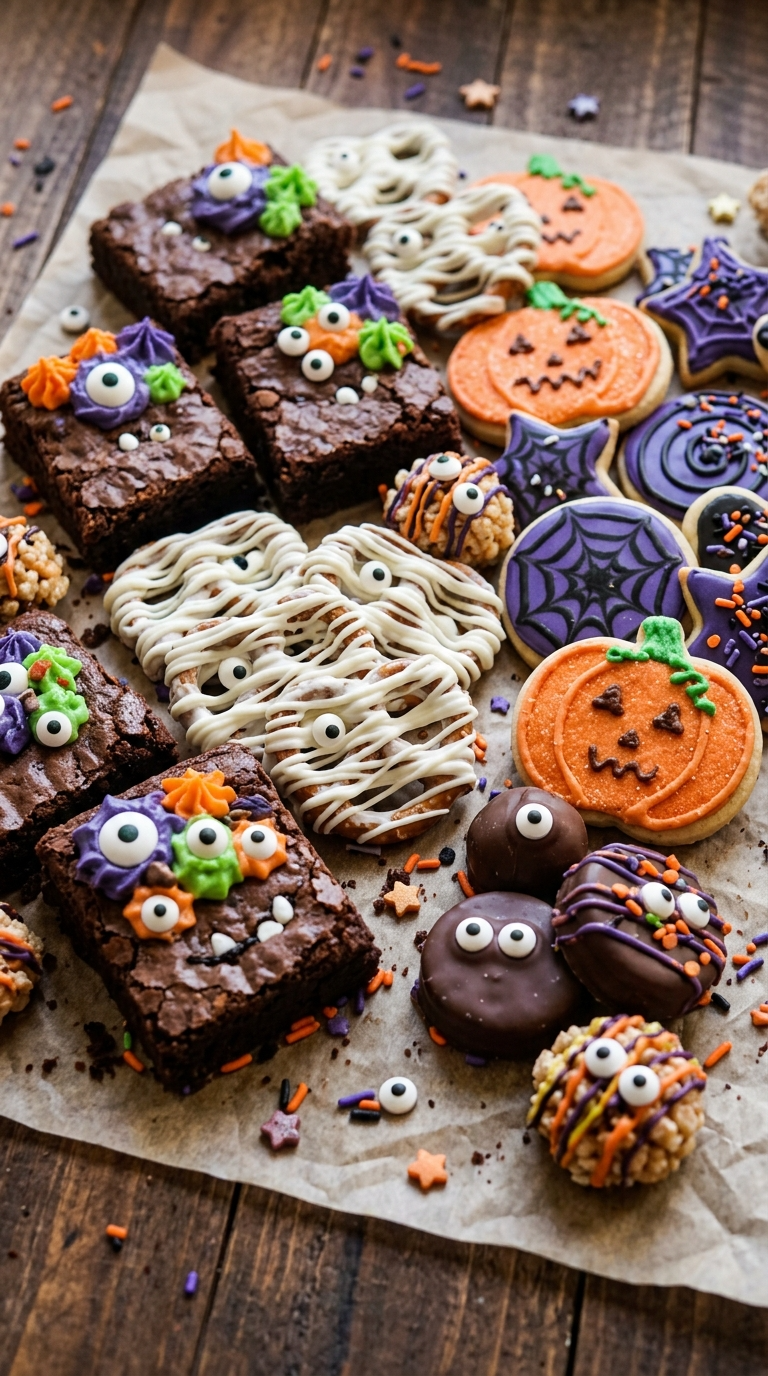
Make a No-Bake Halloween Dessert Table
If you don’t want to turn on the oven, skip the cookies and brownies.
Make chocolate-dipped pretzels, pudding cups, Oreo-style truffle balls, chocolate-covered strawberries, and marshmallow treats instead.
Most of these can go straight into the refrigerator to set.
Make Them Gluten-Free
Use a certified gluten-free all-purpose flour blend for the cookies and brownies.
For pretzels and sandwich cookies, choose gluten-free versions and check the packaging of your other ingredients.
Make a Vegan-Friendly Version
Use plant-based butter and an egg substitute in suitable baked desserts.
Choose dairy-free chocolate and plant-based whipped topping where needed.
For pudding cups, use a dairy-free instant pudding if the package instructions allow it, then prepare it with your preferred plant-based milk.
Create Different Monster Themes
You can turn almost any dessert into a Halloween character.
Use white chocolate for mummies, green frosting for monsters, orange frosting for pumpkins, and black icing for spiders or bats.
Candy eyes do most of the heavy lifting.
Serving Suggestions

I love serving these desserts on a large black tray because the orange, white, purple, and green decorations really stand out.
For a kids’ Halloween party, arrange the desserts at different heights. Use cake stands, small bowls, and wooden boards to keep the table from looking flat.
For an adult Halloween gathering, I would keep the decorations slightly more elegant. Think dark chocolate, black sprinkles, orange sugar, and simple ghost or pumpkin details.
You can also place small dessert labels beside each treat. Something as simple as “Monster Brownies”, “Witch’s Pudding Cups”, or “Mummy Pretzels” instantly makes the table feel more festive.
If you’re hosting a Halloween movie night, make individual dessert boxes with two cookies, a brownie bite, and a few chocolate pretzels.
That way nobody has to keep getting up during the movie.
Related Recipes :
Halloween Treats That Look Like Monsters and Ghosts
Mummy Pizza Toast Spooky Halloween Food Idea for Kids
Easy Buttercream Cream Cheese Frosting Recipe
FAQ’s
How far ahead can I make Halloween desserts?
Most cookies, brownies, and chocolate-covered treats work well 1–3 days ahead when you store them properly.
Creamy desserts usually taste best when prepared closer to serving time, although pudding cups can often be prepared a day ahead.
Can I freeze Halloween cookies?
Yes. Plain baked sugar cookies freeze very well.
Cool them completely, place parchment between layers, and store them in a freezer-safe airtight container.
For the best decorating results, thaw them completely before adding icing.
Can I make brownies ahead of time?
Absolutely.
Brownies often taste even better the next day because the texture becomes fudgier as they rest.
Keep them tightly covered at room temperature unless your particular topping requires refrigeration.
How do I stop Halloween cookies from becoming soft?
Keep them in an airtight container and make sure the icing has fully dried before stacking them.
Don’t store crisp cookies beside very moist desserts because moisture can transfer between them.
Can I prepare Halloween pudding cups the night before?
Yes.
Cover the cups and refrigerate them overnight.
I prefer adding delicate toppings such as whipped cream or certain crunchy decorations closer to serving time so they stay fresh-looking.
What’s the easiest Halloween dessert to make ahead?
Chocolate-dipped pretzels are one of my favorites because they require very little work.
Brownie bites and sugar cookies also make excellent make-ahead choices because you can bake them early and decorate them later.
Final Thoughts
Halloween doesn’t have to mean spending the entire day in the kitchen.
I’ve learned that the smartest dessert table is the one where most of the work happens before the party starts. When guests arrive, I want to enjoy the costumes, laugh at the terrible Halloween jokes, and actually eat one of the desserts I worked so hard to make.
These Halloween dessert ideas you can make ahead give you plenty of room to do exactly that.
Pick a few favorites, prepare them early, and have fun with the decorations. Don’t worry if your ghosts look a little crooked or your monsters have mismatched eyes. That’s part of the charm.
And honestly, those slightly wonky Halloween treats are usually the first ones to disappear.
Leave a Reply
You must be logged in to post a comment.