


Every Halloween, I tell myself I’m going to keep the food simple. Then I see candy eyes at the store, and somehow I’m standing in my kitchen turning perfectly innocent snacks into tiny monsters.
That’s exactly how these Halloween treats that look like monsters and ghosts became a favorite in my house.
The first time I made them, I expected the kids to enjoy the candy. Instead, they spent more time naming every little monster. One had three eyes, another had a crooked smile, and one ghost looked suspiciously like it had eaten too much chocolate.
That’s the fun of these treats. They don’t need to look perfect.
In fact, a little melted chocolate in the wrong place can make a monster look even better. I’ve made these for Halloween parties, school gatherings, movie nights, and those October afternoons when everyone suddenly wants “something spooky.”
You can make a whole tray without complicated decorating skills. Grab some cookies, marshmallows, pretzels, chocolate, fruit, and candy eyes, and let the kitchen get delightfully messy.
Why You’ll Love These Halloween Treats

- They look impressive without fancy decorating skills. Candy eyes do most of the work.
- Kids can help decorate. Give them a bowl of toppings and let them create their own monsters.
- You can mix and match treats. Make ghosts, monsters, mummies, and little creepy creatures on the same tray.
- They work for parties or family nights. You can make a small batch or fill a large dessert table.
- Most ingredients are easy to find. You don’t need specialty Halloween baking supplies.
The best part? Nobody expects perfect decorating. Halloween practically encourages crooked faces and goofy expressions.
Ingredients
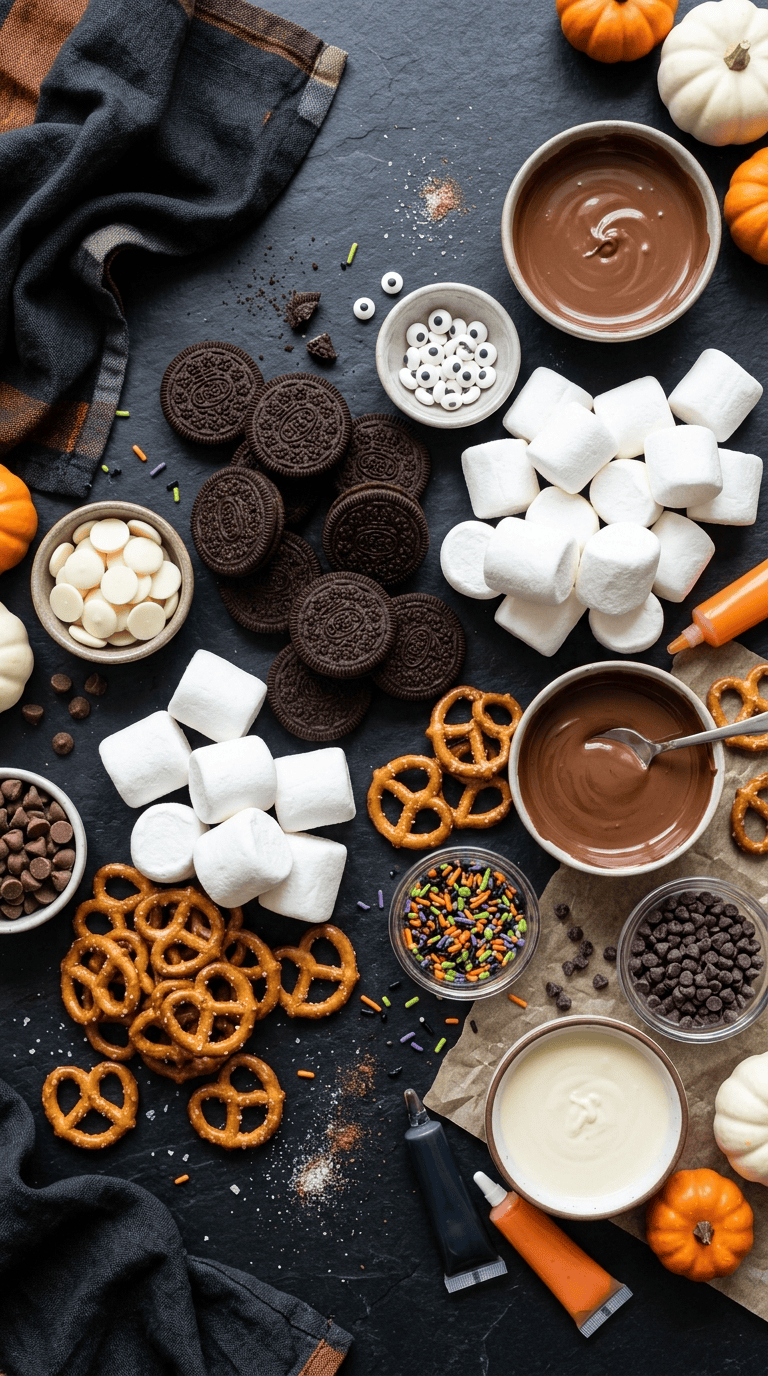
This recipe makes approximately 24 decorated Halloween treats, depending on how many of each type you prepare.
For the Cookie Monsters
- 12 chocolate sandwich cookies
- 1 cup white candy melts
- 1/2 cup dark chocolate chips
- 24–30 candy eyes
- 12 small pretzel twists
- 2 tablespoons orange or green sprinkles
You can use chocolate chip cookies, shortbread cookies, or any sturdy round cookie instead of sandwich cookies.
For the Marshmallow Ghosts
- 12 large marshmallows
- 1 cup white candy melts
- 24 mini chocolate chips
- 12 lollipop sticks or wooden skewers
If you don’t have sticks, simply place the ghosts directly on parchment paper.
For Monster Pretzel Bites
- 24 small pretzel twists
- 1/2 cup milk or dark chocolate chips
- 1/3 cup candy eyes
- 2 tablespoons colored sprinkles
I like pretzel twists because their little openings make the finished monsters look extra goofy.
Optional Decorations
- Mini M&M-style candies
- Orange, purple, black, or green sprinkles
- Mini marshmallows
- Chocolate cookie crumbs
- Red or green decorating gel
- Melted white chocolate
- Melted milk chocolate
You don’t need every decoration on this list. Use whatever you already have in the cupboard.
Step-by-Step Instructions
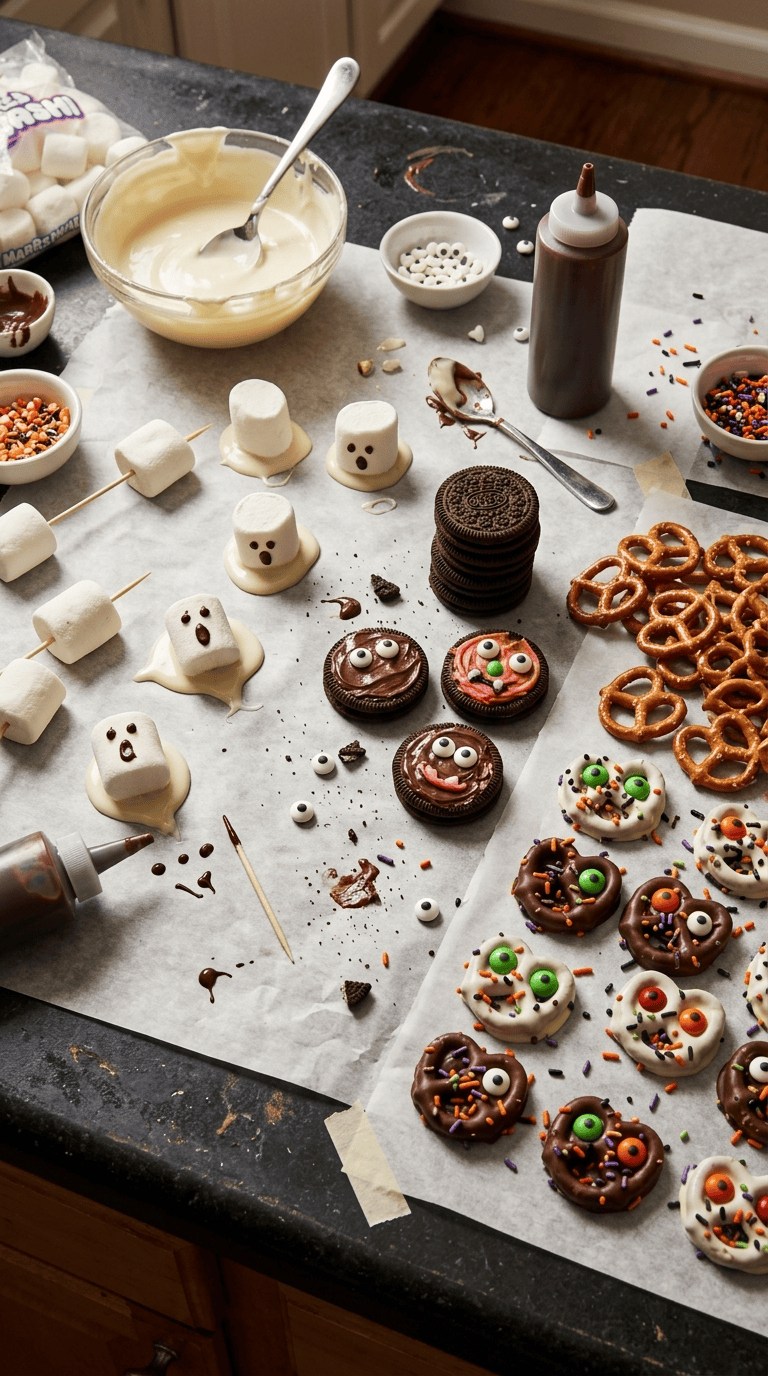
1. Set Up Your Decorating Station
Before melting anything, line two large baking sheets with parchment paper.
Place your candy eyes, sprinkles, pretzels, chocolate chips, and other decorations into small bowls.
This little bit of preparation makes a huge difference.
I learned this after melting chocolate and then realizing I had to open three cupboards looking for the candy eyes. By the time I found them, my chocolate had started setting.
For the cleanest process, prepare everything first and decorate second.
Time: 5 minutes
2. Melt the White Candy Coating
Place the white candy melts in a microwave-safe bowl.
Microwave them in 20-second intervals, stirring well after each interval. Continue until the coating becomes smooth.
Don’t blast the chocolate for a full minute and hope for the best. Candy melts can overheat quickly.
If the coating feels too thick, stir in a small amount of vegetable shortening, about 1/2 teaspoon at a time, until it becomes easier to spread.
Time: 2–3 minutes
3. Make the Ghosts
Insert a lollipop stick into the bottom of each marshmallow if you want handheld ghosts.
Dip each marshmallow into the melted white coating. Let the excess drip back into the bowl.
Place the coated marshmallow onto parchment paper.
While the coating is still soft, add two mini chocolate chips for eyes.
For a more expressive ghost, add a third chocolate chip lower down for a surprised mouth.
Let the coating set for about 15 minutes.
Don’t worry if the coating drips slightly around the bottom. Those little drips can actually make the ghosts look more ghostly.
4. Decorate the Cookie Monsters
Dip the chocolate sandwich cookies into the melted white coating or spread the coating over the top with a small spoon.
Immediately add candy eyes.
Use one eye, two eyes, three eyes, or even five eyes.
There are no rules here.
Press small pretzel pieces into the coating to create monster horns or ears.
Before the coating sets, sprinkle a little orange, green, or purple decoration over the top.
Place the cookies on parchment paper and allow them to firm up.
Setting time: 15–20 minutes
5. Create Pretzel Monsters
Melt the milk or dark chocolate chips in another microwave-safe bowl.
Use 20-second intervals and stir between each round.
Dip each pretzel twist halfway into the chocolate.
Place it on parchment paper.
While the chocolate remains wet, add candy eyes.
You can also attach tiny candies as noses or mouths.
For a really silly monster, place the eyes at different heights. A crooked face usually gets more laughs than a perfectly symmetrical one.
Allow the chocolate to set for approximately 15 minutes.
6. Add the Final Details
Once all the chocolate has hardened, take a look at your monsters.
This is where I usually add the ridiculous details.
Use decorating gel for tiny mouths, eyebrows, scars, or silly expressions.
Add sprinkles to any plain-looking treats.
If one monster has only one eye, give another one three. If one ghost looks too serious, give it a giant chocolate mouth.
The goal isn’t bakery-perfect decoration.
The goal is personality.
Time: 5–10 minutes
7. Arrange Everything on a Halloween Tray
Choose a large serving board or tray.
Place the ghosts around the edges and fill the center with monster cookies and pretzel bites.
Scatter a few extra candy eyes around the tray for a fun Halloween effect.
You can also add wrapped Halloween candies between the treats.
If you want the tray to look more dramatic, use black parchment paper or a dark serving board underneath the treats.
Pro Tips & Tricks
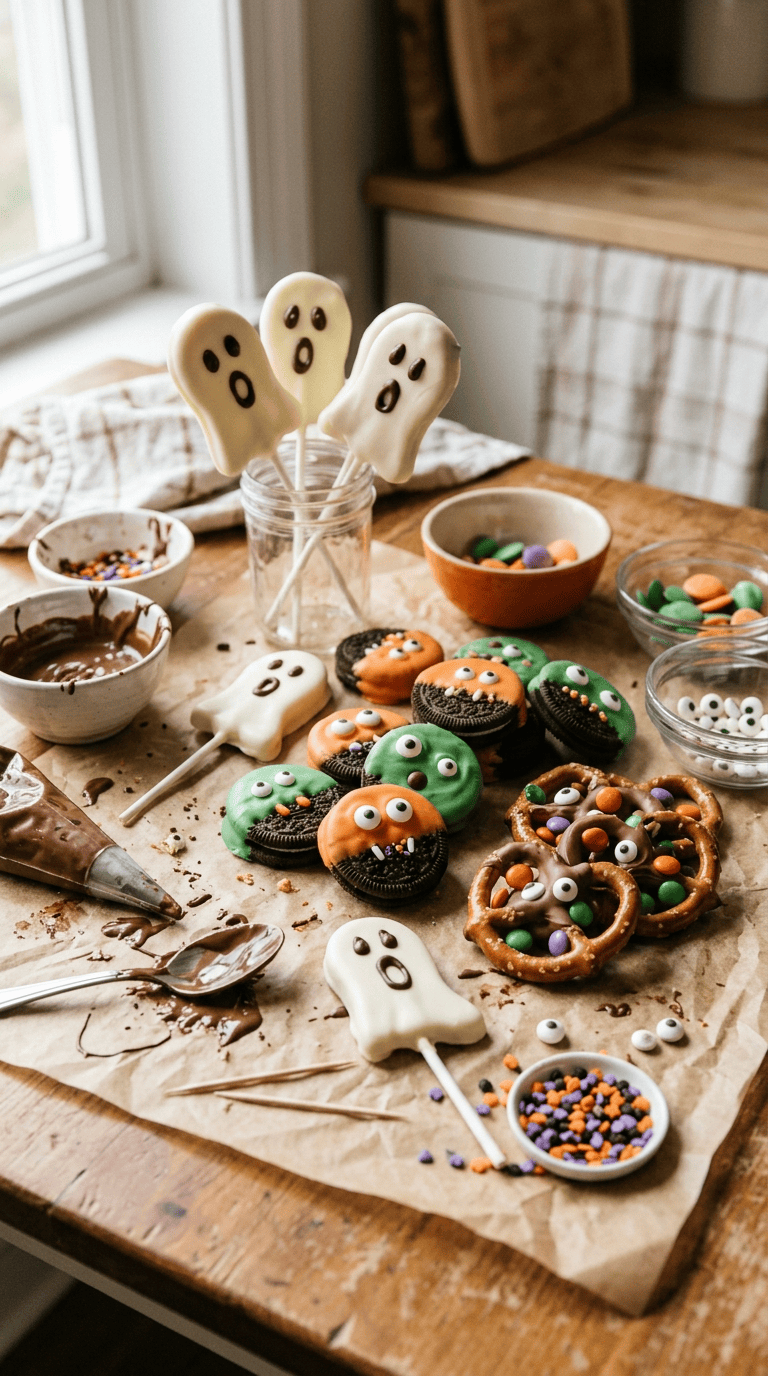
Let the Chocolate Cool Slightly Before Decorating
Hot candy coating can make candy eyes slide right off.
Let the melted coating sit for a minute or two before decorating. It should remain soft but shouldn’t feel extremely hot.
Use Parchment Paper
This sounds boring, but trust me, it saves a lot of frustration.
Once the chocolate sets, the treats usually lift away easily.
Without parchment, you may end up scraping chocolate from the baking sheet.
I’ve made that mistake more than once.
Keep Your Candy Eyes Nearby
Set all your decorations within arm’s reach before you start dipping.
You need to work while the chocolate is still wet.
If you wait too long, the eyes won’t stick.
Don’t Overload the Treats
It’s tempting to cover everything with sprinkles, candy, and chocolate.
Try to stop before the treats become too heavy.
A simple cookie with two giant eyes can look much more impressive than one covered with every decoration in the kitchen.
Make Them the Day Before
You can prepare these treats one day ahead.
Once they fully set, store them in an airtight container at cool room temperature.
If your kitchen feels warm, place the container in the refrigerator, but bring the treats back toward room temperature before serving.
Let Kids Decorate
If you’re making these with children, skip the dipping part for younger kids and let them handle the decorating once the treats cool enough.
Give each child a small plate with candy eyes, sprinkles, pretzels, and candies.
You may end up with some very questionable-looking monsters.
That’s completely fine.
Variations & Substitutions
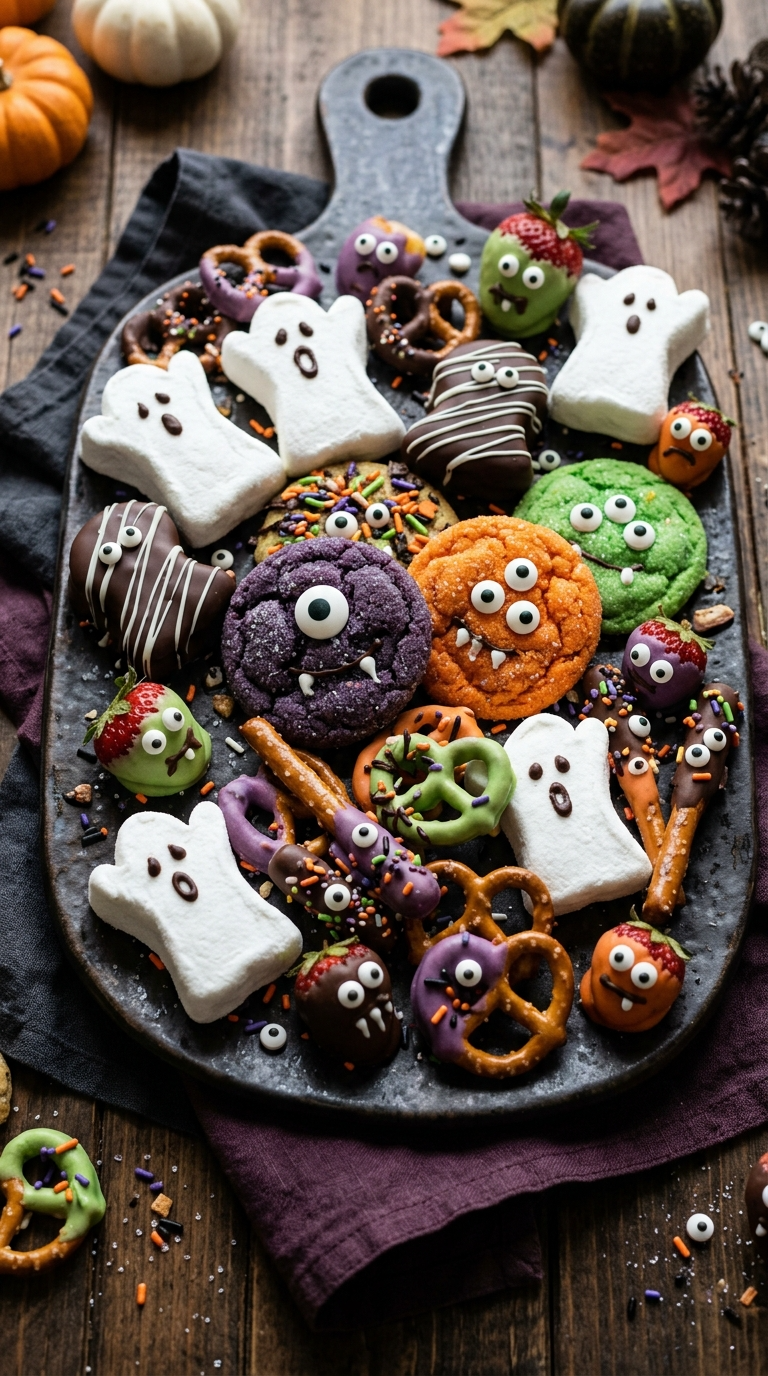
Make Chocolate Ghosts
For a darker Halloween look, dip the marshmallows in melted milk or dark chocolate first.
Once the chocolate sets, drizzle a little white chocolate over the top and add candy eyes.
The result looks more like a spooky little chocolate creature than a traditional ghost.
Make Monster Rice Cereal Treats
Cut homemade or store-bought crispy rice treats into rectangles.
Dip one end into melted chocolate and decorate with candy eyes and sprinkles.
You can create tall monsters, tiny monsters, or even mummy-style treats with thin white chocolate drizzles.
Make Fruity Halloween Monsters
For a lighter snack option, use strawberries, banana slices, apple pieces, or grapes.
Dip only part of the fruit in melted chocolate, then add candy eyes while the chocolate remains soft.
For bananas, serve them shortly after decorating for the best texture.
Dairy-Free Option
Check the labels on your chocolate, candy melts, candy eyes, and other decorations.
Some brands contain milk ingredients while others offer dairy-free alternatives.
Use products that match your dietary needs rather than assuming every candy coating works the same way.
Gluten-Free Option
Choose certified gluten-free cookies and pretzels if you need the finished treats to fit a gluten-free diet.
Also check the labels on your decorations because ingredients and manufacturing practices can vary by brand.
Serving Suggestions

These Halloween treats work especially well on a big party platter.
I like serving them alongside popcorn, fruit, and small bowls of Halloween candy. The different shapes and textures make the table feel festive without requiring a complicated dessert spread.
For a children’s Halloween party, make smaller portions and put each treat into a Halloween cupcake liner.
That keeps sticky chocolate fingers away from the serving platter.
You can also turn the treats into a Halloween movie-night snack board.
Add popcorn, pretzels, chocolate-covered treats, fruit, and these little monsters. Put everything on one large board and let everyone grab what they want.
For school parties, check the school’s allergy and food-sharing rules before bringing homemade treats.
And if you’re making these for trick-or-treat night, prepare them earlier in the day. Nobody wants to be decorating marshmallow ghosts at the exact moment the doorbell starts ringing every thirty seconds.
FAQ’s
How long do Halloween monster and ghost treats last?
Most chocolate-covered treats taste best within 2–3 days when stored properly.
Keep them in an airtight container away from heat and direct sunlight.
Can I make these Halloween treats ahead of time?
Yes.
You can prepare them one day ahead and store them in an airtight container.
For a party, I actually prefer making them the night before so I’m not trying to decorate everything while guests are arriving.
Can I freeze decorated Halloween treats?
You can freeze some chocolate-covered treats, but I don’t usually recommend freezing decorated marshmallow ghosts.
Freezing can affect the texture of marshmallows and may cause condensation when the treats thaw.
If you need to prepare ahead, make them fresh one day before serving instead.
Why are my candy eyes falling off?
The chocolate coating probably started setting before you added the eyes.
Work in small batches and decorate immediately after dipping.
If the coating has already hardened, add a tiny dot of melted chocolate to the back of each candy eye and attach it again.
Can I use regular chocolate instead of candy melts?
Absolutely.
Melted chocolate works beautifully for monster cookies and pretzels.
White chocolate works for ghosts, although it can be a little more sensitive to heat than candy melts. Melt it slowly and stir often.
What can I use if I don’t have candy eyes?
Use tiny chocolate chips, small pieces of marshmallow, decorating gel, or little dots of melted chocolate.
You can even make silly faces with sprinkles.
The treats don’t need candy eyes to look spooky.
Final Thoughts
I’ve made plenty of Halloween desserts over the years, and the funny thing is that the slightly messy ones often disappear first.
These Halloween treats that look like monsters and ghosts prove that you don’t need professional decorating skills to make something memorable.
Give the monsters crooked eyes. Make one ghost ridiculously wide-eyed. Let the kids create a creature that makes absolutely no sense.
That’s half the fun.
Put on some Halloween music, cover the counter with parchment paper, and let everyone decorate a few. You might make a mess, but you’ll also end up with a tray full of treats that people actually want to talk about.
And if one monster ends up looking suspiciously like your family pet, just go with it.
Happy Halloween baking!
Leave a Reply
You must be logged in to post a comment.