

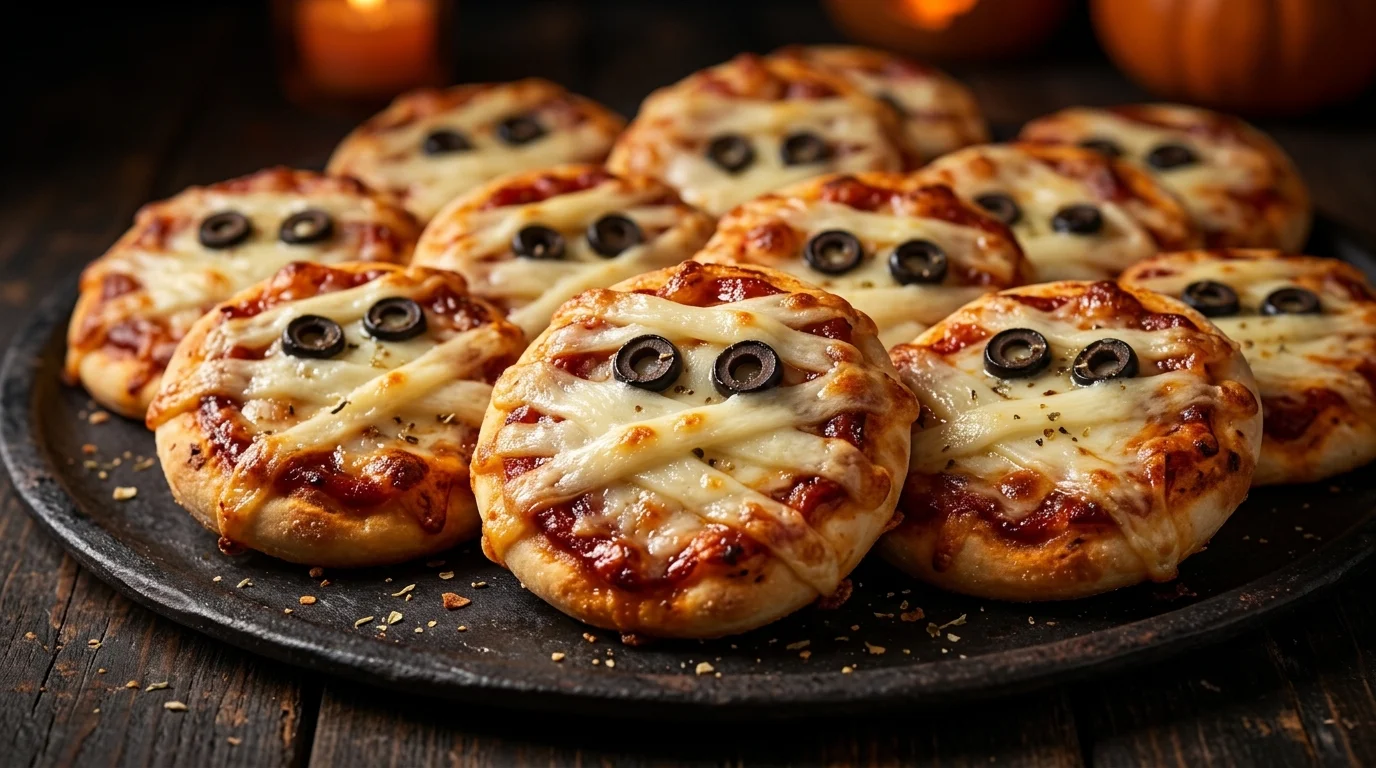
The first time I made these for a Halloween party, I honestly expected them to look much better than they did.
I had grand plans. I wanted a tray of perfectly spooky little bites that looked like they belonged in a fancy Halloween magazine. Instead, my first batch came out a little uneven, a few of the decorations wandered off during baking, and one batch got slightly darker around the edges than I intended.
And you know what? Nobody cared.
The plate disappeared before I even had a chance to refill it.
That experience taught me something I now keep in mind whenever I make Halloween food: party snacks don’t need to look perfect. They need to be delicious, easy to grab, and fun enough to make people smile.
These Halloween Mummy Pizza Bites check all three boxes.
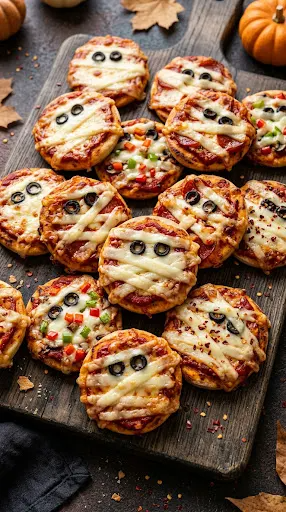
They’re little rounds of pizza dough topped with tomato sauce, melted mozzarella, and strips of cheese arranged to look like mummy bandages. A couple of olive pieces make simple eyes, and suddenly an ordinary pizza bite turns into something wonderfully spooky.
I’ve made these several times since that first Halloween experiment, and I’ve learned a few tricks along the way. The biggest one? Don’t overload the toppings. A little sauce, plenty of cheese, and thin strips of mozzarella give you the best balance between flavor and appearance.
They’re also forgiving, which makes them ideal if you’re cooking with kids or trying to prepare a whole Halloween spread at once.
Put them on a big platter, add a bowl of your favorite dipping sauce, and watch them vanish.
Why You’ll Love This Halloween Food Recipe

- Easy enough for beginners. You don’t need fancy decorating skills or complicated equipment.
- Party-friendly. Each mummy pizza bite fits neatly in one hand, so guests can grab one while chatting.
- Great for kids. Let them arrange the cheese “bandages” and add the little olive eyes.
- Budget-friendly. You only need a handful of everyday ingredients.
- Easy to customize. Add pepperoni, vegetables, extra cheese, or a little spice depending on your crowd.
Most importantly, you can prepare a lot of the components ahead of time. That’s a lifesaver when you’re also trying to decorate the house, answer the door, and remember where you put the Halloween candy.
Ingredients
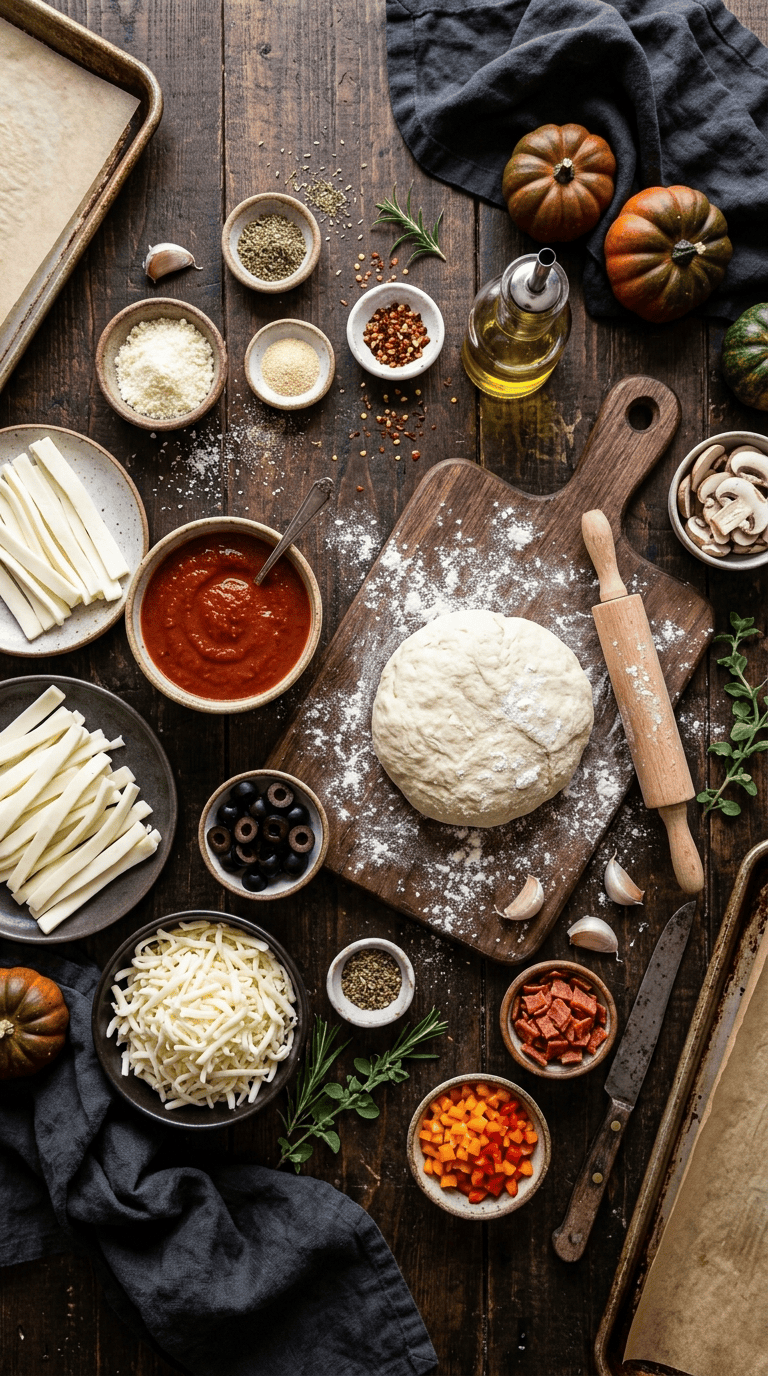
This recipe makes about 18–20 mummy pizza bites, depending on the size of your dough rounds.
For the pizza bites
- 1 pound (450 g) refrigerated or homemade pizza dough
- 1/2 cup (120 g) pizza sauce or marinara sauce
- 1 1/2 cups (170 g) low-moisture shredded mozzarella cheese
- 2 tablespoons grated Parmesan cheese
- 2 tablespoons olive oil
- 1/2 teaspoon dried Italian seasoning
- 1/4 teaspoon garlic powder
- 1/4 teaspoon salt
For the mummy decorations
- 4–5 slices mozzarella cheese
- 8–10 black olives, pitted
- 1 tablespoon finely grated Parmesan, optional
You can use pre-shredded mozzarella if that’s what you have. I usually prefer freshly shredded low-moisture mozzarella because it melts smoothly without making the pizza bites too wet.
For the olives, black olives work particularly well because they create strong little eyes against the pale cheese. If your guests don’t like olives, tiny pieces of bell pepper work too.
Optional toppings
If you want something more substantial than plain cheese pizza, try:
- 1/3 cup finely chopped pepperoni
- 1/4 cup finely diced bell pepper
- 1/4 cup finely chopped mushrooms
- A pinch of red pepper flakes
- 2 tablespoons cooked crumbled sausage
Keep optional toppings small. Large chunks can make the cheese strips difficult to arrange and can cause the little pizzas to become messy.
Step-by-Step Instructions
1. Get the oven hot — about 10 minutes
Preheat your oven to 425°F (220°C).
If you have a pizza stone or baking steel, you can use it. Otherwise, a regular sturdy baking sheet works perfectly well.
I usually line my baking sheet with parchment paper. It makes cleanup much easier, especially when a little cheese inevitably escapes onto the pan.
2. Prepare the dough — about 5 minutes
Lightly flour your work surface and place the pizza dough on it.
If you’ve refrigerated the dough, let it sit at room temperature for about 15–20 minutes first. Slightly warmer dough stretches and cuts much more easily.
Roll the dough to roughly 1/4 inch thick.
Don’t worry if it isn’t perfectly even. We’re making spooky party food, not entering a geometry competition.
Use a 2 1/2- to 3-inch round cookie cutter, biscuit cutter, or drinking glass to cut out circles.
Gather the scraps, gently press them together, and roll them again. Try not to knead the scraps too much, or they’ll become chewy and difficult to roll.
You should end up with around 18–20 small dough rounds.
3. Season the dough — about 2 minutes
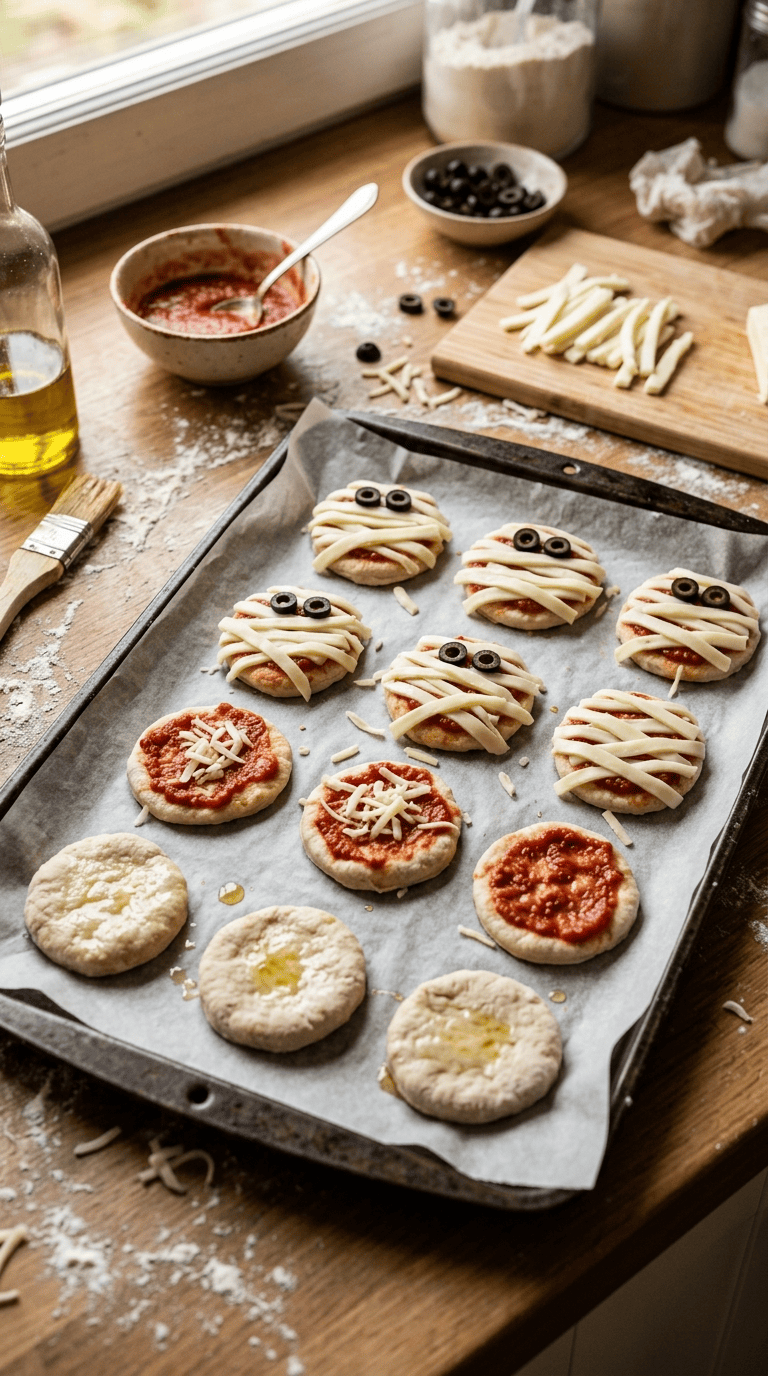
Arrange the dough rounds on your prepared baking sheet.
Brush each one lightly with olive oil.
Mix the Italian seasoning, garlic powder, and salt together, then sprinkle a tiny amount over the dough.
You don’t need much. The sauce and cheese will provide most of the flavor.
4. Add the sauce — about 3 minutes
Spoon about 1 teaspoon of pizza sauce onto each dough round.
Spread it almost to the edge, leaving a narrow border of plain dough.
This part matters more than it seems. If you add too much sauce, the center can become soggy and the cheese strips may slide around.
I’ve made that mistake before, usually because I convince myself that more sauce must mean more flavor. With these little pizzas, less really does work better.
5. Add the mozzarella — about 3 minutes
Sprinkle a small amount of shredded mozzarella over each pizza.
Aim for roughly 1 tablespoon per piece.
Don’t pile it too high. You still need room for the mummy bandages.
If you’re adding pepperoni or another topping, tuck a few tiny pieces underneath the cheese.
6. Create the mummy bandages — about 8 minutes
Now comes the fun part.
Cut the mozzarella slices into thin, uneven strips.
They don’t need to match. In fact, I prefer making some strips longer and some shorter because the finished mummies look much more playful.
Lay the strips across each pizza bite, leaving little gaps between them.
Don’t cover the entire surface. You want the tomato sauce and melted cheese underneath to peek through.
If the cheese feels too soft to cut neatly, place it in the refrigerator for 10–15 minutes first. Chilled cheese behaves much better.
7. Add the eyes — about 2 minutes
Cut the black olives into tiny pieces.
Place two little olive pieces near the upper part of each pizza bite to create the mummy’s eyes.
This is where kids can really take over.
Don’t worry if some mummies have surprised-looking eyes or slightly crooked faces. Mine certainly do, and those are usually the first ones people pick.
8. Bake — 9–12 minutes
Place the baking sheet in the preheated oven.
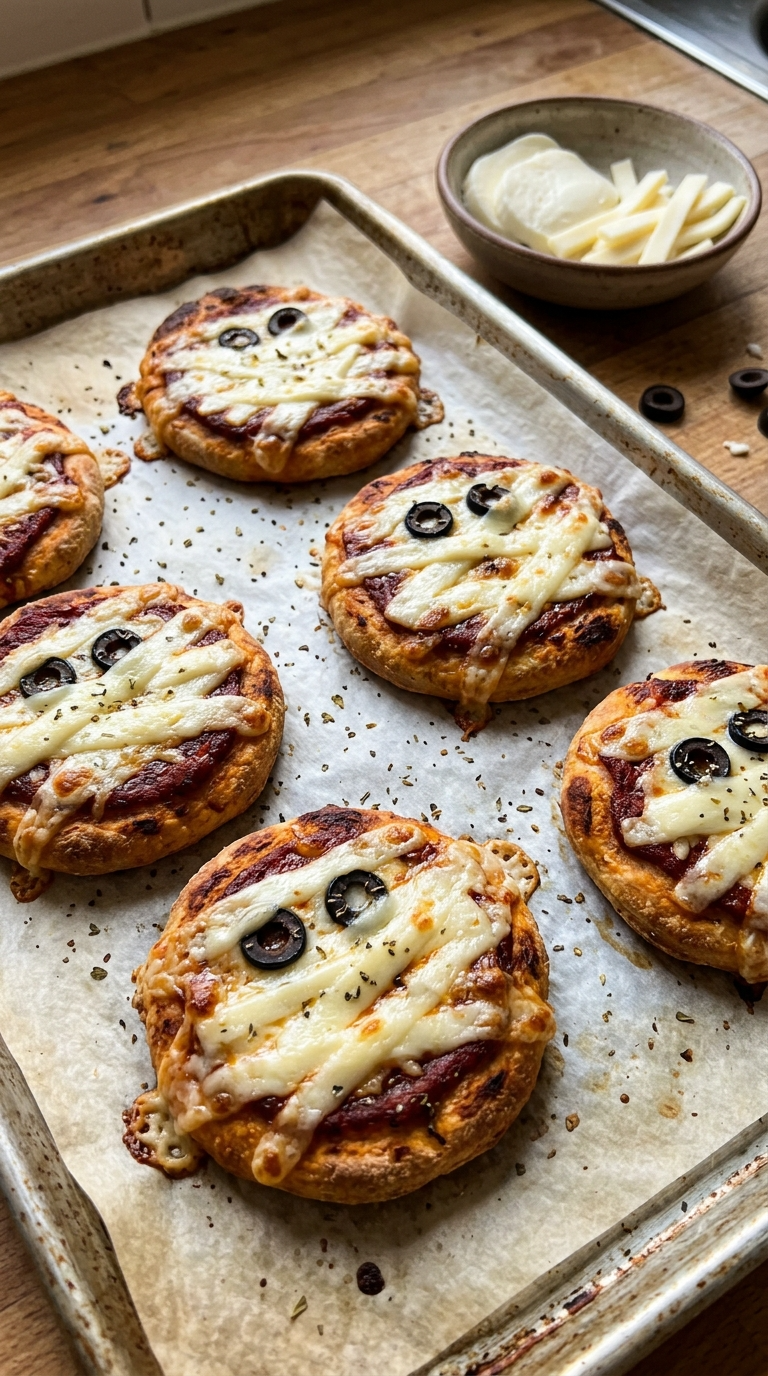
Bake for about 9–12 minutes, or until the dough looks golden around the edges and the cheese has melted.
Keep an eye on them during the final few minutes. Small pizza bites cook quickly, and the difference between golden and overdone can happen surprisingly fast.
You’re looking for lightly browned edges and bubbling cheese.
If your oven has hot spots, rotate the tray halfway through baking.
9. Let them cool briefly — about 5 minutes
Remove the pizza bites from the oven and let them sit for about five minutes.
They’ll be very hot in the center immediately after baking.
The short rest also helps the cheese settle, which makes them easier to pick up without everything sliding off.
For an extra Halloween touch, sprinkle a tiny amount of Parmesan around the platter before arranging the mummy pizzas. It gives the whole tray a slightly rustic, spooky look.
Pro Tips & Tricks
Don’t drown the dough in sauce
This is probably the most common mistake.
Because these pizza bites are small, even an extra teaspoon of sauce can make a noticeable difference. Keep the layer thin and even.
Chill the cheese before cutting it
If you’re making the mummy strips from sliced mozzarella, cold cheese makes the job much easier.
You can even cut the strips earlier in the day and keep them covered in the refrigerator until you’re ready to assemble.
Don’t chase perfect mummies
Seriously.
Some of mine look like mummies. Some look like tiny cheesy monsters. One year, several looked like they had extremely large eyebrows.
Everyone still ate them.
The uneven ones actually make the platter feel homemade and fun.
Make them ahead
You can prepare the dough rounds and toppings several hours ahead.
Arrange the dough, sauce, and shredded cheese, then cover the tray and refrigerate it. Add the mozzarella strips and olive eyes shortly before baking for the best appearance.
Take the tray out of the refrigerator about 15 minutes before baking so the dough doesn’t go into the oven ice-cold.
Store leftovers properly
Place cooled pizza bites in an airtight container and refrigerate them for up to 3 days.
For the best texture, reheat them in a toaster oven or conventional oven at 350°F (175°C) until warmed through.
A microwave works when you’re in a hurry, but it can make the crust softer.
Freeze them for later
You can freeze baked pizza bites once they’ve cooled completely.
Arrange them in a single layer on a tray and freeze until firm. Then transfer them to a freezer-safe container or bag.
For the best quality, use them within about 2 months.
Reheat them from frozen in a 350°F (175°C) oven until hot throughout.
The decorations may not look quite as crisp after freezing, but they’ll still taste good.
Variations & Substitutions
Make them pepperoni mummies
For a heartier version, tuck a few tiny pieces of pepperoni under the mozzarella.
Don’t use large slices because they can make the little pizzas greasy and interfere with the mummy design.
You can also use finely chopped cooked sausage if that’s what you have in the refrigerator.
Try a spicy version
Add a tiny pinch of red pepper flakes to the pizza sauce or sprinkle a little crushed chili over the finished pizza bites.
For adults who enjoy heat, a few finely chopped pickled jalapeños make a surprisingly good addition.
Just remember that Halloween parties often include children, so I usually make a mild batch first and put spicy toppings on the side.
Make them vegetarian
Skip the meat and add finely diced mushrooms, bell pepper, or sweetcorn.
Keep the vegetables small and don’t add too many. Moisture-heavy vegetables can make the little crusts softer than you want.
Use homemade dough
If you already have a favorite pizza dough recipe, absolutely use it.
I often use refrigerated dough when I’m hosting because Halloween party preparation already gives me enough things to do.
When I have more time, homemade dough gives the bites a slightly chewier texture and makes the kitchen smell fantastic.
Serving Suggestions

These mummy pizza bites work especially well as part of a larger Halloween snack table.
I like putting them on a large wooden board or dark-colored serving platter and surrounding them with a few small bowls of dipping sauces.
Try:
- Warm marinara sauce
- Garlic butter
- Ranch dressing
- Mild pizza sauce
- Creamy cheese dip
For a Halloween party, you can label the dipping bowls with little handwritten signs such as “Monster Sauce” or “Mummy Dip.”
You don’t need expensive decorations. A few plastic spiders, paper bats, or orange napkins around the platter can create the whole effect.
If you’re serving these as part of dinner, pair them with a simple green salad, roasted vegetables, or a bowl of soup.
For a kids’ party, I like serving them alongside fruit skewers, popcorn, pretzels, and a few sweet Halloween treats.
They’re also perfect for a Halloween movie night. Put the pizza bites in the middle of the coffee table, add some drinks, turn on the movie, and let everyone help themselves.
Related Recipes :
- Halloween Dessert Recipe for a Spooky Sweet Table
- Easy Halloween Dessert Recipes for Beginners
- Halloween Truffles That Make Adorable Party Treats
FAQ’s
Can I use store-bought pizza dough?
Absolutely.
Store-bought refrigerated pizza dough makes this recipe much quicker, and I’ve used it plenty of times. Let it rest at room temperature for about 15–20 minutes before rolling so it doesn’t fight you.
Can I prepare Halloween Mummy Pizza Bites the day before?
You can prepare most of the components a day ahead.
Cut the dough rounds, prepare the toppings, and refrigerate everything separately in covered containers. For the freshest texture, assemble and bake the pizza bites on the day of your party.
Why did my pizza bites turn soggy?
You probably used too much sauce or added very moist toppings.
Use a thin layer of sauce and keep vegetables finely chopped. Also make sure your oven has fully preheated before the pizza bites go in.
Can I use cheddar instead of mozzarella?
Yes.
Cheddar gives the pizza bites a stronger flavor and a slightly different appearance. For the classic pale mummy-bandage look, mozzarella works better.
You can also mix mozzarella and cheddar for a richer flavor.
How do I reheat leftover mummy pizza bites?
Reheat them in a 350°F (175°C) oven or toaster oven until hot.
Usually, 5–8 minutes works well for refrigerated leftovers, but ovens vary.
Avoid overheating them because the cheese can become tough and the crust can dry out.
Can I freeze these Halloween pizza bites?
Yes.
Let them cool completely, freeze them in a single layer, then transfer them to a freezer-safe container.
Reheat them in a 350°F (175°C) oven until they’re hot throughout. The mummy decorations may look slightly less defined after freezing, but the flavor holds up nicely.
Final Thought
Every Halloween party needs at least one food that makes people stop and smile before they take a bite.
For me, these Halloween Mummy Pizza Bites have become that food.
They’re not complicated. They don’t require professional decorating skills, unusual ingredients, or an entire afternoon in the kitchen. You can make them with kids, prepare them for a crowd, or throw together a small batch for a cozy Halloween movie night.
And don’t worry if your mummies don’t look exactly alike. That’s part of the charm.
The last time I made these, I deliberately gave each one a slightly different expression. Some looked sleepy, some looked surprised, and a few looked downright confused.
Those were the ones everyone talked about.
So roll out some dough, grab the cheese, and make a tray of your own little Halloween crew. And if one of your mummies comes out looking completely ridiculous, put it right in the center of the platter.
It’ll probably be the first one gone.
Leave a Reply
You must be logged in to post a comment.