

Last autumn, I had one of those evenings when I wanted something homemade but absolutely did not want to wrestle with a pie crust.
I had pumpkin puree in the cupboard, cream cheese in the refrigerator, and a package of graham crackers that had been sitting there waiting for a purpose. That combination practically made the decision for me.
I started experimenting with little cheesecake cups.
The first batch looked a little too pale, and I had overbaked a few of them because I kept checking the oven every five minutes. But the second attempt was different. I browned the butter first, added pumpkin and warm spices to the cheesecake mixture, and gave the cups plenty of time to cool.
That small change made a huge difference.
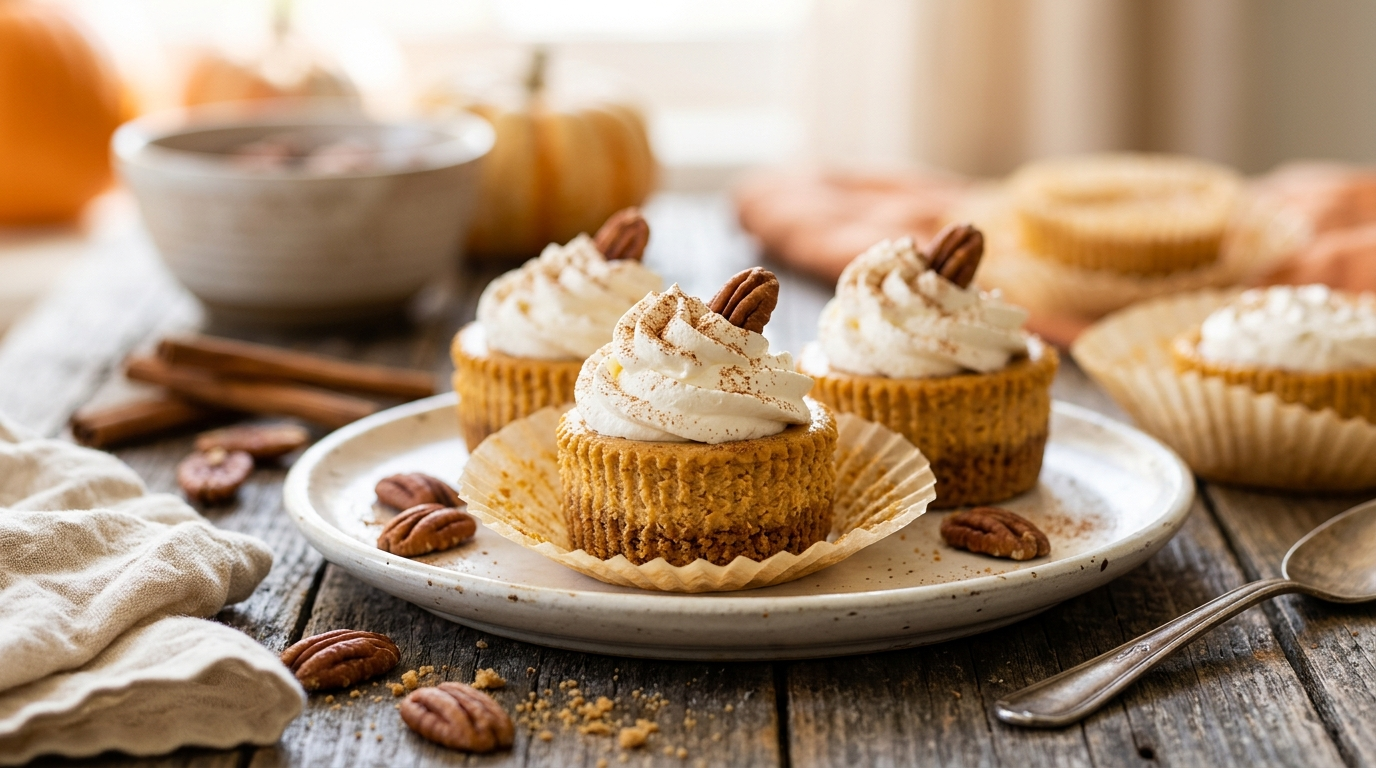
The finished desserts had a creamy pumpkin center, a buttery crumb base, and just enough cinnamon and nutmeg to make the whole kitchen smell like fall. I topped a few with whipped cream and left the rest plain.
The plain ones disappeared first.
Since then, these Brown Butter Pumpkin Cheesecake Cups have become one of my favorite seasonal desserts. They look like something that took much more effort than they actually did, which is exactly the kind of recipe I like keeping around.
Why You’ll Love This Recipe

- No pie crust required: The crumb base takes minutes to prepare.
- Easy portion control: Every guest gets an individual dessert instead of digging into a whole pie.
- Big seasonal flavor: Pumpkin, brown butter, cinnamon, and vanilla create a wonderfully cozy combination.
- Great for entertaining: You can prepare the cups ahead and keep them chilled until dessert time.
- Beginner-friendly: You don’t need a water bath or complicated cheesecake technique.
Ingredients
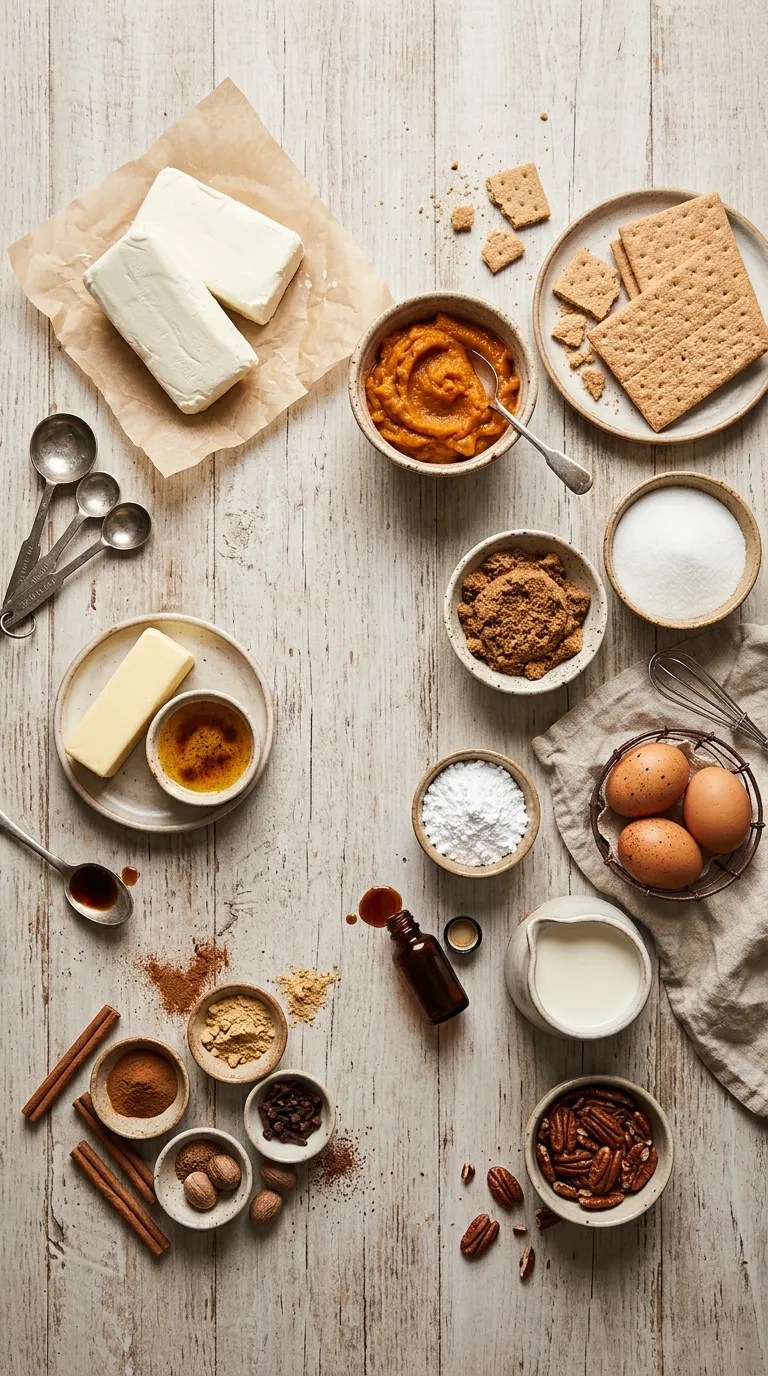
This recipe makes 12 individual cheesecake cups using a standard 12-cup muffin pan.
For the Graham Cracker Base
- 1 1/2 cups finely crushed graham crackers
- 5 tablespoons unsalted butter, melted
- 2 tablespoons light brown sugar
- 1/4 teaspoon ground cinnamon
- Pinch of salt
You can replace graham crackers with digestive biscuits if that’s what you have available. The texture may vary slightly, but the base will still work.
For the Pumpkin Cheesecake Filling
- 16 ounces full-fat cream cheese, softened
- 3/4 cup pumpkin puree
- 1/2 cup granulated sugar
- 1/4 cup packed light brown sugar
- 2 large eggs
- 4 tablespoons unsalted butter
- 1 teaspoon vanilla extract
- 1 1/2 teaspoons ground cinnamon
- 1/2 teaspoon ground ginger
- 1/4 teaspoon ground nutmeg
- 1/8 teaspoon ground cloves
- 1/4 teaspoon fine salt
Use plain pumpkin puree, not pumpkin pie filling. Pumpkin pie filling already contains sugar and spices, so substituting it would change the balance of the recipe.
For the Topping
- 1 cup cold heavy whipping cream
- 2 tablespoons powdered sugar
- 1/2 teaspoon vanilla extract
- A little ground cinnamon for sprinkling, optional
You can skip the whipped cream if you want a simpler dessert. The cheesecake cups taste delicious on their own.
Step-by-Step Instructions
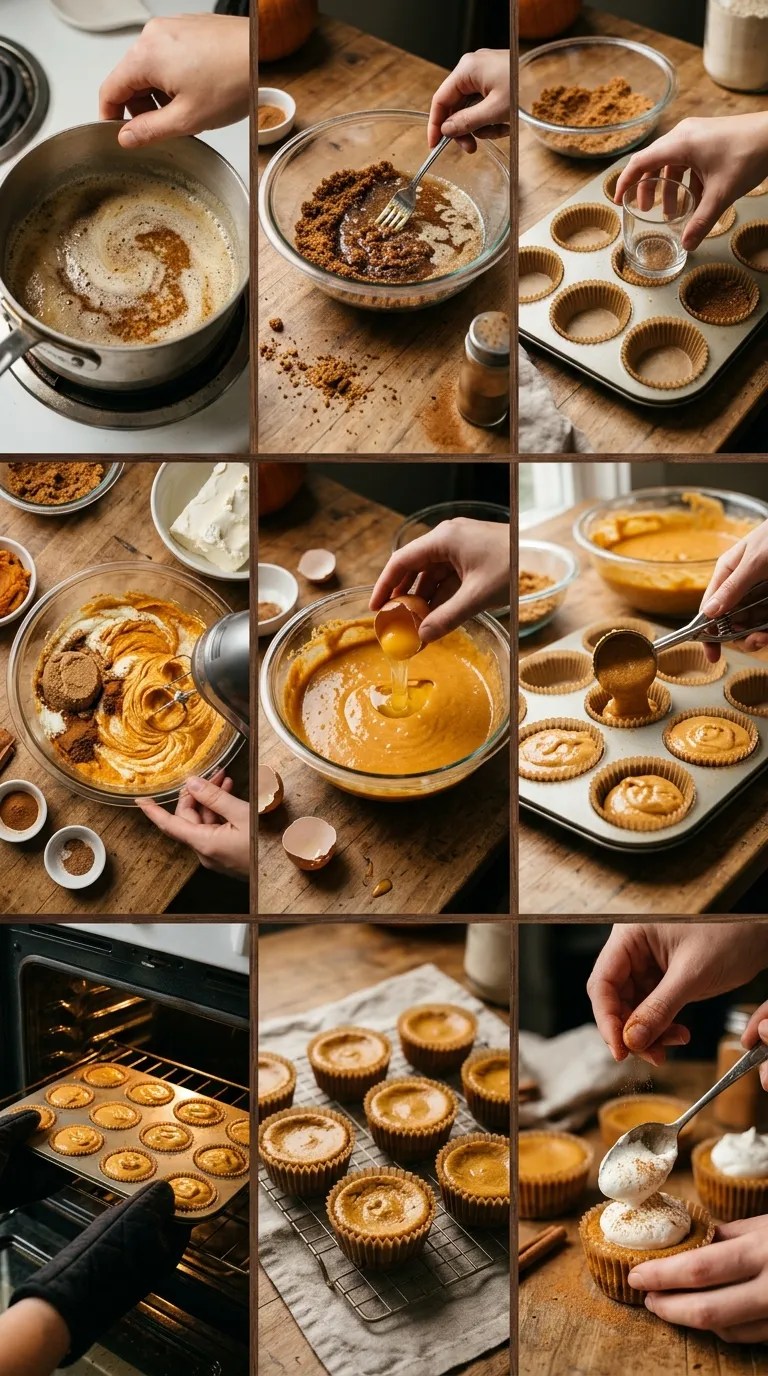
1. Get the Muffin Pan Ready — 5 Minutes
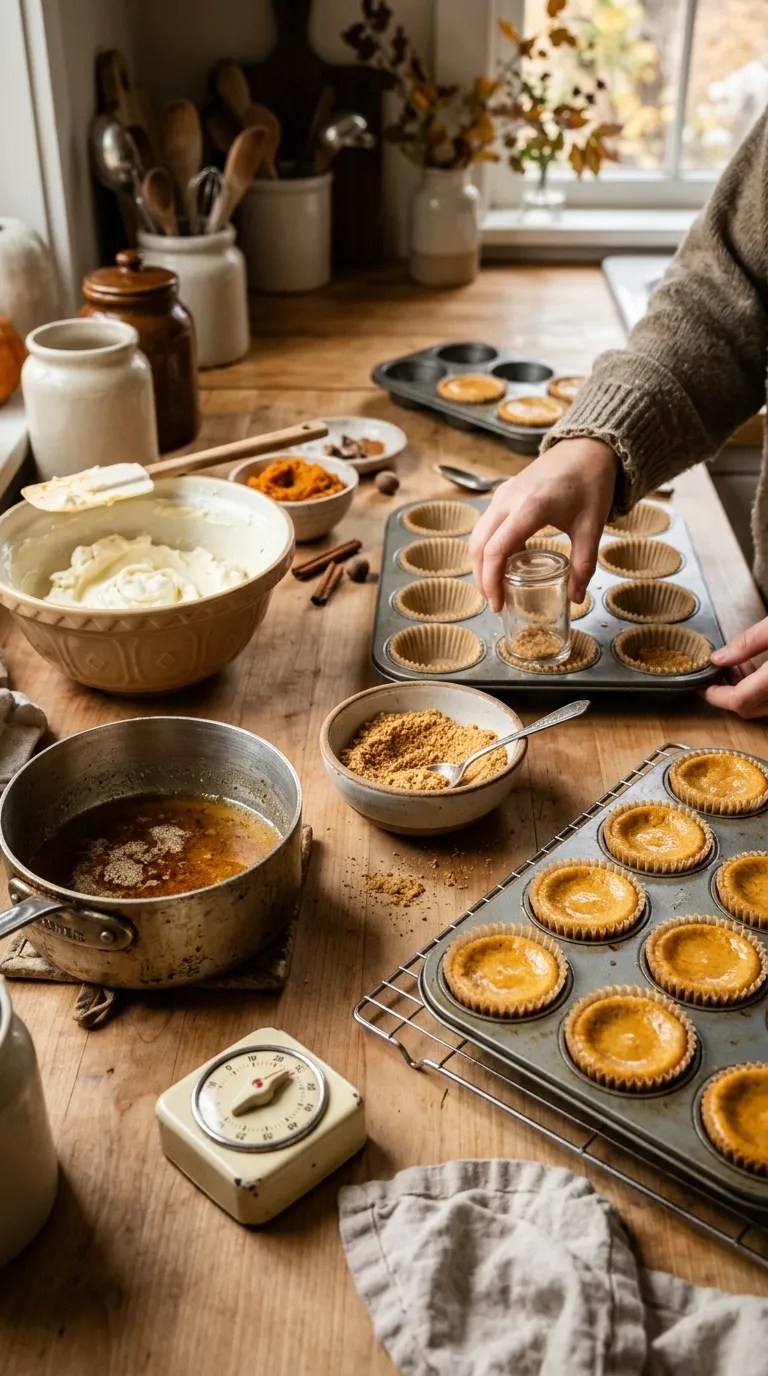
Heat your oven to 325°F (165°C).
Line a standard muffin pan with 12 paper liners.
I recommend using good-quality liners rather than very thin ones. The cheesecake filling can make flimsy liners difficult to handle once you remove the cups from the pan.
Set the pan aside while you prepare the crust.
2. Brown the Butter — 5 to 7 Minutes
Place the 4 tablespoons of butter in a small saucepan over medium heat.
Let it melt completely.
Continue cooking, stirring or swirling the pan occasionally. The butter will foam first. After a few minutes, the foam will begin to settle and small golden-brown bits will appear at the bottom.
Once the butter smells nutty and the milk solids turn golden brown, immediately remove the pan from the heat.
Pour the browned butter into a heatproof bowl.
This is one part of the recipe where you shouldn’t walk away. Butter can go from beautifully browned to burnt surprisingly quickly.
Let it cool for several minutes.
3. Prepare the Crumb Base — 5 Minutes
Combine the crushed graham crackers, melted butter, brown sugar, cinnamon, and salt in a bowl.
Mix until the crumbs look evenly moistened.
Put about 2 tablespoons of the mixture into each muffin liner.
Press the crumbs down firmly with the back of a small spoon or the bottom of a shot glass.
You don’t need to make the crust perfectly smooth. Just make sure there aren’t loose, dry crumbs underneath.
Bake the crusts for 6 minutes.
Take the pan out and let the bases cool slightly while you make the filling.
4. Beat the Cream Cheese — 3 Minutes
Place the softened cream cheese in a large mixing bowl.
Using a hand mixer or stand mixer, beat it on medium speed until smooth.
This usually takes about 2–3 minutes.
Scrape down the sides of the bowl before continuing.
If your cream cheese is still cold and lumpy, your filling may develop little pieces that never completely disappear. Letting it soften first saves you from trying to fix the mixture later.
5. Add the Sugars and Pumpkin — 3 Minutes
Add the granulated sugar and brown sugar.
Beat briefly until incorporated.
Add the pumpkin puree, cooled brown butter, vanilla, cinnamon, ginger, nutmeg, cloves, and salt.
Mix on low speed until everything looks evenly combined.
At this stage, the filling should smell intensely warm and spiced. If you’re tempted to taste it, remember that the mixture contains raw eggs, so save the spoonful for after baking.
6. Add the Eggs — 2 Minutes
Add the eggs one at a time.
Mix on low speed after each addition, stopping as soon as the egg disappears into the batter.
Don’t whip the mixture excessively.
Cheesecake filling doesn’t need lots of air. Overmixing can create more bubbles, which may leave you with a less even surface after baking.
7. Fill the Cups — 5 Minutes
Divide the pumpkin cheesecake mixture among the 12 prepared cups.
Fill each liner roughly three-quarters full.
Give the muffin pan a couple of gentle taps against the counter to encourage any large air bubbles to rise.
Don’t bang it hard. A light tap is enough.
8. Bake the Cheesecake Cups — 20 to 25 Minutes
Bake at 325°F (165°C) for approximately 20–25 minutes.
The edges should look set while the centers should still have a slight wobble when you gently move the pan.
That wobble is what you want.
Don’t wait until the centers look completely firm. Cheesecake continues cooking from residual heat after you remove it from the oven.
If the tops puff slightly during baking, don’t worry. They usually settle as they cool.
9. Cool Slowly — About 1 Hour
Turn off the oven and leave the muffin pan inside with the oven door slightly open for about 10 minutes.
Then remove the pan and place it on a cooling rack.
Let the cheesecake cups cool at room temperature for about 45–60 minutes.
Once they stop feeling warm, transfer them to the refrigerator.
Chill for at least 3 hours, although overnight works even better.
I learned this the hard way with my first batch. I tried to serve them after only about an hour in the refrigerator, and the centers were much softer than I expected.
They tasted wonderful.
They just didn’t look like the neat little cheesecake cups I had imagined.
10. Make the Whipped Cream — 5 Minutes
When you’re ready to serve, pour the cold heavy cream into a chilled mixing bowl.
Add the powdered sugar and vanilla.
Beat until soft-to-medium peaks form.
Don’t keep mixing once the cream holds its shape. If you go too far, you’ll start moving toward a much thicker, grainier texture.
Add a small spoonful of whipped cream to each cheesecake cup.
Finish with a tiny sprinkle of cinnamon if you like.
Pro Tips & Tricks
Bring the Cream Cheese to Room Temperature
This simple step makes the filling much smoother.
Leave the unopened cream cheese on the counter for roughly 30–45 minutes before mixing. Don’t try to speed things up by heating it aggressively because unevenly softened cream cheese can behave differently throughout the batter.
Watch the Brown Butter Carefully
Brown butter adds a wonderful toasted flavor, but it needs attention.
As soon as the milk solids become golden brown and the butter smells nutty, take it off the heat. The residual heat in the saucepan will continue cooking it for a short time.
If it smells sharply burnt rather than nutty, start again. It’s faster than trying to rescue burnt butter.
Don’t Overbake the Cheesecake
This may be the biggest mistake beginners make.
The center should still move slightly when you gently shake the pan.
A completely firm center usually means you’ve taken the cheesecake farther than necessary. Once chilled, the texture will become much firmer.
Crush the Graham Crackers Finely
Large chunks can make the crust difficult to cut with a spoon.
A food processor makes quick work of the crackers, but you can also place them in a sealed bag and crush them with a rolling pin.
Chill Before Decorating
Wait until the cheesecake cups are properly cold before adding whipped cream.
If the filling still feels warm, the topping can soften quickly.
Keep Leftovers Covered
Store the cheesecake cups in the refrigerator in an airtight container or covered baking dish.
They’re best within 3–4 days.
Keep the whipped cream separate if you’re preparing them several days ahead. Add it shortly before serving for the best texture.
Variations & Substitutions
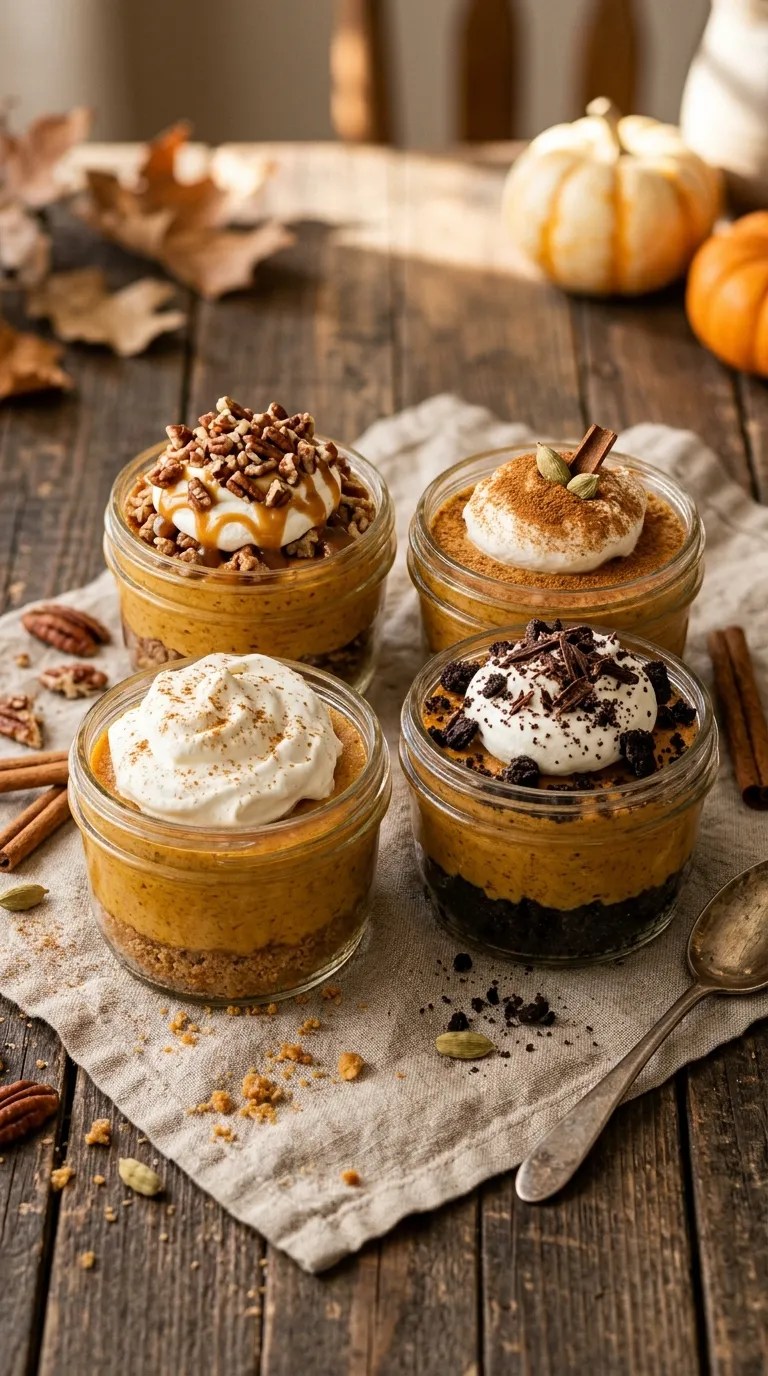
Turn Them Into Chocolate Pumpkin Cheesecake Cups
For a chocolate version, add 2 tablespoons unsweetened cocoa powder to the filling.
You can also replace half of the graham cracker crumbs with finely crushed chocolate cookies.
The chocolate makes the pumpkin flavor slightly more subtle and gives the dessert a richer character.
Make a Pecan Crust
If you love pecan pie flavors, replace 1/3 cup of the graham cracker crumbs with finely chopped pecans.
Keep the rest of the crust ingredients unchanged.
The nuts toast slightly during baking and add a pleasant crunch beneath the creamy filling.
Use a Different Spice Blend
You don’t have to use every traditional pumpkin spice.
If cloves taste too strong for you, leave them out.
You can also increase the cinnamon slightly or add a small pinch of cardamom for a more fragrant flavor.
The important thing is to keep the spices balanced rather than throwing in a large amount of every spice in the cupboard.
Make Them Without Brown Butter
If you’re short on time, use the same amount of regular melted unsalted butter.
You’ll lose the toasted, nutty note, but the cheesecake cups will still have plenty of flavor from the pumpkin, vanilla, and spices.
Serving Suggestions

These little cheesecakes work especially well for gatherings because guests can simply pick up an individual portion.
They’re a natural fit for autumn dinners, Thanksgiving-style meals, family get-togethers, school bake sales where individual portions are useful, and weekend baking projects.
For a dessert table, arrange the cups on a large platter and add the whipped cream shortly before serving.
If you want them to look a little more festive, place a tiny pecan half on each serving.
For a cozy evening at home, serve one chilled cheesecake cup with coffee or tea.
For a warmer dessert experience, let a cheesecake cup sit at room temperature for about 15 minutes before eating. The filling becomes a little softer and creamier as it loses its refrigerator chill.
I also like serving them without any extra caramel or sauce. The browned butter already gives the filling enough depth that it doesn’t need a mountain of toppings.
Related Recipes:
- How to Make Pumpkin Cheesecake Bites for Thanksgiving
- How to Make Pecan Pie Cheesecake From Scratch
- Easy Pumpkin Cheesecake Recipe for Thanksgiving
- Pumpkin Cheesecake Recipe Without Cream Cheese
FAQ’s
Can I make these pumpkin cheesecake cups the day before?
Yes, and I actually prefer doing so.
Prepare and bake the cheesecake cups the day before, then refrigerate them overnight. Add whipped cream shortly before serving.
The extra chilling time helps the filling set properly and makes the dessert easier to serve.
Can I freeze pumpkin cheesecake cups?
Yes.
Freeze the cooled cheesecake cups without whipped cream. Place them in a freezer-safe container and separate layers with parchment paper.
Thaw them overnight in the refrigerator.
Add fresh whipped cream after they thaw rather than freezing the topping with the cheesecake.
Why did my cheesecake cups crack?
Cracks usually happen when the cheesecake gets too hot or stays in the oven too long.
Don’t worry if a few small cracks appear. The whipped cream will cover them easily.
More importantly, watch the center of the cheesecake rather than waiting for the entire surface to become firm.
Can I use canned pumpkin?
Yes, canned pumpkin puree works very well.
Just make sure you buy 100% pumpkin puree rather than canned pumpkin pie filling.
If your pumpkin puree looks particularly watery, you can let it sit in a fine-mesh strainer for a few minutes before using it.
Can I make this recipe without a stand mixer?
Definitely.
A hand mixer works perfectly, and you can even mix the filling by hand with a sturdy whisk if your cream cheese is very soft.
A stand mixer simply makes the process more convenient.
How do I know when the cheesecake is finished baking?
Look at the edges and center.
The edges should appear set, while the middle should still have a gentle jiggle when you carefully move the pan.
The cheesecake will continue setting as it cools and chills, so resist the urge to bake it until the center becomes completely solid.
Final Thought
I still think about that first batch whenever pumpkin season rolls around.
Not because it was perfect—it definitely wasn’t—but because it reminded me that good desserts don’t always need complicated techniques.
A little browned butter, a spoonful of pumpkin, some warm spices, and a simple crumb crust can turn into something that feels genuinely special.
These Brown Butter Pumpkin Cheesecake Cups have become the kind of dessert I make when friends are coming over and I want something homemade without spending the entire day in the kitchen.
Make them the night before, hide one in the back of the refrigerator if you need to, and serve them cold with a little whipped cream.
And if you make a batch, don’t be surprised if the first question you hear is, “Are there any more?”
That’s usually my sign that the recipe worked.
Leave a Reply
You must be logged in to post a comment.