

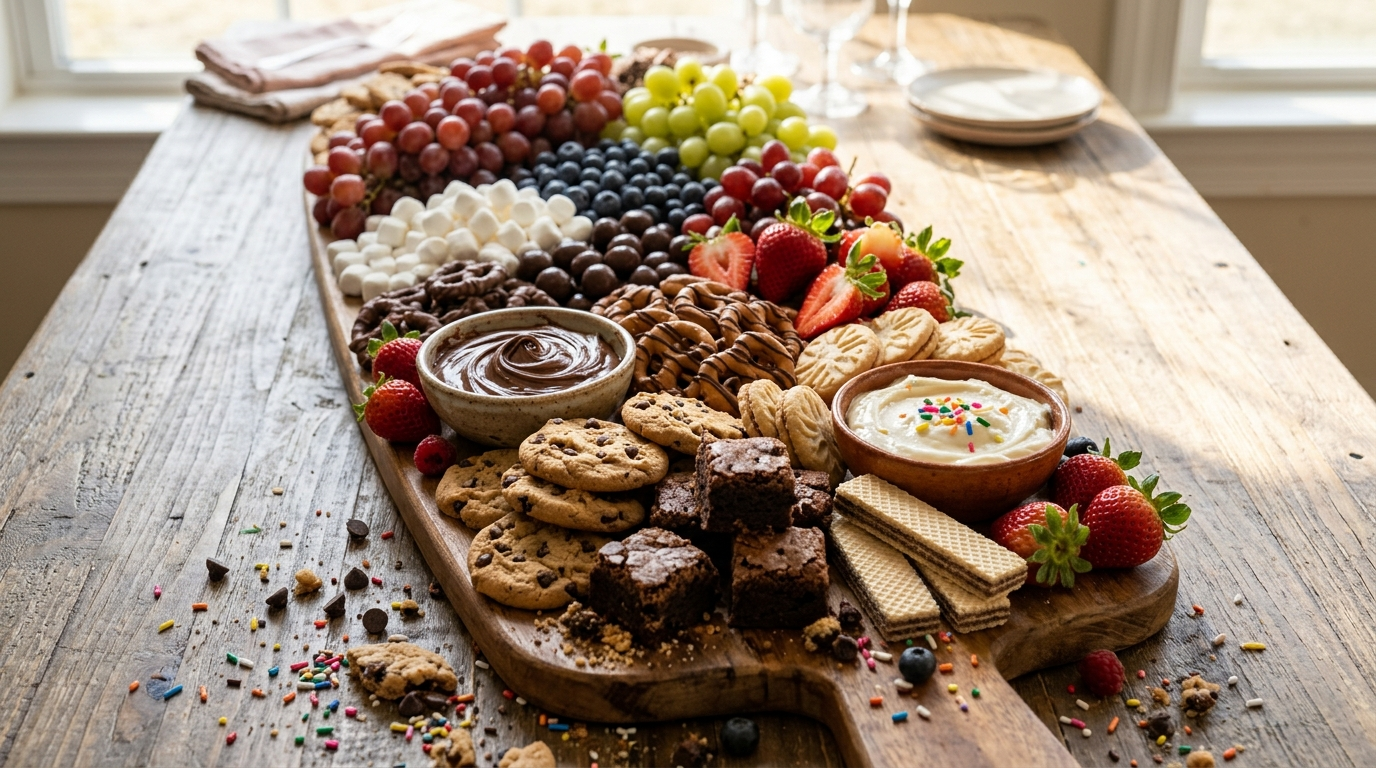
The first time I made a dessert charcuterie board, I honestly expected everyone to politely take one or two things and leave the rest alone. I had a big wooden board on the counter, a few bowls scattered around it, and a kitchen that looked like I had somehow used every mixing bowl I owned.
Then the guests arrived.
Within minutes, people were standing around the board, pointing out their favorites, building little combinations, and going back for “just one more” cookie. The best part? I didn’t have to worry about slicing cake, keeping frosting neat, or serving individual desserts.
That’s why this easy dessert charcuterie board idea for parties has become one of my favorite ways to serve sweets. It looks festive without requiring fancy decorating skills, and you can build it around whatever treats you already have.
I’ve made versions for birthdays, family gatherings, holiday parties, movie nights, and casual get-togethers. I’ve also learned that the board doesn’t need to be perfectly symmetrical. In fact, a little messiness makes it feel more generous and inviting.
The trick is to mix different shapes, colors, textures, and flavors so every corner gives people something new to discover.
Why You’ll Love This Recipe

- No baking required. You can assemble the whole board with store-bought treats.
- Easy to customize. Change the sweets based on the occasion, season, or your guest list.
- Great for groups. Everyone can choose exactly what they want instead of committing to one dessert.
- Looks impressive. A few simple arranging tricks make an ordinary collection of treats look party-ready.
- Easy to prepare ahead. Most of the components can sit ready while you handle everything else.
Ingredients List
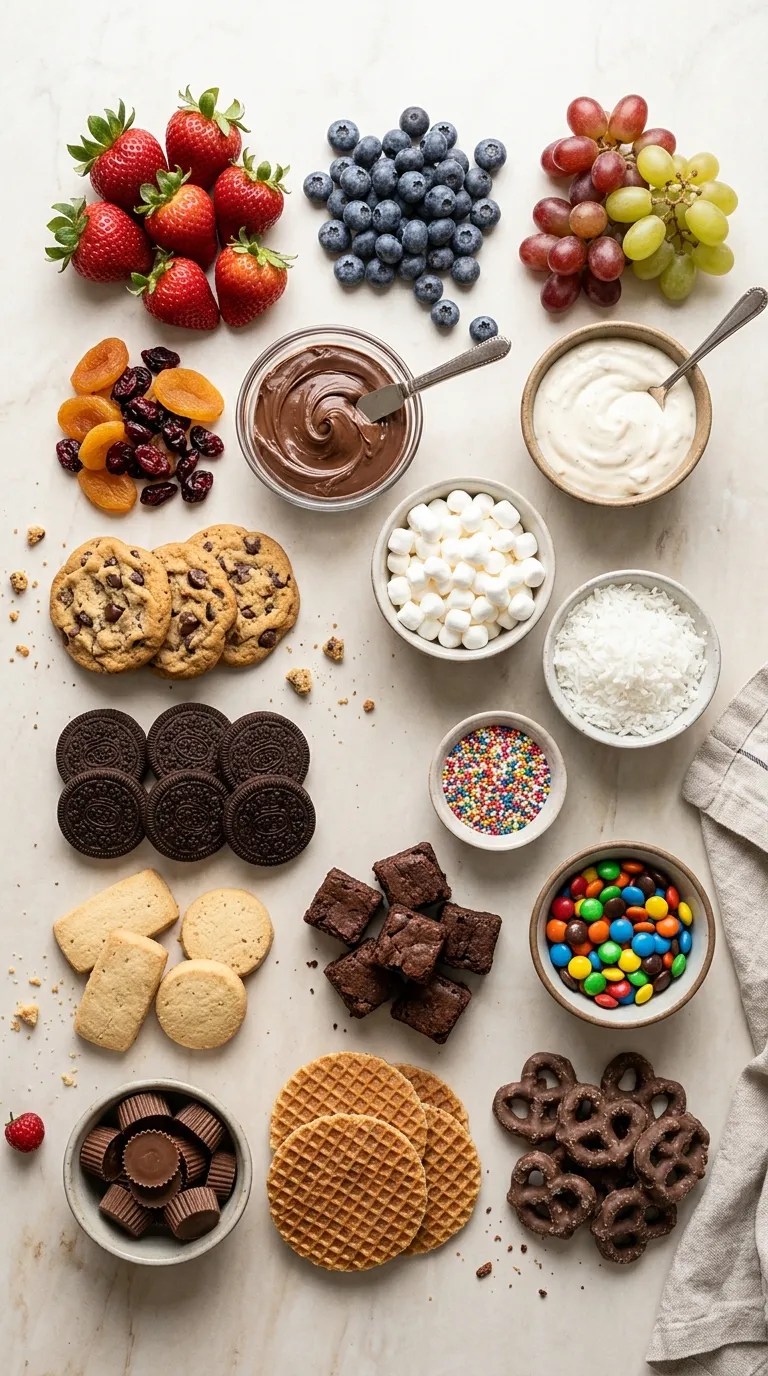
For a medium dessert charcuterie board serving about 8–10 people, I usually use:
Cookies and baked treats
- 12 chocolate chip cookies
- 10 small chocolate sandwich cookies
- 8 shortbread cookies
- 6 mini brownies, cut into bite-size pieces
- 8 mini waffle cookies or wafer cookies
You don’t need every type listed here. If you have leftover homemade cookies, use those first. A mixture of two or three varieties works perfectly well.
Candy and chocolate
- 1 cup chocolate-covered pretzels
- ¾ cup chocolate candies
- ½ cup mini peanut butter cups
- ½ cup gummy candies or fruit chews
- ½ cup white chocolate pieces or chocolate truffles
For a nut-free gathering, skip peanut butter cups and replace them with extra chocolate or another candy.
Fresh and dried fruit
- 1 cup strawberries
- 1 cup seedless grapes
- ½ cup blueberries
- ½ cup dried apricots or dried cranberries
Choose fruit that stays fairly firm. I avoid very juicy fruit because it can make nearby cookies soft.
Dips and little extras
- 1 cup chocolate-hazelnut spread
- ¾ cup vanilla frosting or cheesecake dip
- ½ cup mini marshmallows
- ½ cup shredded coconut
- ⅓ cup colorful sprinkles
You can also add caramel sauce, peanut butter, jam, or a small bowl of whipped cream if you plan to serve the board immediately.
Equipment
You don’t need special equipment, which is one reason I love this idea.
- 1 large wooden or bamboo serving board
- 4–6 small bowls or ramekins
- Small serving spoons
- Small tongs
- A sharp knife and cutting board
- Parchment paper, optional
A large rimmed platter works just as well if you don’t own a charcuterie board.
Step-by-Step Instructions
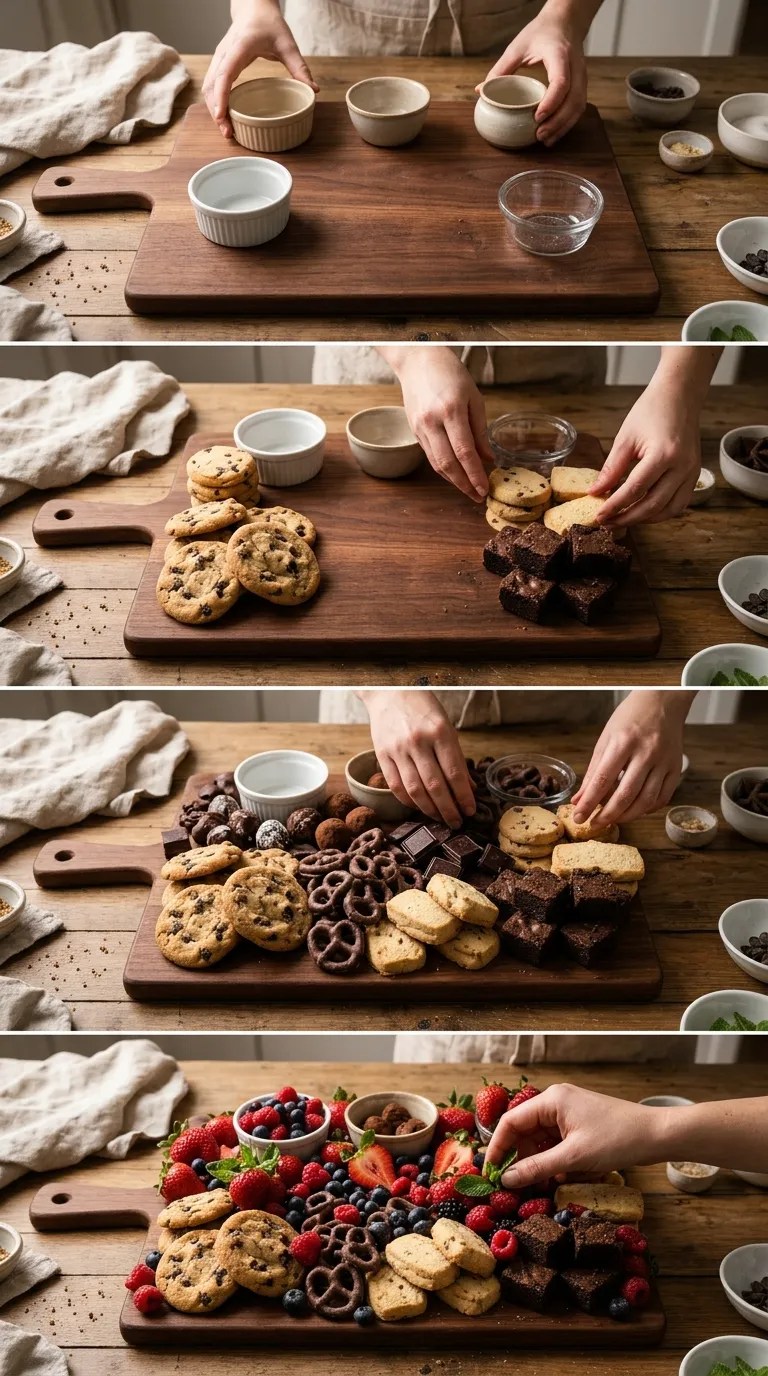
1. Choose your board — 2 minutes
Start with a board large enough to hold everything without making the treats look crowded.
For 8–10 people, I like a board around 16–18 inches wide. If you’re serving a larger crowd, use two smaller boards instead of trying to cram everything onto one giant board.
Before adding food, give the board a quick wipe and let it dry completely.
2. Prepare the fruit — 5–10 minutes
Wash your strawberries, grapes, and blueberries and dry them very well.
This step sounds insignificant, but I’ve learned the hard way that wet fruit can cause problems. A damp strawberry next to a crisp cookie can turn that cookie surprisingly soft.
Hull the strawberries if needed and leave smaller berries whole.
If your strawberries vary greatly in size, cut the largest ones in half. Keep the pieces easy to pick up without utensils.
3. Set out the bowls — 2 minutes
Place your small bowls on the empty board first.
Fill them with the things that can roll, spill, or spread, such as:
- Chocolate-hazelnut spread
- Frosting dip
- Sprinkles
- Small candies
- Mini marshmallows
Don’t worry about spacing them perfectly.
I usually place the bowls in different areas of the board rather than lining them up. That gives me natural spaces to build the rest of the arrangement.
4. Add the largest treats — 3 minutes
Now add the brownies, larger cookies, and waffle cookies.
Think of these as your anchor pieces.
Instead of making one giant pile, create two or three small clusters. For example, place brownies near one bowl and cookies near another.
Try turning some cookies sideways or overlapping them slightly. That creates height and keeps the board from looking like everything came straight from a grocery-store package.
5. Add chocolate and candy — 3–5 minutes
Fill the open spaces with chocolate-covered pretzels, chocolate candies, mini peanut butter cups, and other small sweets.
This is where the board starts coming together.
I like to repeat similar treats in different areas rather than putting every chocolate item in one pile. If chocolate-covered pretzels sit in two corners, the board feels more balanced without looking overly arranged.
Don’t pack everything tightly. People need room to grab individual pieces.
6. Add the fruit — 3 minutes
Tuck the strawberries, grapes, and blueberries into the remaining spaces.
Use fruit to break up sections that look too brown or beige. A handful of strawberries can make a very chocolate-heavy board look much brighter.
Keep particularly juicy fruit away from cookies and brownies whenever possible.
7. Fill the tiny gaps — 2–3 minutes
Now comes my favorite part.
Look for little empty spaces and fill them with mini marshmallows, coconut, sprinkles, or a few individual candies.
You don’t need to fill every inch.
A few small gaps actually make the board easier to eat because guests can see where to pick something up.
8. Give the board a final check — 2 minutes
Step back and look at the whole board.
Ask yourself:
- Does every section have something different?
- Are the bowls easy to reach?
- Can guests pick up treats without knocking things over?
- Do you have a mixture of soft, crunchy, chewy, and fresh foods?
- Does anything need to be refrigerated?
If one area looks too empty, move a few pieces rather than immediately adding more food.
That’s one of the little lessons I learned after making these boards several times: arrangement usually matters more than quantity.
Pro Tips & Tricks
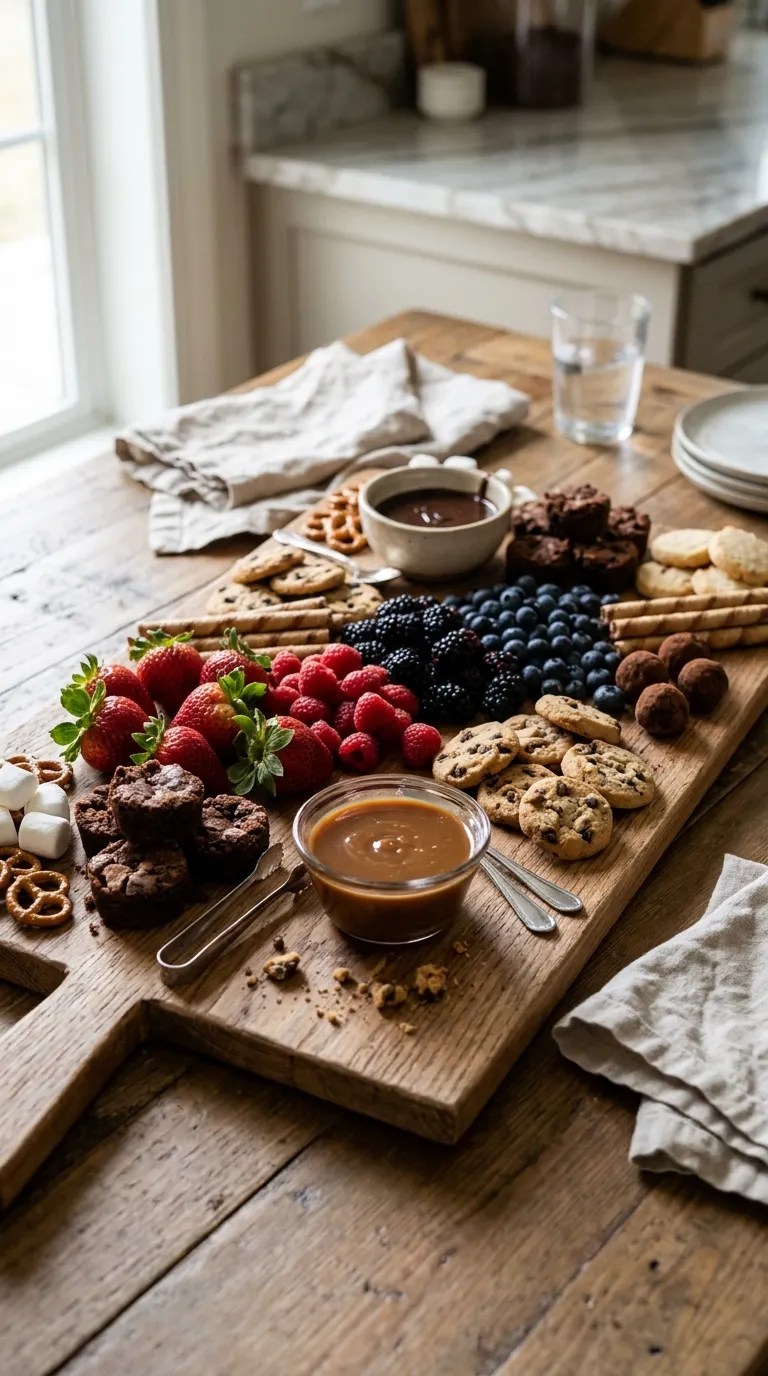
Don’t build the board too early
You can prepare most of the ingredients ahead, but I prefer assembling the finished board about 30–60 minutes before serving.
Keep cut fruit refrigerated until you’re ready to assemble it.
Use bowls for messy foods
Anything sticky, creamy, crumbly, or tiny deserves its own bowl.
This keeps the rest of the board clean and makes serving much easier.
Mix homemade and store-bought treats
You don’t need to bake five different desserts.
If you have homemade brownies, use them alongside store-bought cookies and chocolates. That combination actually makes the board feel more personal without turning the preparation into an all-day project.
Don’t overfill it
This was probably my biggest mistake with my early boards.
I kept adding treats because I thought an empty corner meant the board wasn’t finished. Eventually, the board became so crowded that people couldn’t easily pick anything up.
Leave some breathing room.
Cut large treats into smaller portions
If you have regular-size brownies, blondies, fudge, or cake, cut them into bite-size squares.
Smaller pieces give guests the freedom to try several things instead of taking one large portion.
Make the board easier for kids to use
For children’s parties, keep most foods bite-size and place bowls where little hands can reach them safely.
Use larger serving pieces for anything especially small, sticky, or difficult to grab.
Keep allergy information in mind
If you’re serving a group, don’t assume everyone can eat everything.
If nuts, dairy, gluten, or another ingredient could be an issue for your guests, label those items clearly and keep them separate from the other treats.
Variations & Substitutions
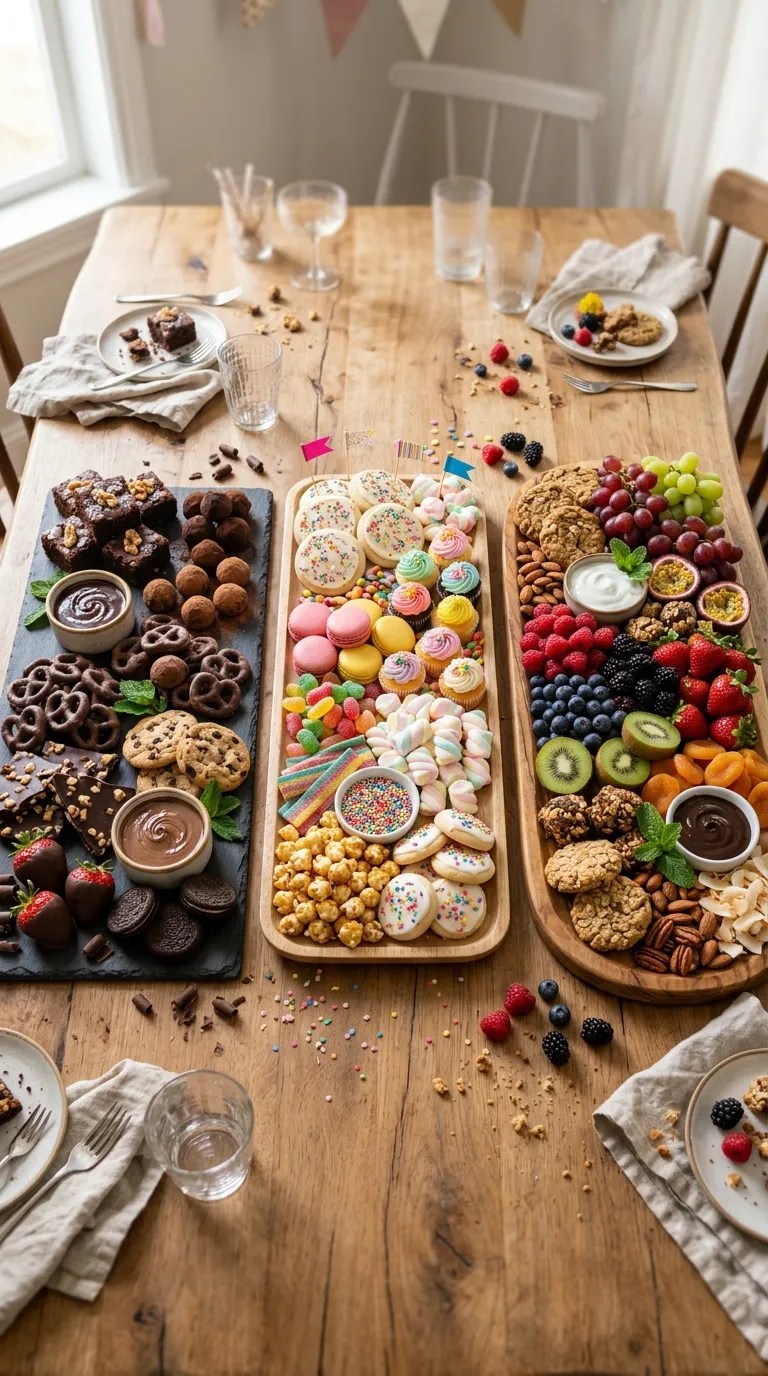
A chocolate lover’s board
For a chocolate-heavy version, replace some of the fruit with chocolate bark, brownie bites, chocolate-covered strawberries, and extra truffles.
I still like keeping a little fruit on the board because the fresh flavor gives everyone a break between richer bites.
A colorful birthday board
For birthdays, use treats that match the party colors.
Add frosted sugar cookies, colorful candies, mini cupcakes, marshmallows, and sprinkles. You can even arrange candies into little sections based on color.
A few birthday candles placed around the board can make it feel special, but keep them separate from the food unless you’re actually lighting them.
A simple vegan-friendly board
For a vegan version, choose cookies, chocolates, spreads, and candies that are specifically labeled vegan.
Use fresh fruit, dairy-free chocolate, coconut-based treats, and a plant-based dessert dip.
Always check the packaging because ingredients vary widely between brands.
A gluten-free version
Build the board around certified gluten-free cookies, brownies, chocolate, fruit, marshmallows, and candies.
If you’re serving someone with celiac disease or a serious allergy, pay attention to cross-contact as well as the ingredient list. Use clean serving utensils and keep gluten-containing foods completely separate.
Serving Suggestions

A dessert charcuterie board works especially well when you want something relaxed rather than a formal plated dessert.
I love putting one in the middle of the table during a birthday party, because guests can snack throughout the celebration instead of waiting for a designated dessert time.
It’s also great for:
- Holiday gatherings
- Baby or bridal showers
- Graduation parties
- Family game nights
- Movie nights
- Sleepover parties
- Afternoon tea-style gatherings
- Potlucks
- Dinner parties
For a larger party, make two boards with slightly different selections. One can focus on cookies and chocolate while the other features fruit, cake bites, and lighter sweets.
You can also pair the board with hot drinks. Coffee, hot chocolate, chai, or tea all work nicely with cookies and chocolate.
For a summer party, serve it alongside lemonade or iced tea and lean more heavily on fresh berries and fruit.
For a cozy winter gathering, I like adding peppermint chocolate, ginger cookies, fudge, dried fruit, and marshmallows.
Related Recipes:
- Easy Dessert Recipes Anyone Can Make
- Quick and Easy Dessert Recipes for Busy Days
- Easy Halloween Dessert Recipes for Beginners
- Easy Chocolate Dessert for Every Occasion
FAQ’s
Can I make a dessert charcuterie board the night before?
You can prepare many components the night before, but I wouldn’t assemble the entire board that early.
Pack cookies, candy, and chocolate in airtight containers. Wash and thoroughly dry fruit, then refrigerate it separately. Assemble the board shortly before serving so the cookies stay crisp and the fruit stays fresh.
How much dessert should I put on a charcuterie board?
For a dessert board serving 8–10 people, around 6–8 cups of assorted treats gives you a good starting point.
You can adjust that amount depending on whether the board acts as the main dessert or simply provides snacks alongside cake or another dessert.
What can I use instead of a wooden charcuterie board?
Almost any large serving platter works.
A ceramic platter, large cutting board, slate serving board, or rimmed baking tray can all do the job. If you’re feeding a crowd, two smaller platters can actually work better than one enormous board.
How do I stop fruit from making the cookies soggy?
Dry the fruit extremely well before adding it to the board.
Keep juicy fruit away from cookies when possible, and use small bowls for fruit that releases a lot of moisture. Don’t assemble the board several hours ahead if you’re using very juicy fruit.
Can I freeze the treats for later?
Some individual treats freeze well, but the assembled board itself doesn’t.
Cookies, brownies, blondies, and certain baked goods can often go into the freezer when stored properly. Fresh fruit, candy, dips, and assembled decorations generally don’t freeze and thaw with the same texture.
If you want to prepare ahead, freeze only the baked components that you know freeze well and add the fresh items later.
What if my board looks uneven?
Don’t panic. Mine rarely look perfect before the final few adjustments.
Move one or two clusters around, spread out repeated ingredients, and use small candies or fruit to fill obvious gaps.
You don’t need perfect symmetry. You want the board to look abundant and easy to explore.
Final Thought
There’s something wonderfully relaxed about putting dessert in the middle of the table and letting everyone make their own little plate.
That’s probably why I keep coming back to this easy dessert charcuterie board idea for parties. It gives you plenty of room to be creative without requiring complicated recipes or perfect decorating skills.
Start with a few favorites, add something fruity, include a couple of textures, and finish with little treats that fill the gaps. If you accidentally make one section heavier than another, move things around. If you run out of one ingredient, use something else.
That’s the beauty of a dessert board: there really isn’t one right way to build it.
And if you make one for your next party, don’t be surprised if the brownies disappear first. Mine almost always do.
Leave a Reply
You must be logged in to post a comment.