

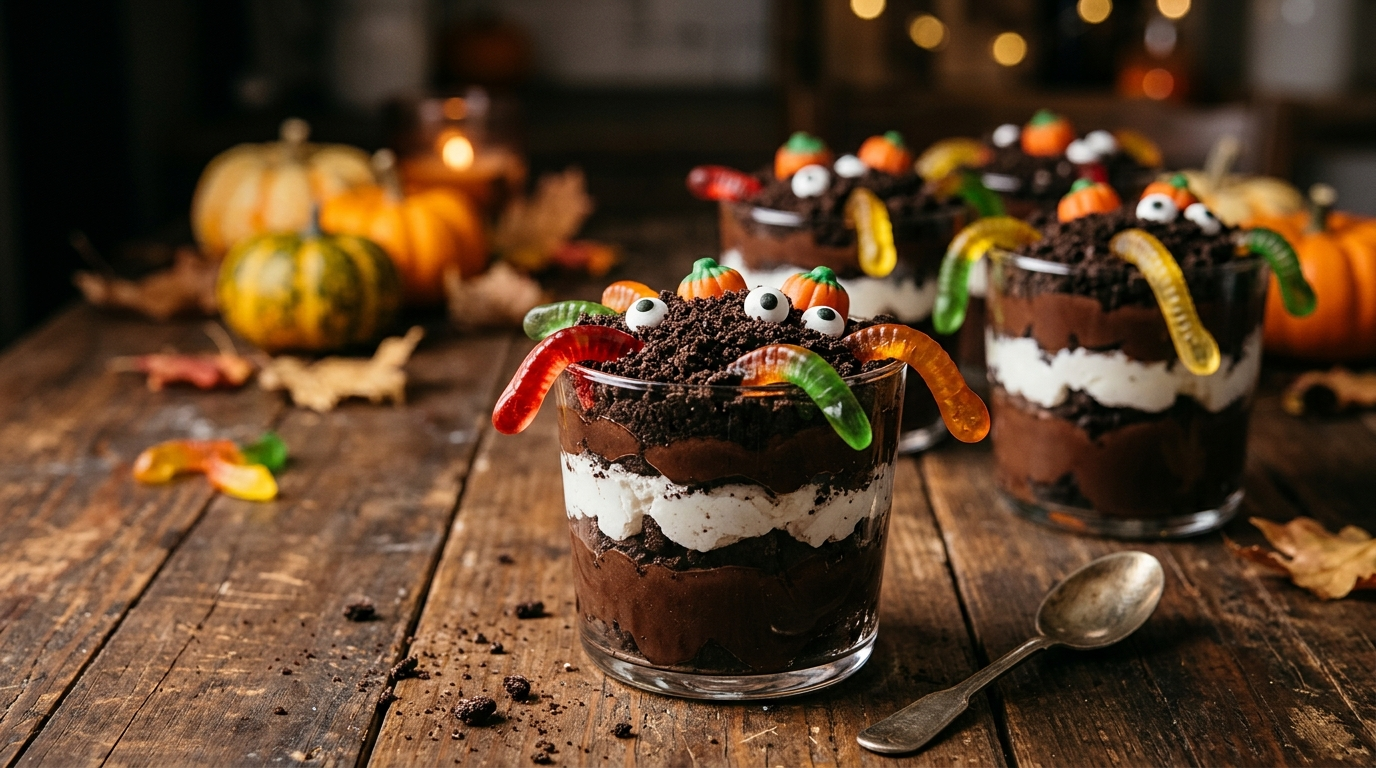
Every Halloween, I like making at least one dessert that looks far more complicated than it actually is. The kind of treat that makes kids squeal when they see it, but still gives adults an excuse to sneak one from the fridge later.
These spooky Halloween Oreo dirt cups became that dessert in my kitchen.
The first time I made them, I had grand plans for perfectly decorated little cups. Then the cookie crumbs ended up everywhere, one of my gummy worms disappeared before I finished decorating, and I accidentally added a little too much pudding to one cup. Nobody cared. In fact, the messy ones looked the most fun.
The basic idea is wonderfully simple: creamy chocolate pudding, crushed chocolate sandwich cookies, fluffy whipped topping, and a handful of Halloween candy. The cookies create a “dirt” effect, while gummy worms, candy pumpkins, candy eyes, and other decorations turn each cup into a tiny Halloween scene.
I especially love this recipe because you can let everyone decorate their own. Set out the ingredients, hand the kids a spoon, and suddenly dessert becomes part of the Halloween activity.
And don’t worry if your monsters look a little wonky. Mine usually do.
Why You’ll Love This Recipe

- No oven required. You only need a refrigerator and a little mixing.
- Kids can help. Crushing cookies and decorating the cups are perfect hands-on jobs.
- Easy to make ahead. Prepare the pudding cups earlier in the day and decorate them before serving.
- Easy to customize. Change the candy decorations to match whatever you already have.
- Adults love them too. The creamy chocolate-and-cookie combination tastes like a nostalgic pudding dessert rather than a novelty treat.
Ingredients
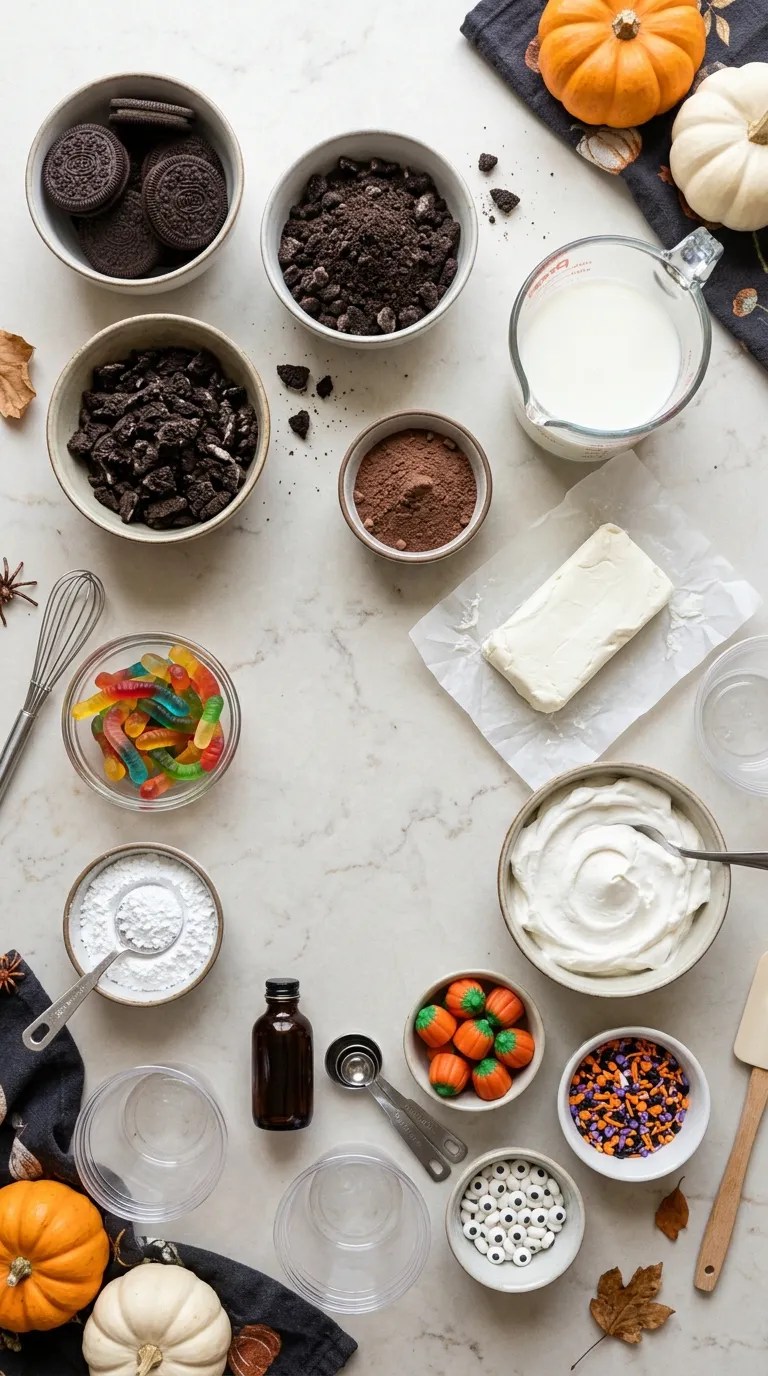
This recipe makes about 8 individual dessert cups, depending on the size of your serving containers.
For the chocolate pudding
- 1 package (3.9 ounces) instant chocolate pudding mix
- 2 cups cold whole milk
- 1 teaspoon vanilla extract
You can use 2% milk if that’s what you have. Whole milk gives the pudding a slightly richer texture, but I have made it with 2% and still had empty cups afterward.
For the creamy layer
- 1 cup whipped topping, thawed
- 4 ounces cream cheese, softened
- 2 tablespoons powdered sugar
For an even simpler version, skip the cream cheese mixture and use extra whipped topping. The cream cheese adds a cheesecake-like tang, though, so I usually keep it.
For the “dirt”
- 24 chocolate sandwich cookies, such as Oreo cookies, with the filling left in
- 1 tablespoon melted butter, optional
You don’t need to remove the cookie filling. I actually prefer keeping it because it helps the crumbs stay slightly moist and gives the dirt layer more flavor.
For Halloween decorations
Use whatever you can find:
- 16–24 gummy worms
- 8 small candy pumpkins
- Candy eyeballs
- Halloween sprinkles
- Chocolate chips
- Mini marshmallows
- Orange or green decorating gel, optional
You don’t need every decoration on this list. A couple of gummy worms and candy eyes can make the cups look surprisingly spooky.
Step-by-Step Instructions
1. Crush the cookies — 5 minutes
Place the chocolate sandwich cookies in a large zip-top bag and seal it well.
Give them a good crush with a rolling pin, the bottom of a measuring cup, or another sturdy kitchen tool. You want a mixture of fine crumbs and a few tiny cookie pieces.
Don’t turn everything into powder. Those little chunks make the finished dessert look more like dirt.
If you have a food processor, you can pulse the cookies several times instead. Stop before you create a completely uniform powder.
Set the crumbs aside.
2. Make the chocolate pudding — 5 minutes
Pour the cold milk into a medium mixing bowl.
Add the instant chocolate pudding mix and vanilla extract. Whisk for about 2 minutes, or follow the mixing time listed on your pudding package.
The pudding should become noticeably thicker and smooth.
Let it sit for about 5 minutes so it can finish setting.
One little kitchen lesson I learned here: don’t rush the pudding into the cups while it’s still very loose. A few extra minutes of setting time makes the layers much easier to build.
3. Make the creamy topping — 5 minutes
Place the softened cream cheese and powdered sugar in a bowl.
Beat them with a hand mixer until smooth, about 1–2 minutes.
Fold in the whipped topping gently with a rubber spatula.
You want a light, fluffy mixture. Don’t stir aggressively or you’ll lose some of that airy texture.
If your cream cheese still feels cold and firm, you’ll probably end up with little lumps. Let it soften at room temperature for a while before mixing.
4. Start layering — about 5 minutes
Grab eight small clear cups or dessert glasses.
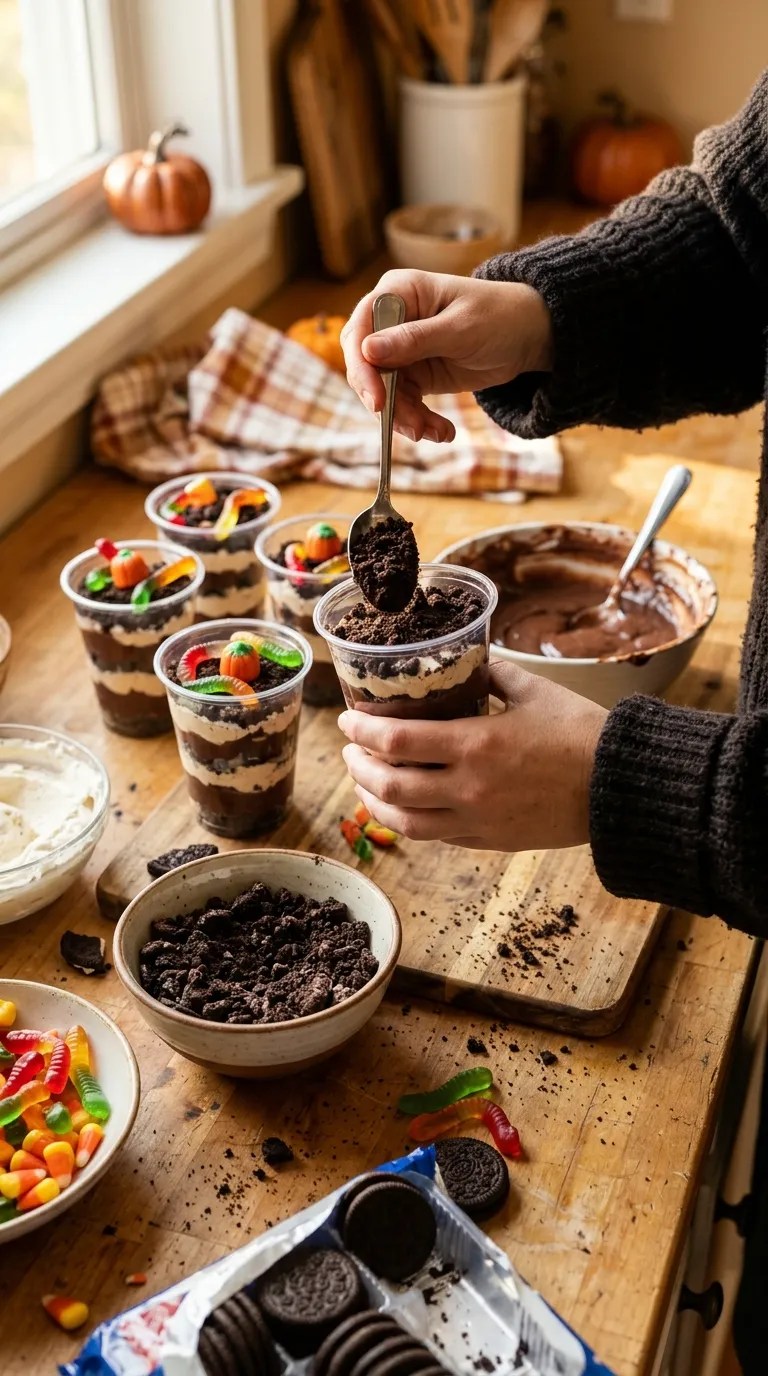
Spoon a layer of chocolate pudding into the bottom of each cup. You can use roughly 2–3 tablespoons per cup.
Add a spoonful of the creamy mixture.
Then sprinkle a layer of crushed chocolate cookies over the top.
Don’t worry about making every layer perfectly even. These desserts actually look better when they have a slightly messy, graveyard-at-midnight appearance.
5. Add another layer
Repeat the pudding, creamy mixture, and cookie crumbs until you reach the top of each cup.
Finish with a generous layer of cookie crumbs.
That final layer creates the best dirt effect, so don’t skimp on it.
If you’re making these with children, this is usually where things get wonderfully chaotic. Give them their own spoon and let them decide how much “dirt” each cup needs.
6. Make them spooky — 5–10 minutes
Now comes the fun part.
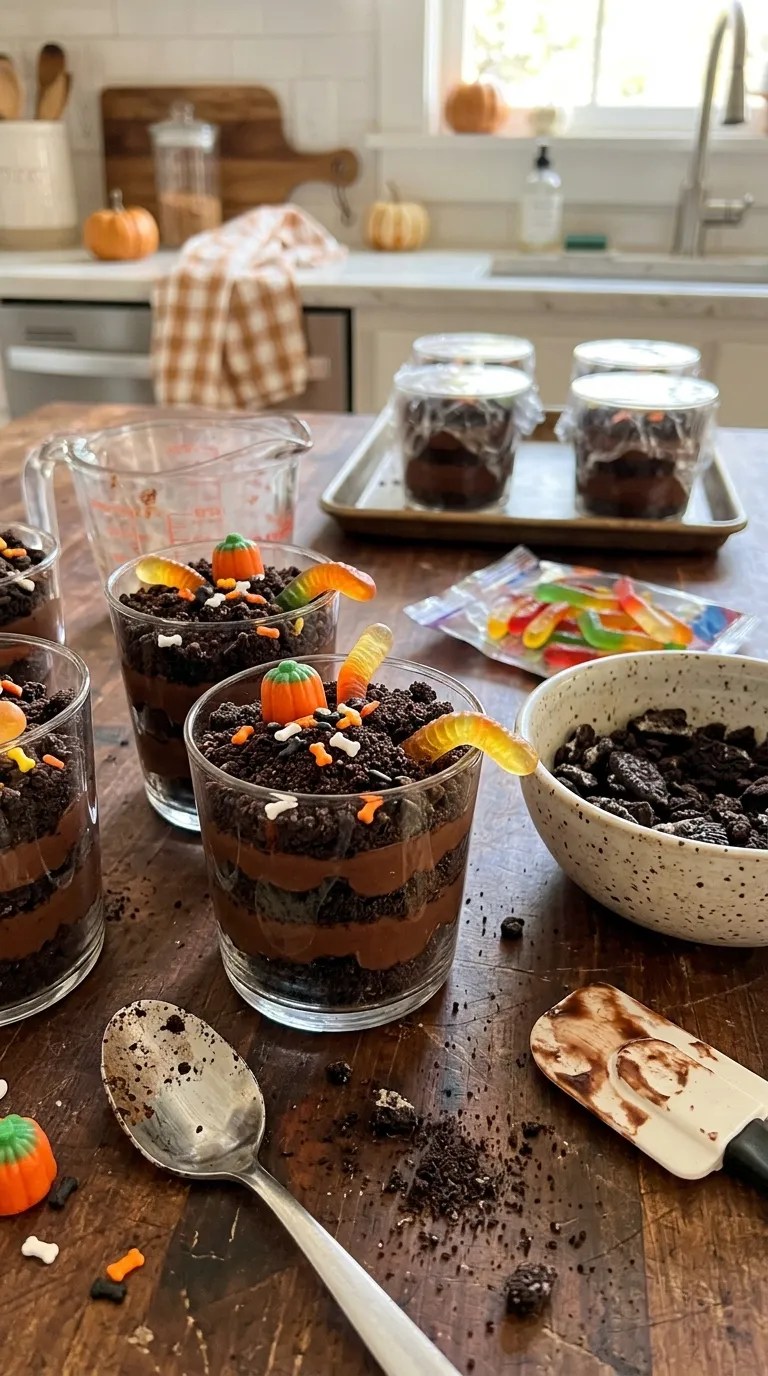
Tuck gummy worms partly into the cookie crumbs so they look like they’re crawling through the dirt.
Add a candy pumpkin to the top of each cup.
Press candy eyeballs into the crumbs or onto a small mound of whipped topping.
You can also scatter Halloween sprinkles around the surface or add little chocolate-chip “rocks.”
For a graveyard theme, place a small rectangle of chocolate cookie or chocolate wafer upright in the crumbs as a pretend tombstone. You can write tiny messages on it with decorating gel if you like.
7. Chill before serving — at least 1 hour
Cover the cups loosely with plastic wrap and refrigerate them for at least 1 hour.
I usually make them about 2–4 hours before serving.
The chilling time lets the flavors settle and gives the pudding and creamy layer a firmer texture.
If you’re preparing them the night before, wait to add delicate candy decorations until closer to serving. Some candies can soften or bleed color while sitting in the refrigerator.
8. Serve and enjoy
Take the cups out of the refrigerator shortly before serving.
Add any final decorations, then put them on a Halloween dessert table, kitchen counter, or party tray.
Serve them with small spoons because the layers are easiest to enjoy by digging straight down through the cookies, pudding, and cream.
And yes, someone will probably eat the gummy worm first.
Pro Tips & Tricks
Don’t crush the cookies too finely
This is probably my biggest tip.
Fine cookie crumbs create the appearance of dirt, but a few small cookie chunks give the dessert a much better texture. Pulse them briefly in a food processor rather than running it continuously.
Use clear cups
Clear plastic dessert cups make a surprisingly big difference.
You can see every layer, which makes the dessert look much more impressive without adding any extra work.
Small glass jars also work well for an adult Halloween gathering.
Soften the cream cheese properly
Cold cream cheese can leave stubborn lumps in the creamy layer.
Let it soften before mixing. If you forget, cut it into small cubes and give it some time at room temperature.
Don’t decorate too early
Gummy candy and sprinkles can change texture or color after several hours in the refrigerator.
For the prettiest presentation, make the pudding cups ahead of time and add the final decorations shortly before serving.
Keep the layers relaxed
You don’t need a pastry bag or special decorating skills.
A spoon works perfectly. If a layer isn’t perfectly straight, nobody will notice once you add the cookie crumbs and Halloween candy.
Storage
Cover leftover cups and refrigerate them.
They taste best within 1–2 days. The cookie crumbs will gradually soften, but the dessert will still be enjoyable.
I wouldn’t leave the finished dessert sitting at room temperature for a long party. Keep the extra cups chilled and bring them out in smaller batches.
Variations & Substitutions
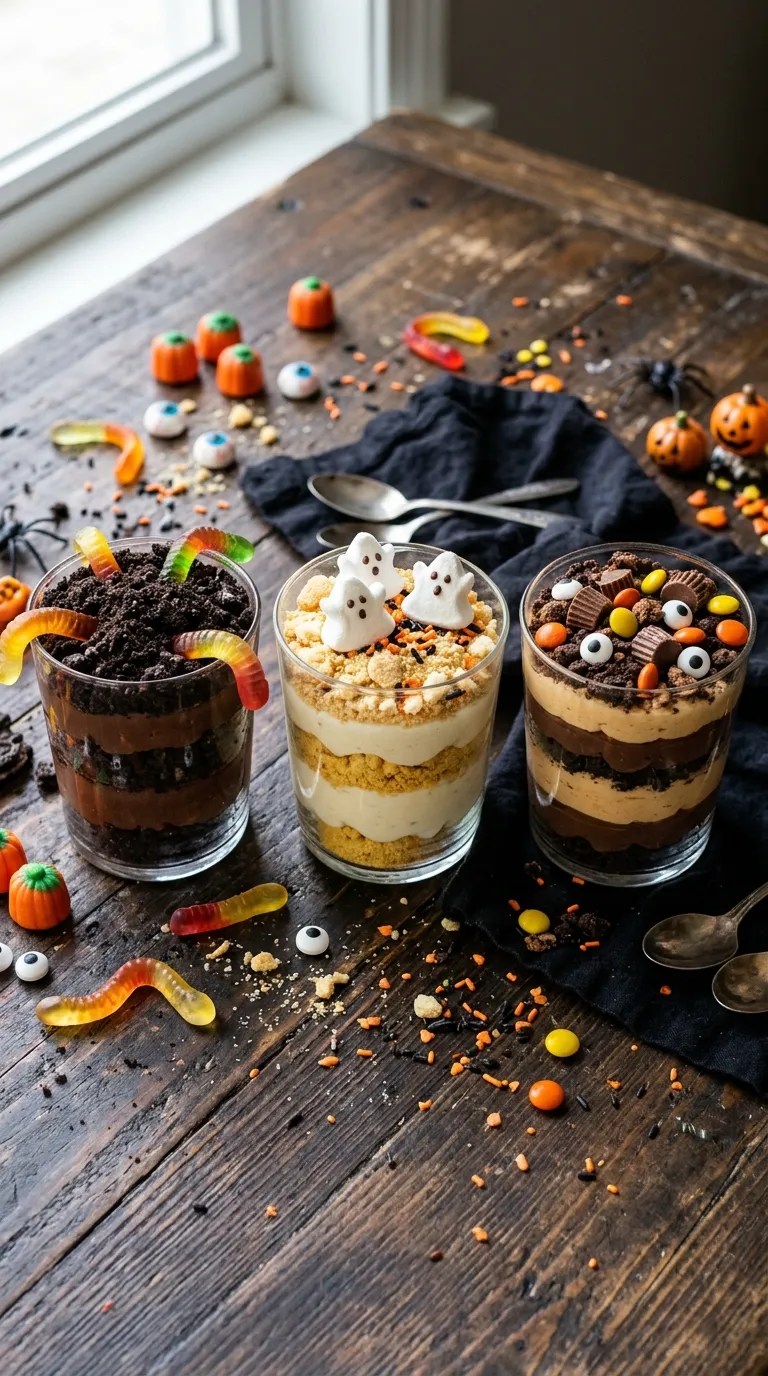
Make a vanilla “ghost dirt cup”
Not everyone wants chocolate pudding, so you can switch the pudding to instant vanilla pudding.
Use crushed vanilla sandwich cookies instead of chocolate cookies. Add whipped topping, candy eyes, and little marshmallow ghosts for a completely different look.
Make individual graveyard jars
For an adult Halloween dinner, layer everything into small glass jars instead of plastic cups.
Add a chocolate wafer “tombstone” and a few chocolate curls on top. You can even serve them with tiny spoons tied to the jars with black or orange ribbon.
The dessert still feels playful, but the presentation works nicely for a dinner party.
Make a peanut-butter version
Add a thin layer of creamy peanut butter between the pudding and cookie crumbs.
You can also mix a spoonful of peanut butter into the cream cheese layer.
If you’re serving this to a group, clearly label the dessert if it contains peanuts or other allergens.
Try a different cookie
Chocolate sandwich cookies aren’t your only option.
Chocolate graham crackers, chocolate wafer cookies, or another crisp chocolate cookie can work well. The texture will vary, so crush the replacement cookie gradually until you get crumbs that resemble loose soil.
Serving Suggestions

These Halloween dessert cups fit almost anywhere you want a fun, low-effort sweet treat.
For a kids’ Halloween party, place the undecorated cups on a table with bowls of gummy worms, candy pumpkins, sprinkles, and candy eyes. Let everyone decorate their own.
For a Halloween movie night, make the cups earlier in the afternoon and keep them refrigerated until the movie starts.
They also work well after a family pumpkin-carving session. In fact, I think they taste even better after you’ve spent an hour cleaning pumpkin seeds off the kitchen counter.
For an adult Halloween gathering, use small glass jars and keep the decorations a little more restrained. A few cookie crumbs, chocolate curls, and one gummy worm can look surprisingly stylish.
You can also serve the cups alongside fresh berries, hot chocolate, or a simple bowl of vanilla ice cream if you’re feeding a crowd with different dessert preferences.
If you’re transporting them, use cups with lids and keep them in a cooler with ice packs. Add fragile decorations after you arrive.
Related Recipes:
- Spooky Halloween Dessert Everyone Will Love
- Easy Halloween Desserts for a Spooky Party
- Easy Halloween Sweets for Kids and Adults Spooky Chocolate
- Easy Halloween Dessert Idea Spiderweb Chocolate Brownies
FAQ’S
Can I make Halloween dessert cups ahead of time?
Yes. You can assemble the pudding and cream layers several hours ahead and refrigerate them.
For the best texture and appearance, add gummy worms, sprinkles, candy eyes, and other decorations closer to serving time.
How long do Oreo dirt cups last in the refrigerator?
Store covered cups in the refrigerator and enjoy them within 1–2 days.
The cookie crumbs become softer as they sit. If you prefer a stronger cookie crunch, assemble the cups a few hours before serving instead of the night before.
Can I use homemade chocolate pudding?
Absolutely.
Homemade pudding works well, but cool it completely before assembling the cups. Warm pudding can soften the other layers and make the dessert difficult to build neatly.
Instant pudding keeps this recipe quick, which is why I usually reach for the boxed mix when Halloween gets busy.
Can I make these without cream cheese?
Yes.
Simply use whipped topping as the creamy layer, or layer chocolate pudding directly with the cookie crumbs.
The cream cheese mixture adds richness and a slight tang, but you don’t need it for a delicious dessert.
Can I freeze Halloween dirt cups?
I don’t recommend freezing the fully assembled cups.
The pudding and whipped topping can change texture after freezing and thawing, while the cookie crumbs can become soggy.
If you need to prepare ahead, make the individual components and assemble the desserts closer to serving time.
Why did my pudding turn out runny?
First, check that you used the correct amount of milk for your specific instant pudding mix.
Too much milk can prevent the pudding from becoming firm enough. Also, give the pudding a few minutes to set before layering it.
If you’re using homemade pudding, make sure it has cooled and thickened properly before assembly.
Can kids make this recipe?
Definitely, with an adult handling any equipment that could cause injury.
Kids can crush the cookies, help whisk the pudding, spoon the layers into cups, and decorate their own creations.
The decorating stage is where they can really take over.
Final Thought
I keep coming back to these spooky Halloween Oreo dirt cups because they don’t ask for perfection.
You don’t need fancy piping skills, complicated ingredients, or an afternoon spent waiting for something to bake. You just make a few simple layers, crush some cookies, and let the Halloween candy do most of the decorating.
And if the gummy worms end up buried completely, the candy eyes land upside down, or one cup gets twice as much cookie “dirt” as the others, that’s perfectly fine.
That’s part of the charm.
Put on some Halloween music, let everyone decorate their own cup, and don’t worry too much about the kitchen getting a little messy. Those are usually the moments people remember.
If you make these Halloween dessert cups, have fun with the decorations and make them your own. A spooky dessert doesn’t need to look perfect to disappear quickly.
Leave a Reply
You must be logged in to post a comment.