

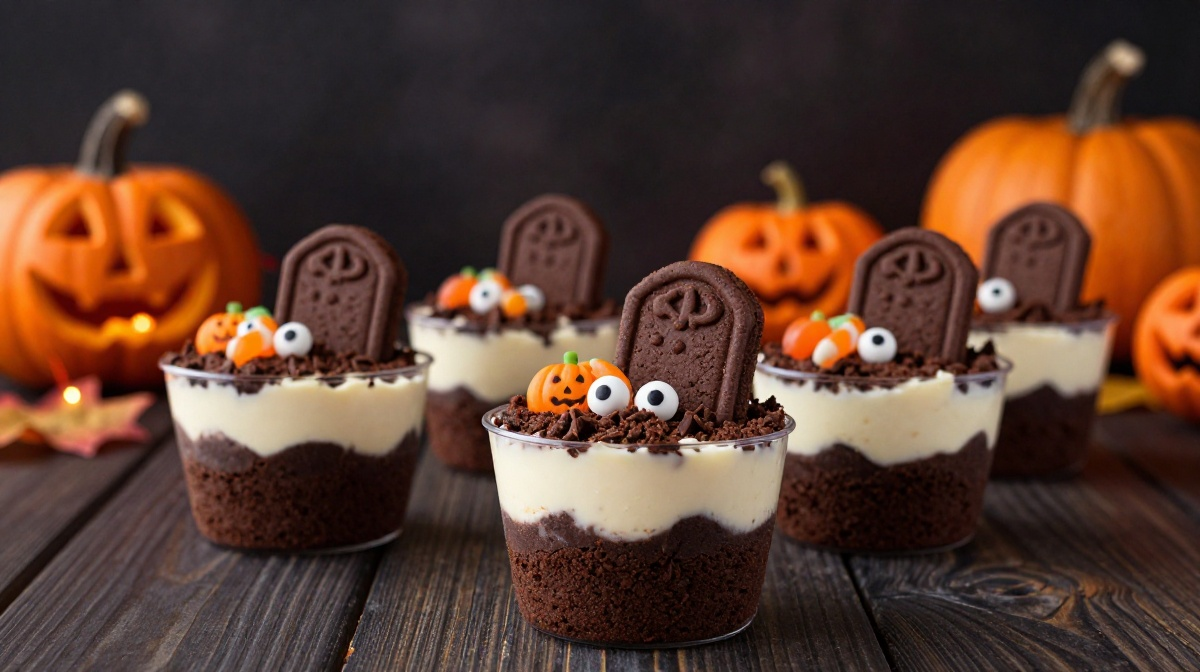
Every Halloween, I like making at least one dessert that looks far more complicated than it actually is. A few years ago, I put together these little graveyard brownie cups for a family Halloween night, mostly because I wanted something fun without spending the whole afternoon decorating.
I expected the kids to go for the candy first.
I was wrong.
The brownie cups disappeared so quickly that I barely got one for myself. Since then, I’ve made them several times, and I’ve learned that the secret isn’t fancy decorating. It’s keeping the brownie layer fudgy, using a simple chocolate-cookie “dirt,” and letting the decorations do most of the work.
These Spooky Halloween Dessert cups make a great party treat because everyone can grab one without cutting a cake or juggling a plate. They also give you plenty of room to get creative with tombstones, candy pumpkins, gummy worms, and little chocolate decorations.
And honestly, they don’t need to look perfect. A slightly crooked tombstone somehow makes the whole thing look more like a spooky little graveyard.
Why You’ll Love This Recipe

- Easy to make: You can use homemade brownies or your favorite boxed brownie mix.
- Perfect for parties: Individual cups make serving simple and mess-free.
- Kid-friendly decorating: Everyone can add their own spooky touches.
- Make-ahead friendly: Prepare the brownie and cookie layers ahead of time, then decorate before serving.
- Easy to customize: Change the toppings to match your Halloween theme.
Ingredients
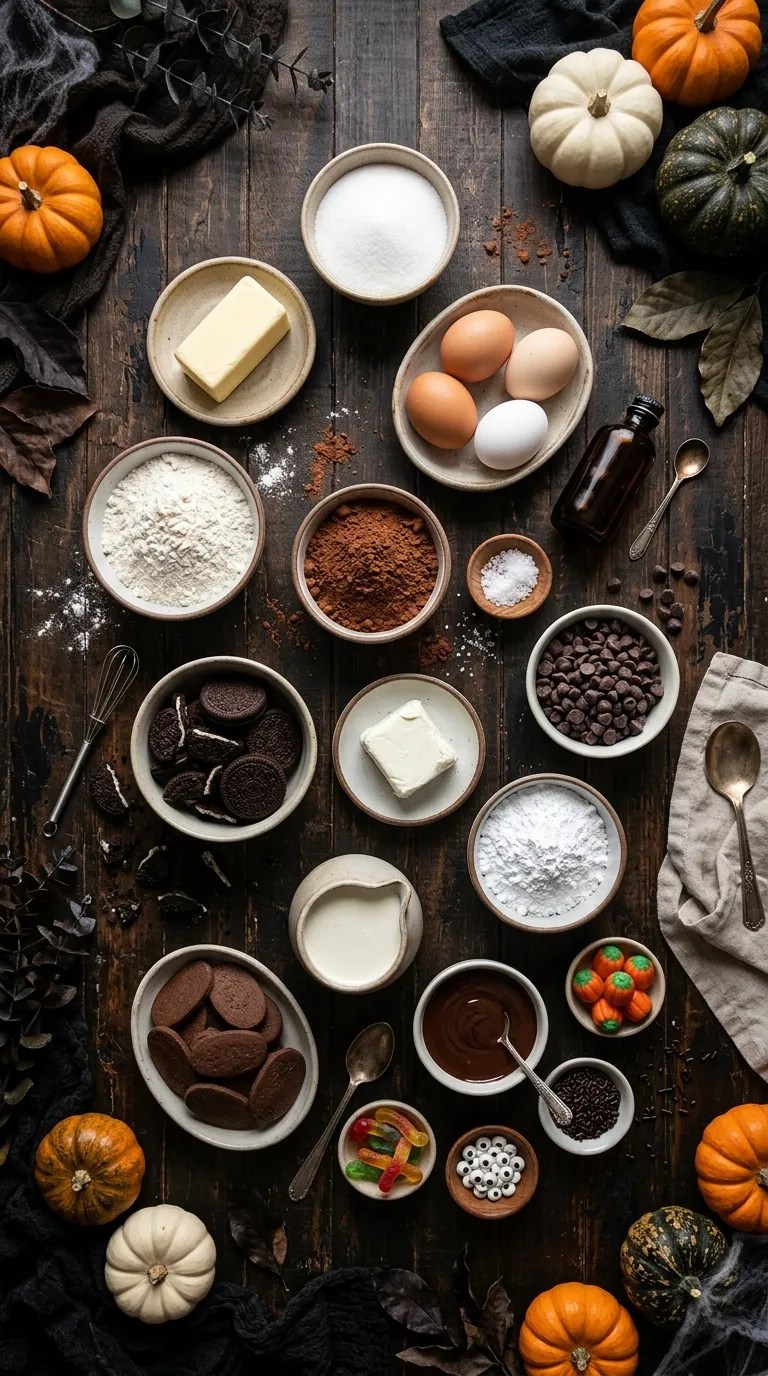
This recipe makes about 12 individual brownie cups.
For the Brownie Layer
- 1/2 cup (113 g) unsalted butter, melted
- 1 cup (200 g) granulated sugar
- 2 large eggs
- 1 teaspoon vanilla extract
- 3/4 cup (95 g) all-purpose flour
- 1/2 cup (43 g) unsweetened cocoa powder
- 1/4 teaspoon salt
- 1/2 cup (85 g) semi-sweet chocolate chips
You can replace the homemade brownie ingredients with one 18- to 19-ounce boxed brownie mix, prepared according to the package directions.
For the Chocolate “Dirt”
- 18 chocolate sandwich cookies
- 2 tablespoons melted butter
Regular chocolate sandwich cookies work well, but you can use any chocolate cookie with a dark, crumbly texture.
For the Creamy Layer
- 8 ounces (225 g) cream cheese, softened
- 1/3 cup (40 g) powdered sugar
- 1 teaspoon vanilla extract
- 1 cup (240 ml) cold heavy cream
- 2 tablespoons powdered sugar
For a slightly lighter texture, you can substitute prepared whipped topping for the homemade whipped cream.
For Decorating
- 12 small rectangular chocolate cookies or chocolate-covered wafer cookies for tombstones
- 1/3 cup melted chocolate, for writing on the tombstones
- 12 candy pumpkins, if available
- 1/4 cup gummy worms
- Candy eyes
- Chocolate sprinkles or extra crushed cookies
You don’t need every decoration on this list. I usually choose two or three so the dessert doesn’t become overly busy.
Step-by-Step Instructions
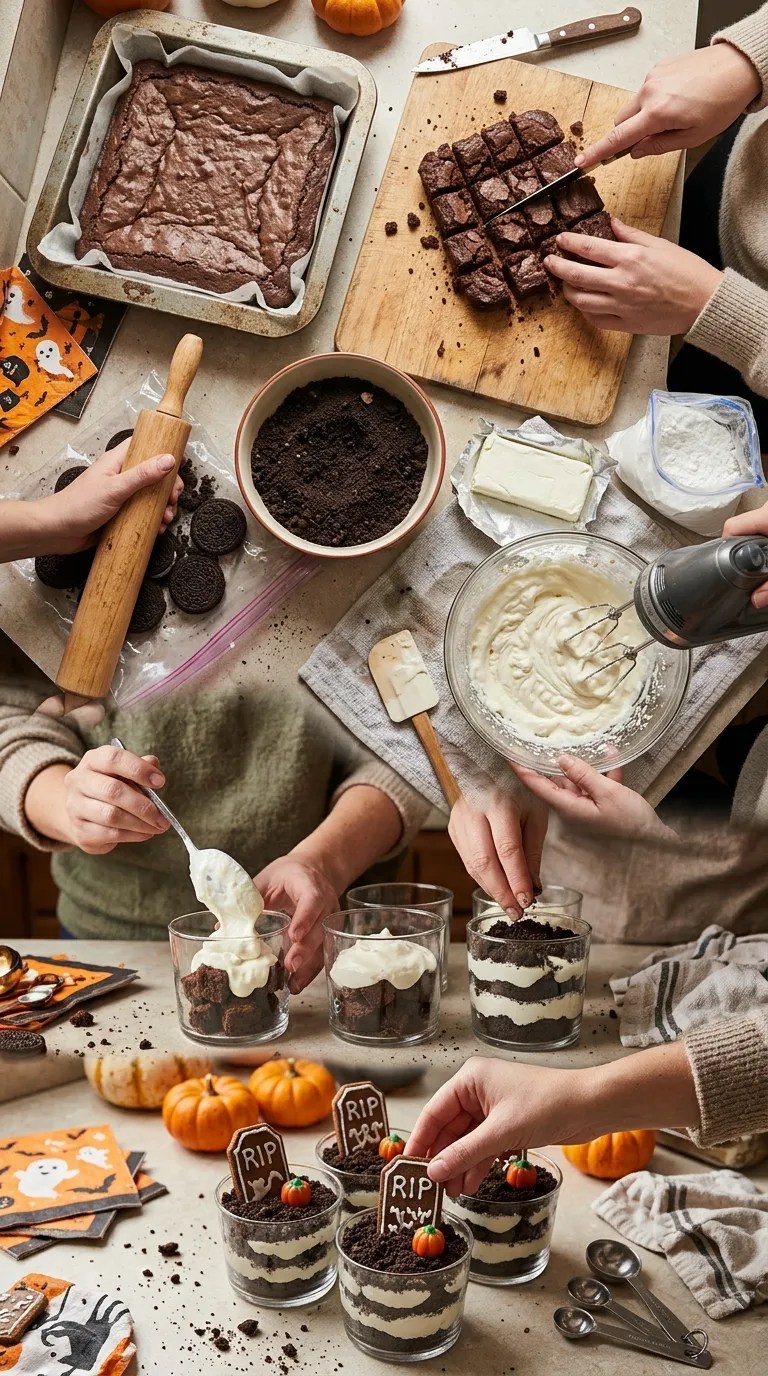
1. Bake the Brownies — 20 to 25 Minutes
Preheat your oven to 350°F (175°C).
Line an 8-inch square baking pan with parchment paper, leaving a little overhang on two sides. The overhang makes it much easier to lift the brownies out later.
In a medium bowl, whisk together the melted butter and sugar. Add the eggs and vanilla, then whisk until the mixture looks smooth and slightly glossy.
In another bowl, stir together the flour, cocoa powder, and salt.
Add the dry ingredients to the wet ingredients and stir just until you no longer see dry flour. Fold in the chocolate chips.
Pour the batter into the prepared pan and spread it into an even layer.
Bake for 20 to 25 minutes.
The center should look set but still slightly soft. Don’t wait for a completely dry-looking center, because that usually means the brownies will turn cakey.
Let the brownies cool completely.
2. Crush the Cookies — 5 Minutes
While the brownies cool, make your chocolate “dirt.”
Place the chocolate sandwich cookies in a food processor and pulse until you have fine crumbs.
If you don’t have a food processor, put the cookies into a sturdy zip-top bag and crush them with a rolling pin. That method takes a little longer, but it works perfectly well.
Stir the crumbs with the melted butter.
You want the mixture to resemble damp soil rather than a smooth paste.
3. Make the Creamy Layer — 5 to 7 Minutes
Place the softened cream cheese, powdered sugar, and vanilla in a mixing bowl.
Beat with a hand mixer or stand mixer for about 1 to 2 minutes, until smooth.
In a separate bowl, whip the cold heavy cream with the remaining powdered sugar until it forms soft peaks.
Fold the whipped cream into the cream cheese mixture gently.
I learned the hard way not to beat everything together aggressively at this stage. Gentle folding keeps the filling light and fluffy instead of turning it heavy.
4. Cut the Brownies — 5 Minutes
Once the brownies have cooled completely, lift them from the pan using the parchment paper.
Cut the brownies into small pieces.
Don’t worry about making every piece identical. You’ll break them up as you assemble the cups anyway.
If your brownies feel especially fudgy and sticky, chill them for about 20 minutes before cutting. Cold brownies are much easier to handle.
5. Assemble the Brownie Cups — 10 Minutes
Grab 12 small clear plastic cups, dessert cups, or small glass jars.
Add a layer of brownie pieces to the bottom of each cup.
Spoon or pipe a layer of the cream cheese mixture over the brownies.
Add a generous layer of crushed chocolate cookies.
Repeat the layers if your cups have enough room.
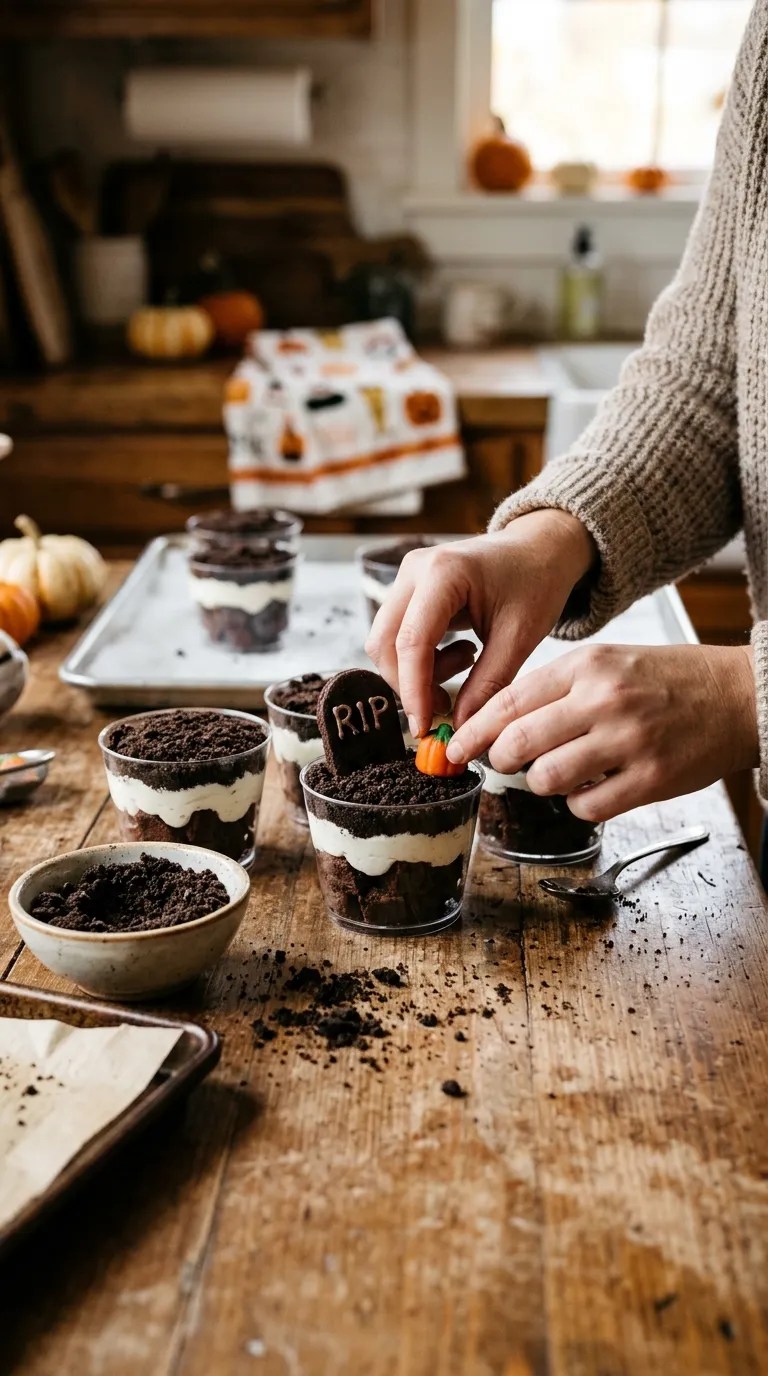
Finish each cup with the chocolate-cookie crumbs. This gives the top a dark, crumbly appearance that looks surprisingly convincing as “dirt.”
Don’t pack the cookie crumbs down too firmly. Loose crumbs look more natural and give you a little room for the decorations.
6. Make the Tombstones — 10 Minutes
Melt the chocolate carefully in the microwave in 15- to 20-second intervals, stirring between each interval.
Dip a toothpick or use a tiny piping bag to write simple messages on the chocolate cookies.
Try things like:
- RIP
- BOO
- EEK
- 13
- A simple spiderweb
You don’t need perfect lettering. In fact, slightly messy writing fits the Halloween theme beautifully.
Let the chocolate set for a few minutes.
7. Decorate the Graveyard — 5 Minutes
Push one decorated cookie into each brownie cup to create the tombstone.
Add a candy pumpkin beside it.
For extra Halloween drama, tuck a gummy worm partly into the cookie crumbs so it looks like it’s crawling out of the dirt.
Add candy eyes or a few chocolate sprinkles wherever you like.
This is the part where I usually let everyone decorate their own cup. It saves me time, and the results are always more entertaining than anything I could create myself.
8. Chill Before Serving — At Least 30 Minutes
Place the finished brownie cups in the refrigerator for at least 30 minutes before serving.
That short chill gives the creamy layer time to firm up and lets the flavors settle together.
If you’re serving them at a party, keep them refrigerated until you’re ready to put them out.
Pro Tips & Tricks
Let the Brownies Cool Completely
This matters more than it seems.
Warm brownies can soften the creamy layer and make the cups messy. Give the brownies enough time to cool before assembling.
If you’re short on time, place the cooled pan in the refrigerator for a while.
Crush the Cookies Finely
Large cookie chunks can make the layers difficult to spoon through.
Aim for mostly fine crumbs with a few slightly larger pieces. That combination gives the “dirt” a more natural texture.
Don’t Overfill the Cups
Leave a little space at the top.
Overfilled dessert cups look impressive for about five minutes, then decorations start falling everywhere. A little headroom makes the cups easier to carry and eat.
Make the Tombstones Ahead
You can decorate the chocolate cookies several hours ahead of time.
Once the chocolate has hardened, store the tombstones in an airtight container at room temperature until you assemble the desserts.
Keep the Dessert Cold
Because the recipe contains cream cheese and whipped cream, refrigerate the finished cups.
For the best texture, I like serving them within a day of assembly.
Variations & Substitutions
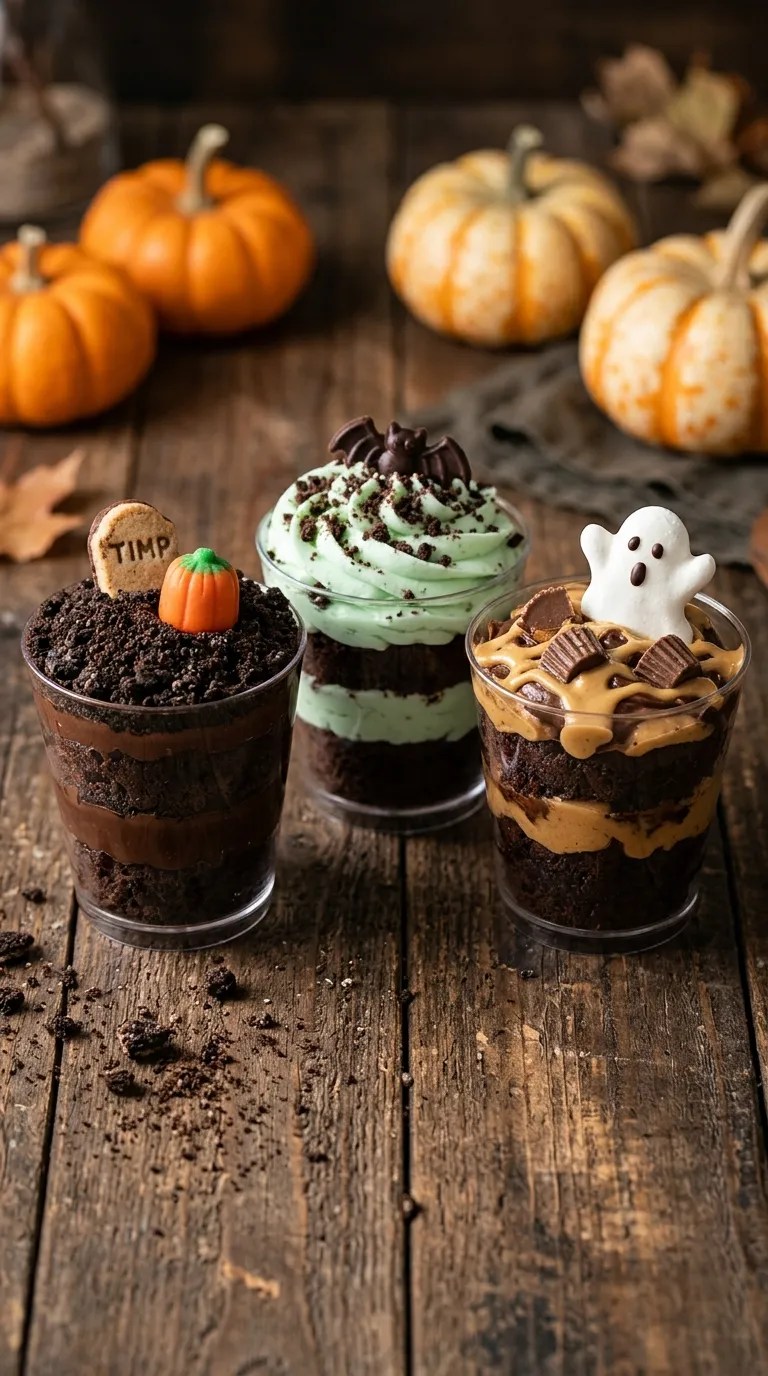
Use Peanut Butter Brownies
For a richer version, add small spoonfuls of creamy peanut butter between the brownie and cream layers.
You can also mix a little peanut butter into the cream cheese layer. Start with 2 tablespoons, taste, and add more if you want a stronger flavor.
If you’re serving guests with peanut allergies, skip this variation and avoid cross-contact with peanut-containing ingredients.
Make a Mint Chocolate Graveyard
Add 1/4 teaspoon peppermint extract to the cream cheese mixture.
Use chocolate sandwich cookies for the dirt and decorate with chocolate candies.
The mint gives the dessert a cool flavor that works especially well with the rich brownies.
Make It Egg-Free
Use your favorite egg-free brownie recipe or an egg-free boxed brownie mix.
For the creamy layer, the ingredients already work without eggs, so you only need to replace the brownie portion.
Try a Gluten-Free Version
Use a certified gluten-free brownie mix or your favorite gluten-free brownie recipe.
Choose gluten-free chocolate sandwich cookies and gluten-free decorations as well. Check individual labels because candy and cookie ingredients can vary by brand.
Serving Suggestions

These brownie cups fit right in at a Halloween party, school-safe family gathering, movie night, or fall dessert table.
I like placing them on a large tray and adding a few extra candy pumpkins around the cups. It makes the whole tray look decorated without requiring much additional work.
For a Halloween movie night, serve them alongside popcorn and warm apple cider.
If you’re hosting a larger gathering, make smaller portions in shot-size dessert cups. You’ll get more servings, and guests can enjoy a brownie cup without committing to a large dessert.
You can also set up a small decorating station. Put the undecorated brownie cups in the refrigerator and let everyone add their own tombstone, gummy worms, candy eyes, and pumpkins.
That works especially well when you’re cooking with children because the decorating becomes part of the activity.
Related Recipes:
- Easy Halloween Desserts for a Spooky Party
- Easy Halloween Sweets for Kids and Adults Spooky Chocolate
- Easy Halloween Dessert Idea Spiderweb Chocolate Brownies
- Easy Halloween Mummy Pizza Pockets Party Food Recipe
- Easy Halloween Dessert Ideas for Parties Spooky Chocolate Spiderweb Brownies
FAQ’s
Can I make these Halloween brownie cups ahead of time?
Yes. Bake the brownies and crush the cookies up to a day ahead.
You can also prepare the cream cheese mixture several hours before serving. Store each component separately in the refrigerator, then assemble the cups closer to party time.
For the freshest appearance, add the decorations shortly before serving.
How long do the finished brownie cups last?
Keep them covered in the refrigerator and enjoy them within about 2 to 3 days.
The brownies will soften as they sit next to the creamy layer and cookie crumbs, so the texture changes slightly over time.
For the best combination of textures, I prefer them on the first or second day.
Can I freeze this Halloween dessert?
You can freeze the brownie portion, but I don’t recommend freezing the fully assembled cups.
The whipped cream and cream cheese mixture can change texture after freezing and thawing, while the cookie crumbs can become soft.
If you want to prepare ahead, freeze the baked brownies separately. Thaw them in the refrigerator, then assemble the cups fresh.
What can I use instead of cream cheese?
Mascarpone can work as a substitute if you have it available.
You can also make a simple whipped-cream layer with heavy cream and powdered sugar. The finished dessert will have a lighter flavor and softer texture.
Why did my creamy layer turn runny?
The most common reason is warm cream cheese or cream that hasn’t whipped enough.
Make sure the cream stays cold and whip it until it reaches soft peaks before folding it into the cream cheese mixture.
Also, avoid overmixing after you combine the two.
Can I use boxed brownies?
Absolutely.
This is one of those recipes where a shortcut makes sense. If you have a favorite boxed brownie mix, use it.
The toppings and presentation create most of the Halloween effect, so you don’t need to spend extra time making brownies from scratch if you’re already busy preparing other party food.
Final Thought
There’s something wonderfully forgiving about these spooky brownie cups.
The brownies don’t need perfect edges. The cookie tombstones don’t need perfect writing. Even the decorations can look a little wonky, and somehow that makes the finished dessert more fun.
I especially love making these when Halloween is getting close and I want something that feels festive without turning the kitchen upside down.
Make the brownies, crush some cookies, layer everything into cups, and let the decorations take over. Before you know it, you’ll have a whole little chocolate graveyard ready for the dessert table.
And if your family starts picking off the candy pumpkins before dinner, I can’t promise I’ll judge them. Mine usually do the exact same thing.
Happy Halloween baking!
Leave a Reply
You must be logged in to post a comment.