

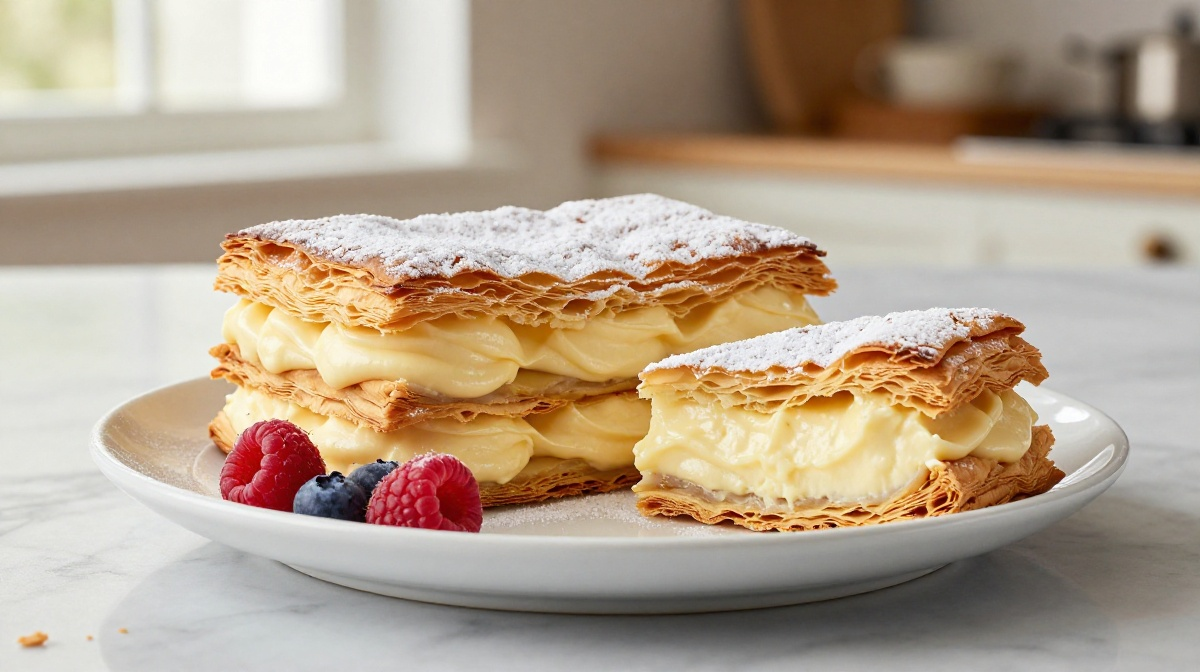
The first time I made a homemade Napoleon dessert, I had one of those moments where I wondered why I had waited so long. I had a package of puff pastry in the freezer, some milk in the fridge, and a craving for something creamy and crisp. That combination turned into one of the most satisfying desserts to come out of my kitchen.
I also learned a lesson the first time: do not rush the pastry cooling step. I stacked my first batch while the pastry was still slightly warm, and the layers softened almost immediately. It still tasted wonderful, but I wanted that lovely contrast between shattering pastry and silky cream.
After a few tries, I settled on a method that gives me crisp, golden pastry, a smooth vanilla custard, and just enough sweetness to make every bite feel special.
Napoleon dessert has roots in European pastry traditions and is closely associated with mille-feuille-style layered pastries. Different countries and families have their own versions, so you will find plenty of variations in the shape, filling, and finishing touches. My version keeps things approachable for a home kitchen while holding onto the classic layered character.
Why You’ll Love This Recipe

- It looks impressive without complicated decorating. The layers do most of the work for you.
- Store-bought puff pastry saves time. You can focus your energy on making a good custard.
- The filling uses everyday ingredients. Milk, eggs, sugar, and vanilla do most of the heavy lifting.
- You can prepare parts ahead. The pastry and custard both work well with a little advance planning.
- It feeds a crowd nicely. Cut it into small rectangles because this dessert is rich and satisfying.
Ingredients
For the flaky pastry
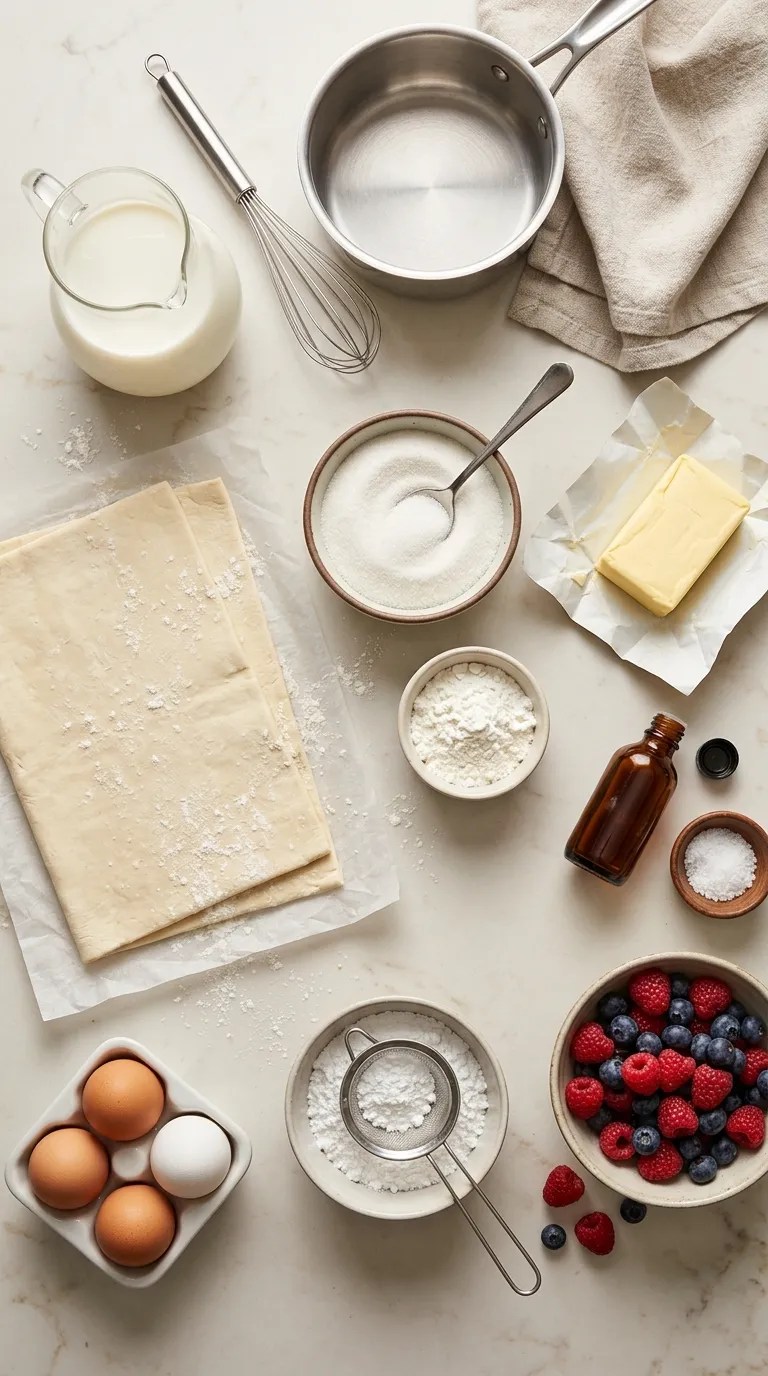
- 1 package (17.3 ounces/490 g) frozen puff pastry, thawed according to the package directions
- 1 tablespoon all-purpose flour, for dusting
- 1 tablespoon granulated sugar, optional, for a lightly sweet pastry surface
Shortcut: Frozen puff pastry works beautifully here. I usually choose an all-butter version when I can find one because I love the flavor, but a standard puff pastry works perfectly well too.
For the vanilla custard
- 3 cups (720 ml) whole milk
- 3 large egg yolks
- 1 large egg
- ¾ cup (150 g) granulated sugar
- ¼ cup (32 g) cornstarch
- 2 tablespoons unsalted butter
- 2 teaspoons pure vanilla extract
- ¼ teaspoon salt
You can use vanilla bean paste instead of vanilla extract if you have it. About 2 teaspoons gives the custard a lovely vanilla flavor and those little vanilla specks that make the filling look extra special.
For finishing
- 1 cup (120 g) powdered sugar
- 2–3 tablespoons milk or heavy cream, as needed
- 1 teaspoon vanilla extract
- 1–2 tablespoons finely chopped toasted nuts, optional
If you prefer a less sweet finish, simply dust the finished Napoleon with powdered sugar instead of making a glaze.
Step-by-Step Instructions
1. Thaw the puff pastry
Time: 30–45 minutes
Take the puff pastry out of the freezer and let it thaw according to the package instructions.
You want it flexible enough to unfold without cracking, but still cool to the touch. Do not leave it sitting on the counter until it becomes warm and sticky.
While it thaws, line two baking sheets with parchment paper and preheat your oven to 400°F (200°C).
I like to get everything ready before opening the pastry because puff pastry becomes much easier to handle when the kitchen feels organized.
2. Make the pastry layers
Time: 10 minutes
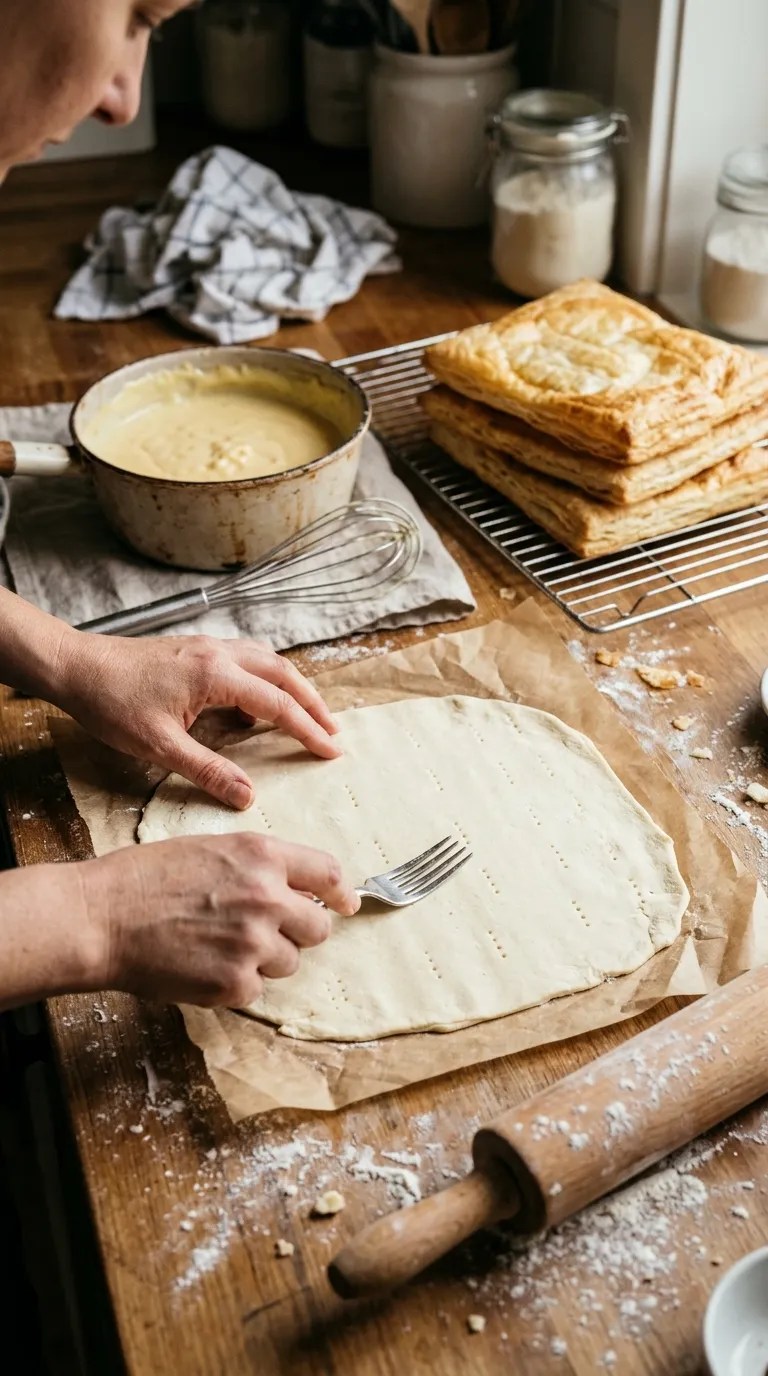
Lightly flour your work surface and unfold the puff pastry.
If your package contains two sheets, keep them separate. Gently roll each sheet just enough to smooth out any creases and create an even rectangle.
Do not roll the pastry paper-thin. You want enough thickness for the baked layers to puff and become crisp.
Transfer the pastry to your prepared baking sheets.
Prick the pastry all over with a fork. This step helps control the puffing so you get flatter, more manageable layers instead of giant bubbles.
For a slightly sweeter crust, sprinkle a very light layer of granulated sugar over the pastry.
3. Bake until golden and crisp
Time: 15–20 minutes
Place the baking sheets in the preheated oven.
Bake until the pastry turns deeply golden and looks dry and crisp. Depending on your oven and the thickness of your pastry, this usually takes around 15 to 20 minutes.
Halfway through baking, take a quick look. If the pastry has puffed dramatically, you can gently press it down with another sheet pan placed on top. Use care because the pans will be hot.
I discovered this trick after making a batch that puffed so high I could barely stack the layers evenly. A little pressure from a second pan gave me much flatter, neater pieces.
Once baked, transfer the pastry to a wire rack and let it cool completely.
Do not assemble the dessert while the pastry remains warm.
4. Start the custard
Time: 5 minutes
While the pastry cools, make the vanilla custard.
Pour the milk into a medium saucepan and heat it over medium heat until it becomes hot and steamy. Do not let it boil aggressively.
In a separate bowl, whisk together the egg yolks, whole egg, sugar, cornstarch, and salt.
Keep whisking until the mixture looks smooth and slightly lighter in color.
5. Temper the eggs
Time: 3–4 minutes
Slowly pour about 1 cup of the hot milk into the egg mixture while whisking constantly.
This step gently raises the temperature of the eggs.
Pour the warmed egg mixture back into the saucepan with the remaining milk.
Keep whisking as you do this. A whisk works much better than a spoon because it keeps the cornstarch from settling and helps prevent lumps.
6. Cook the custard until thick
Time: 5–8 minutes
Place the saucepan over medium heat and whisk continuously.
After several minutes, the custard will begin to thicken. Keep cooking until it reaches a pudding-like consistency and you see slow bubbles breaking through the surface.
Once it thickens, cook it for about another minute while whisking.
Remove the saucepan from the heat.
Stir in the butter and vanilla extract until completely smooth.
The finished custard should look glossy and thick enough to hold its shape on a spoon.
7. Cool the custard properly
Time: 30–60 minutes
Transfer the custard to a shallow bowl.
Press a piece of plastic wrap directly against the surface of the custard. This prevents a thick skin from forming while it cools.
Let it cool until no longer warm, then refrigerate it until thoroughly chilled.
If you have time, make the custard several hours ahead. Cold custard becomes easier to spread and makes assembly much less messy.
8. Trim the pastry
Time: 5 minutes
Once the pastry has completely cooled, use a sharp serrated knife to trim away any uneven edges.
You can cut the sheets into neat rectangles before assembly or build one large Napoleon and cut it afterward.
I prefer cutting the pastry into individual rectangles first. It makes portioning easier and prevents the delicate finished dessert from cracking when I cut it.
Save the trimmed pastry pieces. Crush them into crumbs and use them as a topping.
That little pile of pastry scraps has saved me more than once when a layer cracked during assembly.
9. Assemble the Napoleon
Time: 10–15 minutes
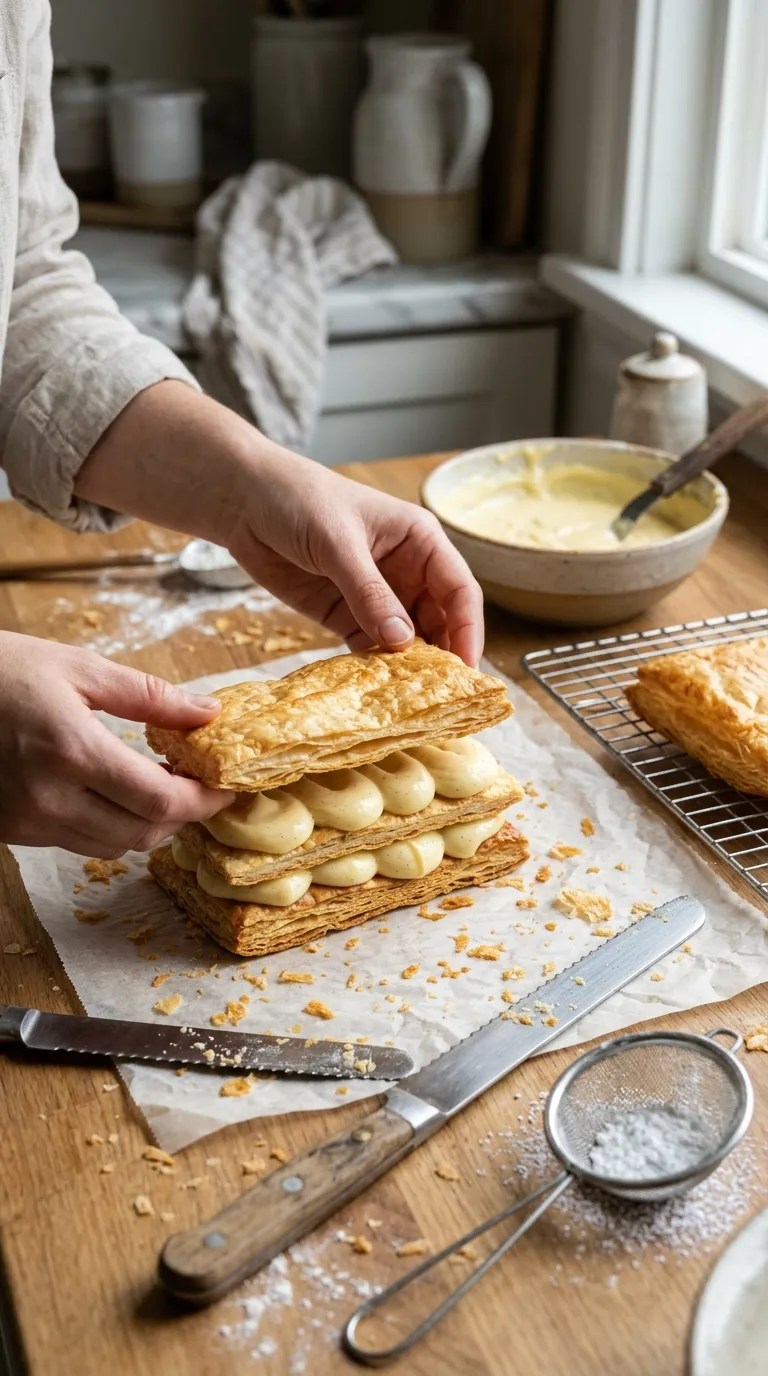
Place one piece of pastry on your work surface.
Spread a generous but even layer of chilled vanilla custard over the top.
Add another pastry layer and gently press it into place.
Repeat with another layer of custard and finish with a pastry layer.
Do not press too hard. You want the layers to sit together without crushing all the flaky pastry.
For individual Napoleons, two layers of custard and three layers of pastry make a beautiful dessert.
If you prefer a taller dessert, you can add another pastry and custard layer, but keep in mind that taller Napoleons become trickier to cut and eat.
10. Make the simple glaze
Time: 3 minutes
Add the powdered sugar to a small bowl.
Whisk in 2 tablespoons of milk or cream and the vanilla extract.
If the glaze looks too thick, add a few drops more liquid. If it becomes too thin, add another spoonful of powdered sugar.
You want a spreadable glaze that sits on top of the pastry instead of running down the sides.
Spread a thin layer over the top of each Napoleon.
If you like, sprinkle the tops with finely chopped toasted nuts or a few of the reserved pastry crumbs.
11. Chill before serving
Time: 1–2 hours
Place the assembled Napoleons in the refrigerator for at least 1 hour before serving.
This gives the custard time to settle between the pastry layers.
The pastry will soften slightly from the moisture in the filling, but it should still retain some crispness.
For the best texture, I like serving them the same day I assemble them.
Pro Tips & Tricks
Keep the pastry cold
Puff pastry behaves best when it stays cool before baking. If your kitchen feels warm and the pastry starts becoming soft, put it in the refrigerator for 10–15 minutes before continuing.
Cold butter creates the flaky layers that make this dessert so enjoyable.
Don’t skip the fork
Pricking the pastry all over helps prevent uneven bubbles.
You want a pastry layer that stays relatively flat and stacks neatly. A few minutes with a fork makes a noticeable difference.
Whisk the custard constantly
The custard can go from smooth to lumpy surprisingly quickly.
Keep the whisk moving, especially once the mixture starts thickening. If you notice a few small lumps despite your efforts, immediately pass the hot custard through a fine-mesh sieve before cooling it.
Let everything cool before assembly
This is probably my biggest Napoleon lesson.
Warm custard can soften the pastry too quickly, while warm pastry can make the custard loose. Cool both components first, and assembly becomes much easier.
Assemble close to serving time
You can prepare the pastry and custard a day ahead, but I recommend assembling the dessert a few hours before serving.
The longer the custard sits against the pastry, the softer the layers become.
Make neat cuts with a serrated knife
A serrated knife works better than a smooth chef’s knife for this dessert.
Use gentle sawing motions instead of pushing straight down. You will get cleaner layers and fewer crushed pastry flakes.
Variations & Substitutions
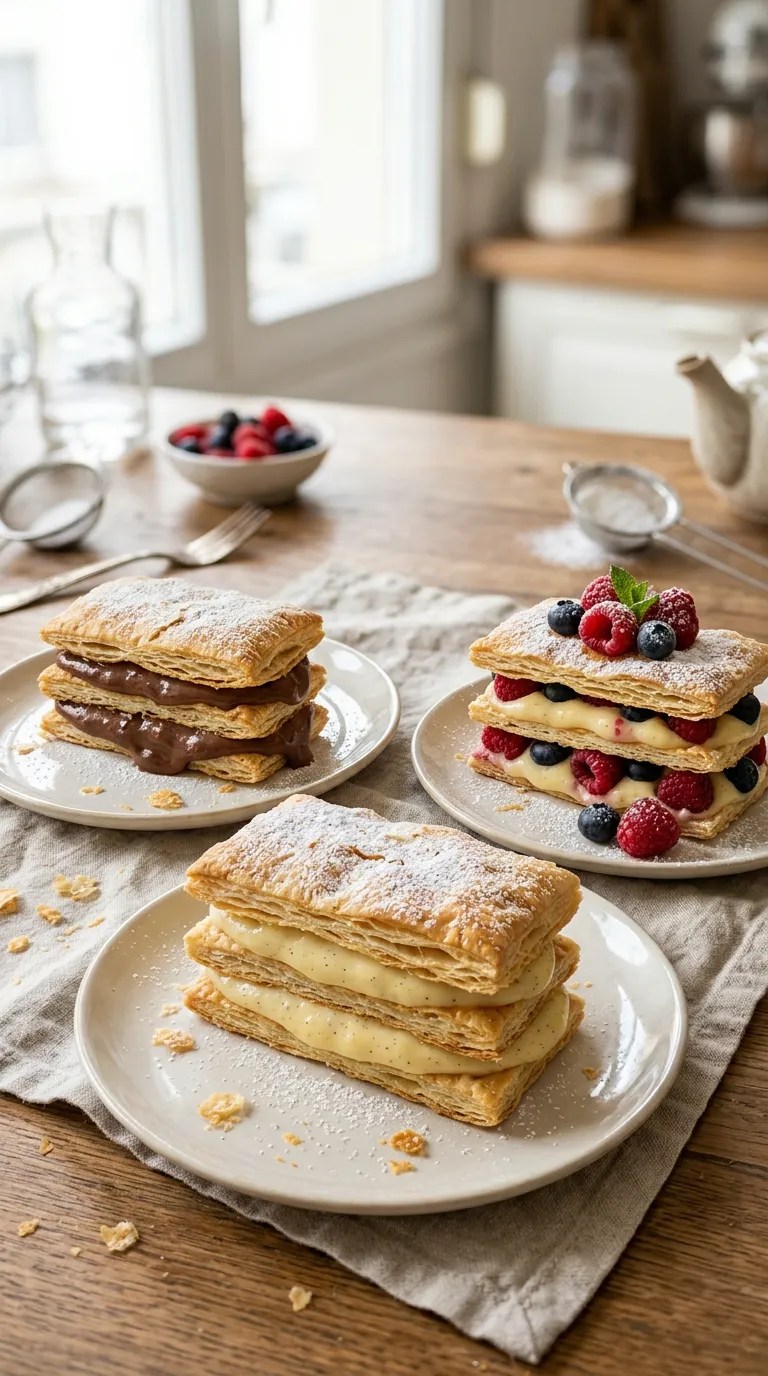
Berry Napoleon
Add a thin layer of fresh raspberries, strawberries, or blueberries between the custard layers.
Choose berries that are firm and dry. Pat them gently with a paper towel before adding them so they do not introduce unnecessary moisture into the pastry.
A little lemon zest in the custard also works beautifully with berries.
Chocolate Napoleon
For a chocolate version, add 2 tablespoons of unsweetened cocoa powder to the custard mixture along with the cornstarch.
You can also melt 3 ounces (85 g) of semisweet chocolate and stir it into the finished hot custard.
The result tastes richer and makes a wonderful dessert for chocolate lovers.
Citrus-Vanilla Napoleon
Add 1 tablespoon of finely grated orange zest to the custard before chilling.
The citrus cuts through the richness of the pastry and gives the dessert a bright flavor without changing the basic recipe.
You can also replace part of the vanilla glaze with a little fresh orange juice for a simple citrus finish.
Dairy-Free Option
For a dairy-free adaptation, use a dairy-free puff pastry and replace the whole milk with an unsweetened plant-based milk that works well in cooked custards.
Choose a product with a fairly neutral flavor so it does not overpower the vanilla.
The texture may differ slightly from the original, so I recommend testing the custard once before making it for a special occasion.
Serving Suggestions

Homemade Napoleon dessert makes a lovely finish for a dinner party because you can prepare the pastry and custard ahead of time.
It also fits nicely on a holiday dessert table. Cut the pieces smaller when serving several desserts so guests can sample a little of everything.
For a simple presentation, place each Napoleon on a small dessert plate and dust the plate with a little powdered sugar.
Fresh berries make an easy garnish, while a few mint leaves add a fresh-looking finish.
If you serve coffee, choose something with a balanced roast rather than an extremely bitter brew. Tea works beautifully too, especially black tea or a mild vanilla tea.
For a more elegant dessert plate, add a few fresh berries beside the Napoleon and a small spoonful of lightly sweetened whipped cream.
I also love serving these slightly chilled rather than straight from the refrigerator. Let them sit at room temperature for about 10 minutes before serving so the custard loses some of its chill while the pastry remains pleasantly crisp.
Related Recipes:
- Fancy Desserts That Look Impressive but Are Easy to Make
- Easy Pear Dessert Recipe for Fall
- Easy Dessert Recipes Anyone Can Make
- Quick and Easy Dessert Recipes for Busy Days
FAQ’s
Can I make Napoleon dessert the day before?
Yes, but I recommend preparing the components separately.
Bake the pastry and cool it completely, then store it in an airtight container at room temperature. Keep the custard covered in the refrigerator.
Assemble the Napoleons on the day you plan to serve them for the best pastry texture.
How long does homemade Napoleon dessert last in the refrigerator?
Once assembled, Napoleon dessert is best within about 1–2 days.
The custard continues to soften the pastry as it sits, so the layers become less crisp over time.
Keep leftovers covered and refrigerated because the dessert contains a cooked egg-and-milk custard.
Can I freeze Napoleon dessert?
I would not freeze the fully assembled dessert if you want crisp, flaky layers.
Freezing and thawing can change the texture of the custard and make the pastry softer.
Instead, freeze the unbaked puff pastry according to its package instructions and make the custard fresh. You can also bake the pastry ahead and freeze the cooled pastry layers well wrapped.
Why did my puff pastry become too puffy?
Puff pastry naturally expands as it bakes because the water in the butter and dough creates steam.
For Napoleon dessert, you want relatively flat layers. Prick the pastry with a fork before baking and, if necessary, gently weigh it down with another baking sheet during part of the baking time.
Why did my custard turn lumpy?
The most common causes are uneven heating or insufficient whisking.
Cook the custard over medium heat rather than blasting it over high heat. Whisk constantly once it starts thickening.
If lumps appear, strain the custard through a fine-mesh sieve while it is still warm.
Can I use store-bought vanilla pudding instead of homemade custard?
You can, especially when you need a shortcut, but homemade vanilla custard gives the dessert a richer, fresher flavor.
If you use prepared pudding, choose a thick variety so it does not squeeze out when you stack the pastry.
Final Thought
There is something wonderfully old-fashioned about a dessert made from crisp pastry and creamy vanilla custard. It looks fancy on a plate, but once you break the recipe into its two main parts, it feels much less intimidating.
My favorite part comes right before serving, when I make that first cut and hear the pastry crack beneath the knife. That little sound tells me the layers are ready.
If your first Napoleon doesn’t look perfectly neat, don’t worry. Mine certainly didn’t. The flaky crumbs, uneven edges, and little imperfections are part of the fun of making pastry at home.
Give this homemade Napoleon dessert a try when you want something that feels special without requiring complicated decoration. And if you add berries, chocolate, citrus, or your own favorite twist, I’d love to hear how your version turns out.
Leave a Reply
You must be logged in to post a comment.