

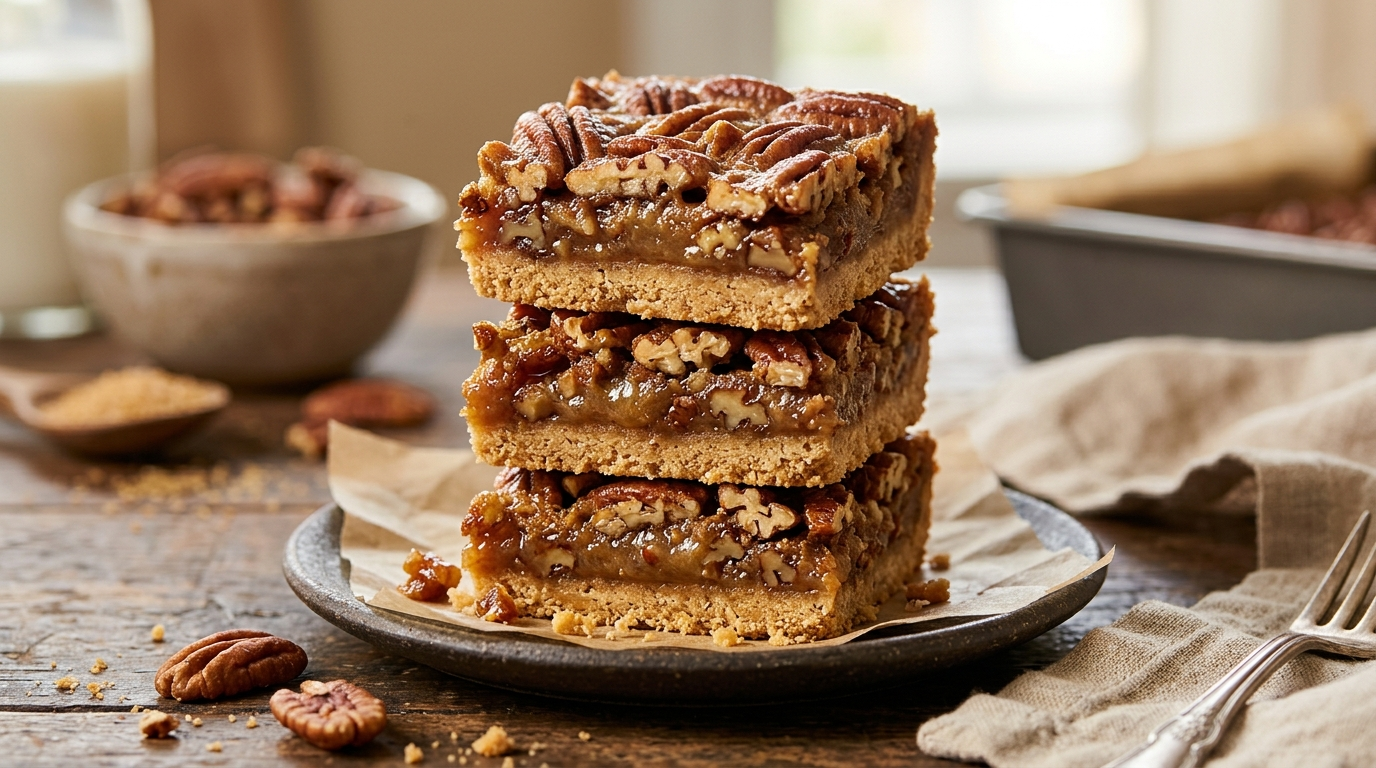
I learned one important lesson the first time I made Pecan Pie Bar With Graham Cracker Crust: patience matters more than you think.
The kitchen smelled like toasted pecans, brown sugar, and butter, and I could barely wait for the pan to cool. I sliced into it while the filling still had a little too much warmth, and the first bar looked more like a delicious pile of pecans than a neat dessert square.
It still tasted fantastic.
The next time, I let the pan cool completely before cutting it. That small change made all the difference. The graham cracker crust stayed crisp and buttery, while the pecan layer settled into a chewy, caramel-like filling that held its shape beautifully.
That combination is exactly why I keep coming back to this recipe. It has the cozy flavor of pecan pie, but you don’t have to fuss with rolling pastry or crimping a pie crust. Everything bakes in one square pan, and you can cut it into small bars that are easy to serve at a holiday table, bake sale, family gathering, or afternoon coffee break.
Why You’ll Love This Recipe

- No pie crust to roll: The graham cracker base comes together quickly and presses right into the pan.
- Big pecan pie flavor: Brown sugar, butter, vanilla, and toasted pecans create that familiar cozy flavor.
- Easy to make ahead: The bars actually become easier to slice after they have time to cool and set.
- Great for sharing: One 9-by-13-inch pan gives you plenty of small dessert bars.
- Beginner-friendly: You don’t need special pastry skills or complicated equipment.
Ingredients
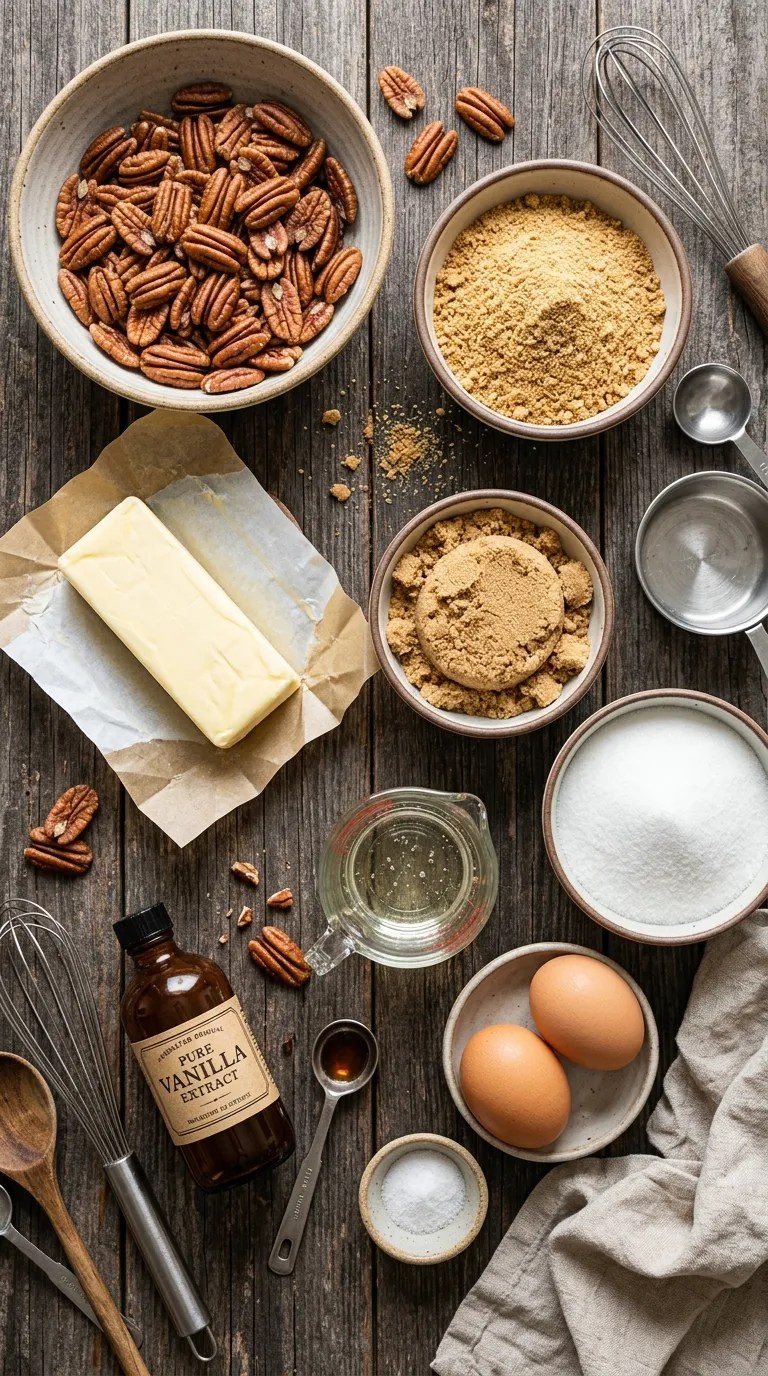
For the Graham Cracker Crust
- 2 cups graham cracker crumbs, about 14–16 full graham cracker sheets
- 1/2 cup unsalted butter, melted
- 1/4 cup granulated sugar
- 1/4 teaspoon fine salt
If you use salted butter, reduce the added salt to a small pinch.
For the Pecan Filling
- 1 cup packed light brown sugar
- 1/2 cup unsalted butter
- 1/2 cup light corn syrup
- 2 large eggs
- 1 teaspoon pure vanilla extract
- 1/2 teaspoon fine salt
- 2 cups pecan halves or roughly chopped pecans
I like to chop about half of the pecans and leave the rest in larger pieces. The smaller pieces help the filling feel substantial throughout the bar, while the larger pieces give you those lovely pecan-filled bites on top.
A Few Helpful Ingredient Swaps
You can use dark brown sugar instead of light brown sugar for a deeper molasses flavor.
For the pecans, chopped pecans work perfectly if you want easier cutting. Pecans taste especially good here, but walnuts can work in a pinch if that’s what you have.
You can also use homemade graham cracker crumbs or store-bought crumbs. Just measure the crumbs by volume after crushing them.
Step-by-Step Instructions
1. Prepare the Pan — 5 Minutes
Heat your oven to 350°F (175°C).
Line a 9-by-13-inch baking pan with parchment paper, leaving a little overhang on two sides. The overhang gives you handles for lifting the cooled bars from the pan later.
Lightly grease the exposed sides of the pan.
I strongly recommend parchment here. It makes cutting and transferring the bars much less frustrating.
2. Make the Graham Cracker Crust — 5 Minutes
Place the graham cracker crumbs, granulated sugar, salt, and melted butter in a bowl.
Stir until every crumb looks lightly coated with butter. When you squeeze a little mixture in your hand, it should hold together rather than crumble apart immediately.
Pour the mixture into the prepared pan.
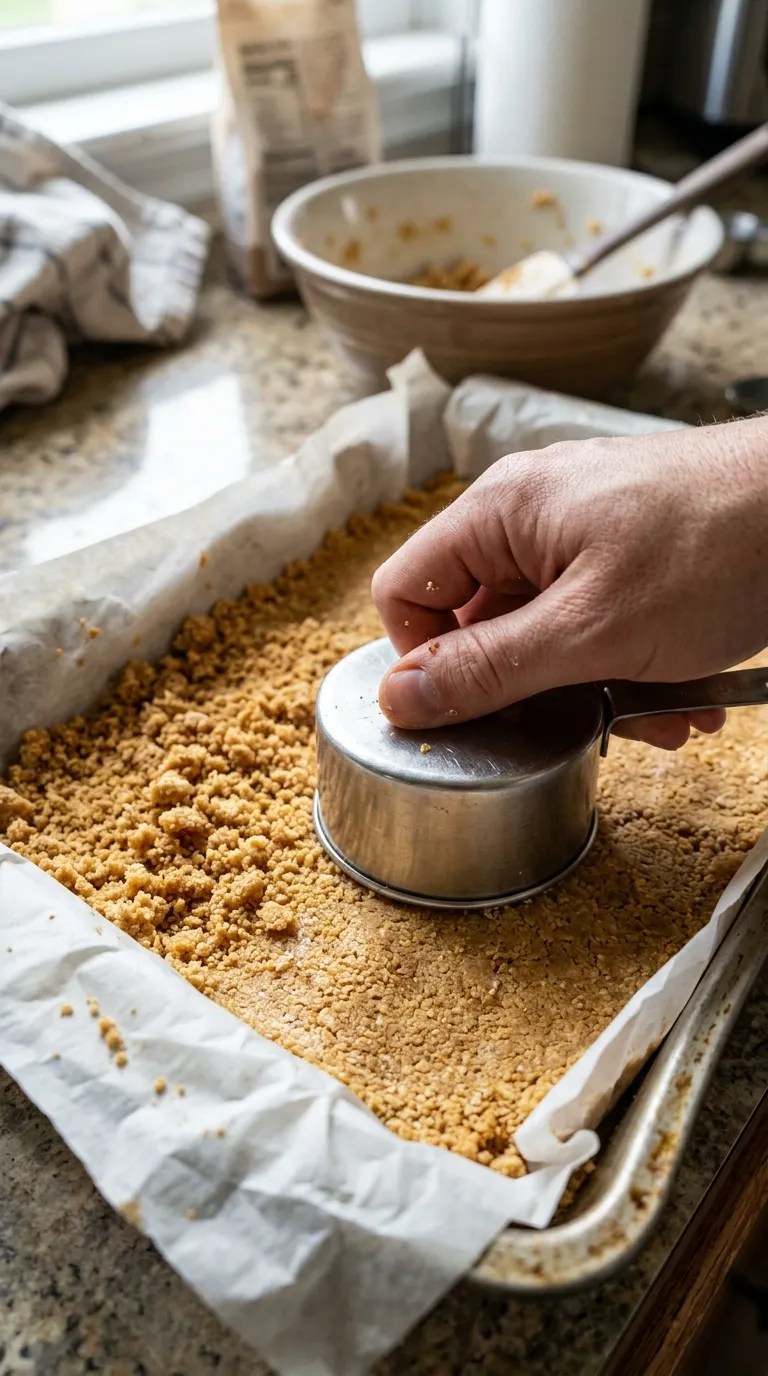
Use the bottom of a measuring cup or a flat glass to press the crumbs into an even layer. Pay special attention to the corners, where loose crumbs like to hide.
Bake the crust for 8–10 minutes, just until it looks set and smells buttery.
You don’t need to wait for a deep golden-brown color. The crust will continue baking with the filling.
3. Toast the Pecans — About 5–7 Minutes
While the crust bakes, spread the pecans on a baking sheet.
Toast them in the oven for about 5–7 minutes, stirring once halfway through.
Watch them closely. Pecans can go from fragrant to over-toasted surprisingly quickly.
Once you smell that warm, nutty aroma, take them out and let them cool for a few minutes.
This step isn’t absolutely mandatory, but I think it gives the finished bars a much richer flavor.
4. Make the Pecan Filling — About 8 Minutes
Melt the butter in a medium saucepan over medium-low heat.
Add the brown sugar and corn syrup. Stir until the butter has melted completely and the mixture looks smooth.
Remove the saucepan from the heat.
Let it cool for a few minutes so it’s warm rather than piping hot.
Whisk in the eggs one at a time, followed by the vanilla and salt.
The mixture should look glossy and smooth.
Don’t add the eggs while the butter mixture is extremely hot. Give it those few minutes to cool first and whisk constantly as you add them.
5. Add the Pecans
Stir the toasted pecans into the filling.
At this point, the mixture should smell like you have somehow turned your entire kitchen into a little pecan bakery.
If your pecans feel very warm from the oven, that’s fine. Just make sure the filling itself isn’t hot enough to cook the eggs when you add them.
6. Pour Over the Crust — 2 Minutes
Take the baked crust from the oven.
Pour the pecan mixture evenly over the warm crust.
Use a spatula to spread the pecans into an even layer if needed.
You want the filling to reach the corners without disturbing the crust underneath.
7. Bake Until Set — 25–30 Minutes
Return the pan to the oven and bake at 350°F (175°C) for about 25–30 minutes.
Start checking around the 25-minute mark.
The edges should look set, and the center should have a slight jiggle when you gently move the pan. It shouldn’t look liquid or sloshy.
Don’t wait until the center becomes completely firm in the oven. The filling continues to set as it cools.
If the top starts browning more quickly than you’d like, loosely cover the pan with foil for the final few minutes.
8. Cool Completely — At Least 2 Hours
This is the part I used to rush.
Don’t.
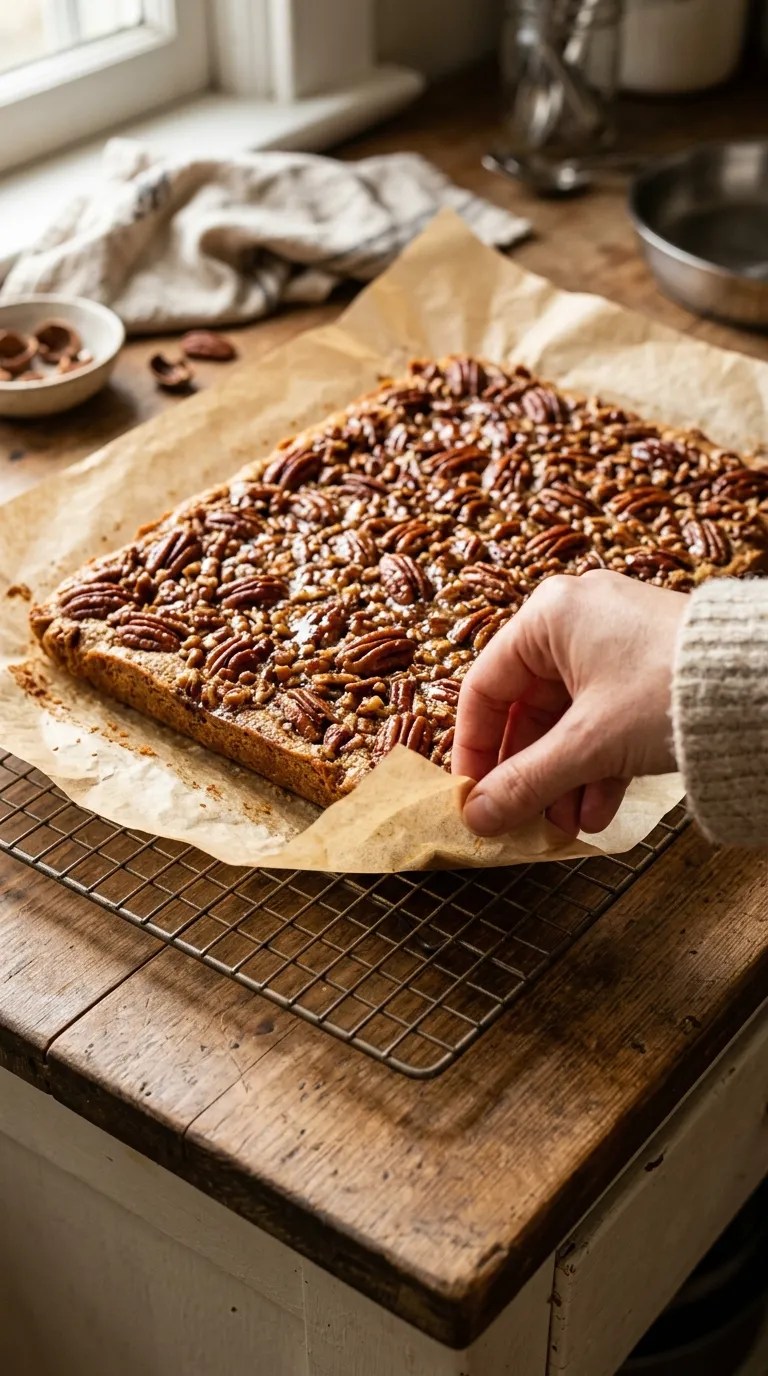
Set the pan on a wire rack and let the bars cool completely at room temperature. For the cleanest slices, refrigerate them for another 30–60 minutes after they reach room temperature.
The filling firms up as it cools, so cutting too early can give you messy bars.
9. Slice and Serve
Use the parchment overhang to lift the entire slab from the pan.
Place it on a cutting board.
For neat squares, use a sharp knife and wipe the blade between cuts.
I usually cut these into 24 small bars because they’re rich enough that a little square feels satisfying. For a larger dessert, cut the slab into 16 bars.
Pro Tips & Tricks
Don’t Pack the Graham Cracker Crust Too Loosely
A loose crust can crumble when you pick up the bars.
Press it firmly and evenly, especially around the edges and corners. A flat-bottomed measuring cup works better than your fingers for creating a compact, level surface.
Don’t Overbake the Filling
The center should still have a gentle jiggle when you take the bars out.
If you bake until the middle looks completely firm, you may end up with a filling that’s firmer and less chewy once it cools.
Think of it like a pecan pie: the filling finishes setting after it leaves the oven.
Let the Bars Cool Before Refrigerating
I know the temptation to move the hot pan straight into the refrigerator.
Instead, let it cool at room temperature first. Once it’s no longer hot, refrigerate it if you want to speed up the final setting.
Use Parchment With Handles
Leave enough parchment sticking above the long sides of the pan to grab comfortably.
Once the bars have cooled, you can lift them out in one piece instead of trying to pry individual squares from the pan.
Store Them Airtight
Keep leftover bars in an airtight container.
They’ll stay good at room temperature for about 2 days, or you can refrigerate them for roughly 5 days. Refrigeration makes them firmer, so let them sit at room temperature for a little while before serving if you prefer a softer texture.
Make Them Ahead
These bars make an excellent make-ahead dessert.
Bake them the day before you plan to serve them, let them cool completely, cover them, and refrigerate. The next day, simply slice and arrange them on a serving platter.
That also takes one dessert off your holiday-day to-do list.
Variations & Substitutions
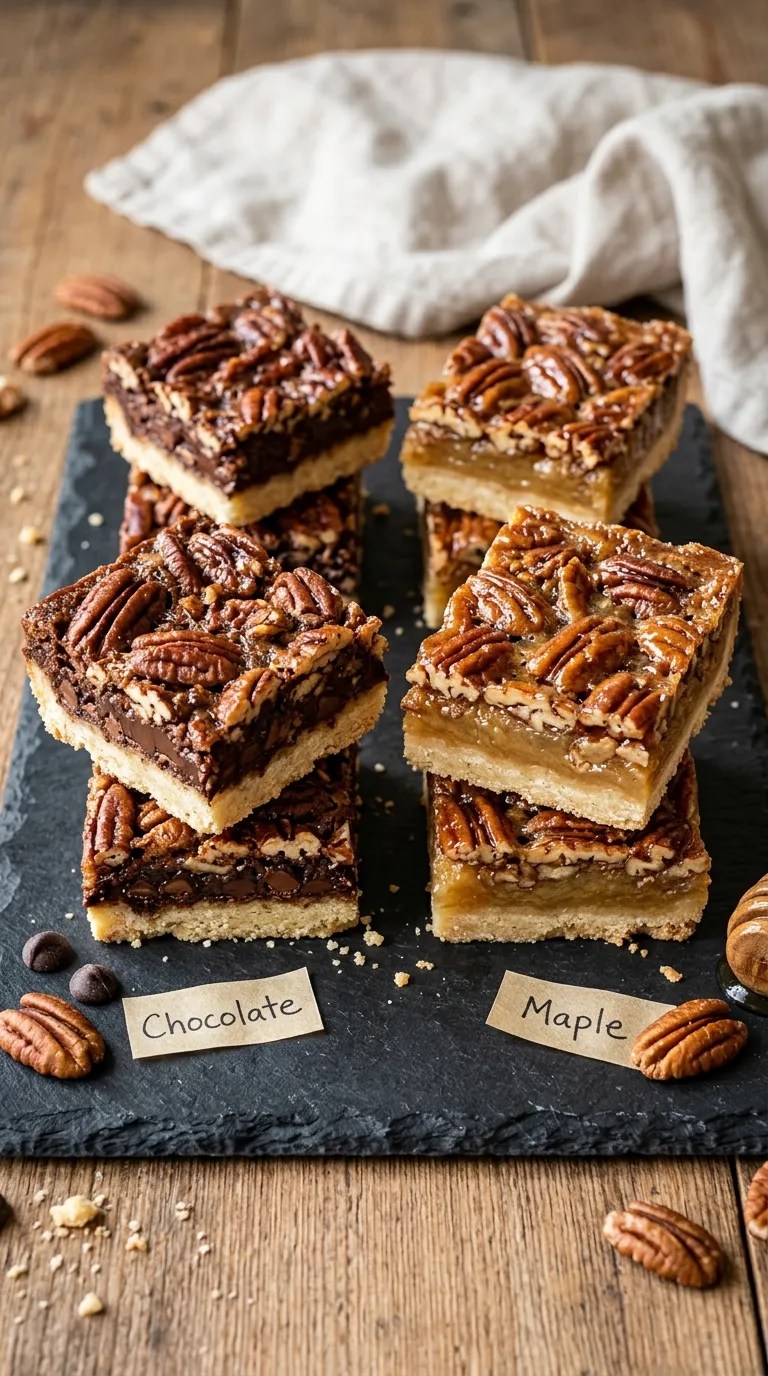
Chocolate Pecan Bars
For a chocolate twist, sprinkle about 1/2 cup semisweet chocolate chips over the warm graham cracker crust before adding the pecan filling.
The chocolate melts into little pockets beneath the pecans, giving the bars a richer dessert flavor.
Maple Pecan Bars
Replace about half of the corn syrup with pure maple syrup.
The filling will have a more pronounced maple flavor, which pairs beautifully with pecans and brown sugar. Because changing liquid ingredients can affect texture, keep an eye on the filling as it bakes and rely on the visual cues rather than a strict minute-by-minute bake time.
Gluten-Free Pecan Bars
Use certified gluten-free graham crackers and make sure your other packaged ingredients carry the appropriate gluten-free labeling for your needs.
The rest of the recipe can remain essentially the same.
A Little Orange Zest
If you want something slightly brighter, add 1 teaspoon finely grated orange zest to the filling along with the vanilla.
It’s a small addition, but orange and pecan make a surprisingly good combination.
Serving Suggestions

These bars fit almost anywhere you would normally serve pecan pie.
For Thanksgiving or another holiday meal, cut them into small squares and arrange them on a platter alongside other desserts. Their compact size makes it easy for everyone to grab one without committing to a giant slice of pie.
For a casual afternoon treat, serve a bar with coffee or tea.
If you’re serving them warm, give each piece a few seconds in the microwave and add a small scoop of vanilla ice cream. The contrast between the warm, nutty bar and cold ice cream is hard to beat.
You can also dust the finished bars very lightly with powdered sugar just before serving. I prefer keeping this optional because the bars already have plenty of sweetness.
For parties, I like cutting the bars into smaller bite-sized pieces. You get more servings from the pan, and people can try one without needing a fork and plate.
Related Recipes:
- How to Make Pumpkin Cupcakes With Cinnamon Cream Cheese Frosting
- Easy Pumpkin Cheesecake Recipe for Thanksgiving
- Creamy Pumpkin Cheesecake Without Sour Cream
- How to Make Pumpkin Cheesecake Without Cream Cheese
- Homemade Pecan Pie Bars for Thanksgiving
FAQ’s
Can I make Pecan Pie Bar With Graham Cracker Crust ahead of time?
Absolutely. These bars work especially well when you make them the day before serving.
Let them cool completely, cover the pan, and refrigerate. Cut them shortly before serving or whenever you’re ready to arrange them.
Why is my pecan filling still soft?
The filling continues to firm as it cools.
If the bars seem soft immediately after baking, don’t assume something went wrong. Let them cool completely before judging the texture.
If the center remains unusually loose even after cooling, the bars may simply need a few more minutes of baking next time. Oven temperatures vary, so visual cues matter more than the exact timer.
Can I use chopped pecans instead of pecan halves?
Yes.
Chopped pecans make the bars easier to cut and give you pecan flavor throughout every bite. For a more attractive finished top, reserve a handful of larger pecan pieces and scatter them over the filling before baking.
Can I freeze pecan pie bars?
Yes. Let the bars cool completely, then wrap individual pieces or the whole slab tightly before placing them in a freezer-safe container.
Freeze for up to about 2 months for the best quality.
Thaw the bars in the refrigerator, then let them sit at room temperature before serving.
Can I reheat these bars?
You can enjoy them cold, at room temperature, or gently warmed.
For a warm dessert, heat an individual bar briefly in the microwave. Use short intervals rather than blasting it for a long time, since the filling can become very hot.
Why did my crust fall apart when I cut the bars?
Usually, the crust either didn’t contain enough butter, didn’t get pressed firmly enough, or the bars were cut before they cooled and set.
Make sure the crumbs look evenly moistened before pressing them into the pan, then give the crust a firm, even press.
Most importantly, let the finished bars cool completely before slicing.
Final Thought
There are desserts that require an entire afternoon, a pile of mixing bowls, and a very patient baker.
These aren’t those bars.
Pecan Pie Bar With Graham Cracker Crust gives you the cozy flavors I love about pecan pie without asking you to make a traditional pie crust. The buttery graham cracker layer, chewy brown-sugar filling, and toasted pecans all come together in one pan.
And honestly, the hardest part may be waiting for them to cool.
I’ve made plenty of desserts that look impressive but demand constant attention. These bars aren’t fussy. Once they go into the oven, you mostly need to let them do their thing and resist cutting them too early.
So grab a bag of pecans, crush some graham crackers, and give them a try. If you make them for a gathering, don’t be surprised if the little corner pieces disappear first. Those are always the ones I reach for.
Leave a Reply
You must be logged in to post a comment.